MANUAL | QUICK START GUIDE
CSL Universal Hub
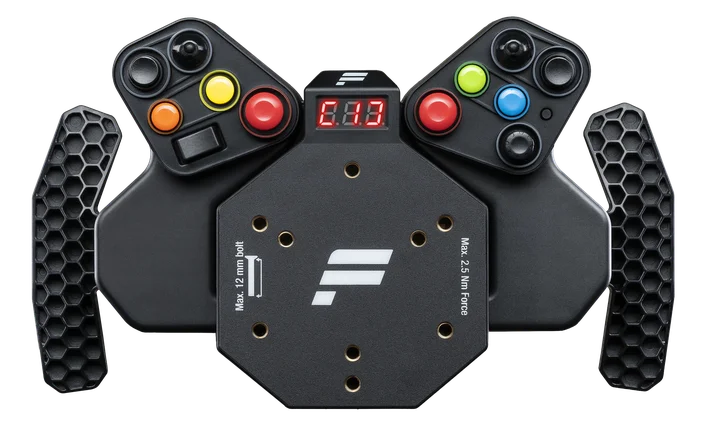
PACKAGE CONTENT

A - 1x CSL Universal Hub
B - 1x 3 mm Allen key
C - 1x 8 mm wrench
WHEEL RIM COMPATIBILITY

Choose M5 bolts with a maximum thread length of 12 mm. Fanatec Wheel Rims are supplied with the correct bolts. If your wheel rim is not pre-drilled, use the drilling template for the CSL Universal Hub which can be downloaded from the Fanatec website.
WIDTH ADJUSTMENT
The CSL Universal Hub features adjustable button box modules for maximum compatibility with a variety of rim shapes and diameters.
ATTENTION: Do not attempt adjusting the button box modules whilst the CSL Universal Hub is attached to a wheel base.

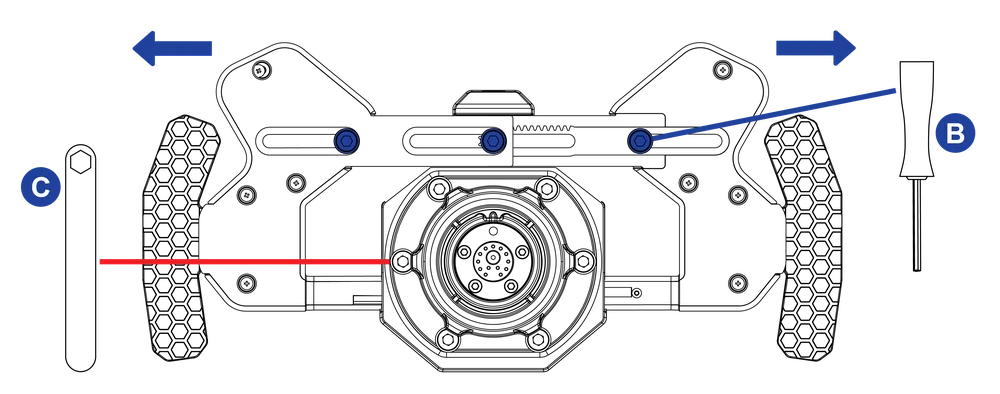
STEP 1
ATTENTION: All 7 bolts highlighted below are equally important for adjusting the button box modules. Do not use excessive force to loosen and tighten.
Loosen the bolts highlighted in blue by using the 3 mm Hex tool (B) and the nuts highlighted in red by using the Wrench tool (C) as illustrated.
NOTE: Do not remove the bolts or nuts. Only loosen enough to allow the left and right modules to move. Only use the provided tools (B) and (C).
STEP 2
Adjust the horizontal position of modules as desired, then tighten the highlighted bolts and nuts to secure the desired position as illustrated.
NOTE: Both left and right modules move symmetrically. Ensure both can move freely at the same time while adjusting the position. Only use the provided tools (B) and (C) to tighten the bolts and nuts.
ATTACHING THE CSL UNIVERSAL HUB
NOTE: Ensure that you have installed the latest wheel base and steering wheel firmware via the Fanatec App. A Windows PC is required to perform firmware updates.
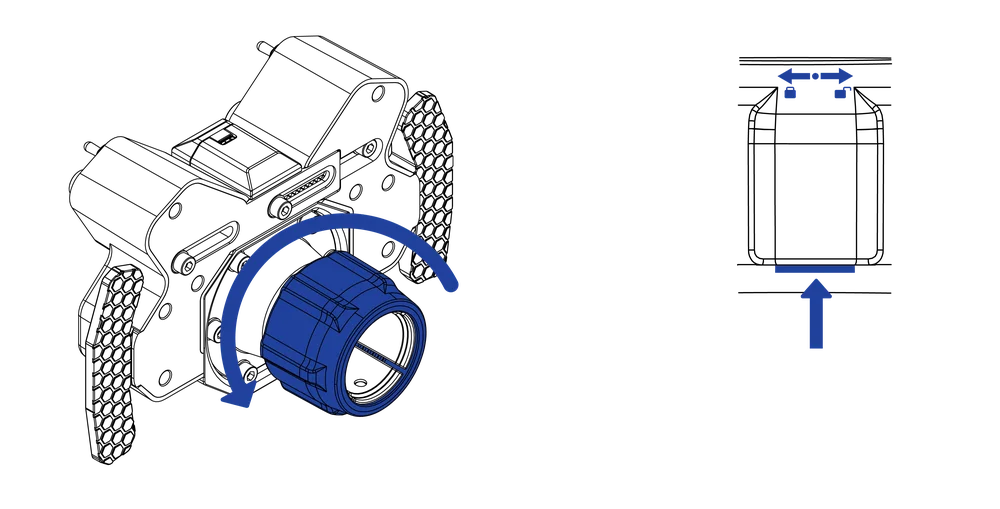
STEP 1
Ensure that the QR1 Lite indicator line is completely visible by turning the clamping nut to the mechanical limit in the open lock direction as illustrated.

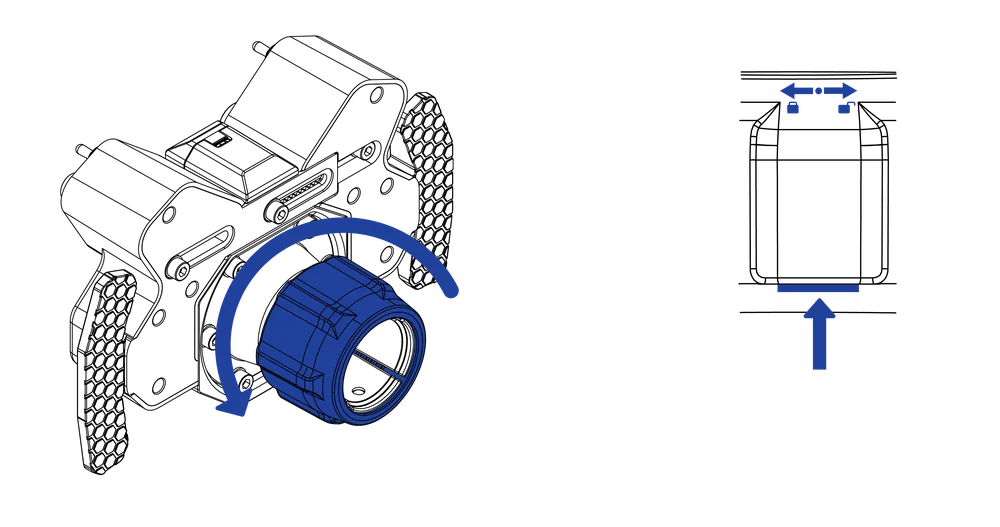
STEP 2
ATTENTION: Turning the QR1 Lite clamping nut after the indicator line is completely hidden could damage the QR1 Lite. Only tighten the clamping nut by hand.
Align the wheel base axle with the QR1 Lite guide rail, then slide the CSL Universal Hub onto the wheel base axle until the limit is reached as illustrated.

Turn the QR1 Lite clamping nut in the closed lock direction until the indicator line is completely hidden as illustrated.
DETACHING THE CSL UNIVERSAL HUB
Ensure that the QR1 Lite indicator line is completely visible by turning the clamping nut to the mechanical limit in the open lock direction as illustrated.

Slide the CSL Universal Hub away from the wheel base axle as illustrated.
MODES

Press the highlighted buttons to cycle through PC and console modes.
*Available modes are Wheel Base dependent.
TUNING OPTIONS
STEP 1
Enter the Tuning Menu by pressing the button shown.

STEP 2
Navigate the Tuning Menu using the FunkySwitch™.
Right or left changes the tuning paramater.
Up / down or rotating changes the parameter value.

STEP 3
Exit the Tuning Menu.

CENTER CALIBRATION
After a Wheel Base firmware update "CAL" will be shown in the Steering Wheel display.

STEP 1
To initiate center calibration at any time, enter the Tuning Menu by pressing the button shown.

STEP 2
Turn your wheel to the center position.
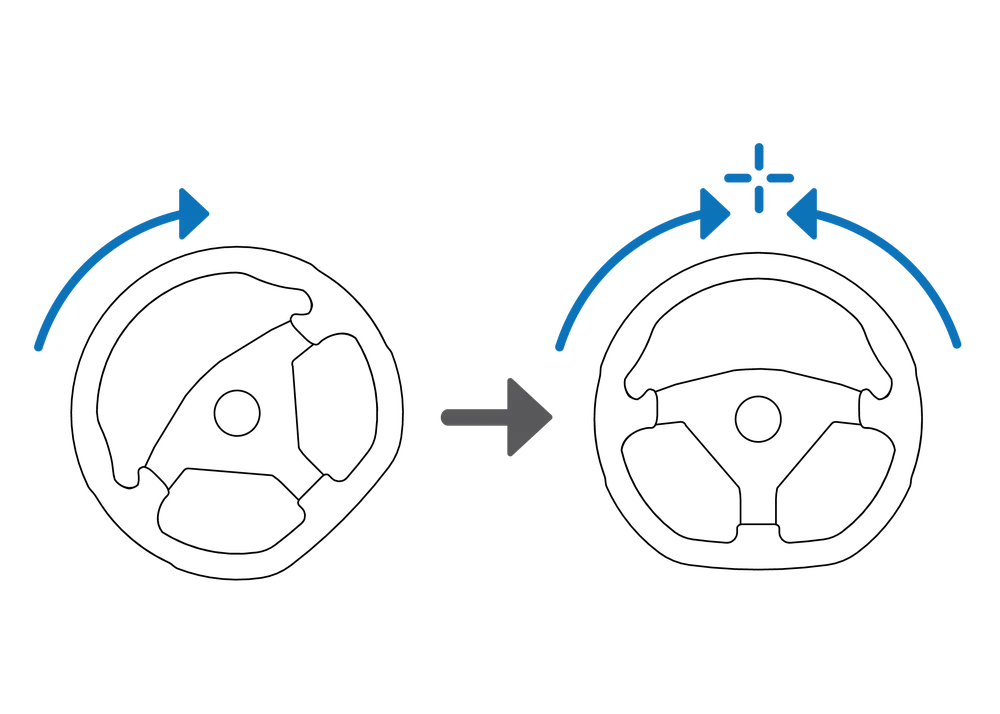
STEP 3
Press the button combination as shown.

STEP 4
Exit the Tuning Menu.

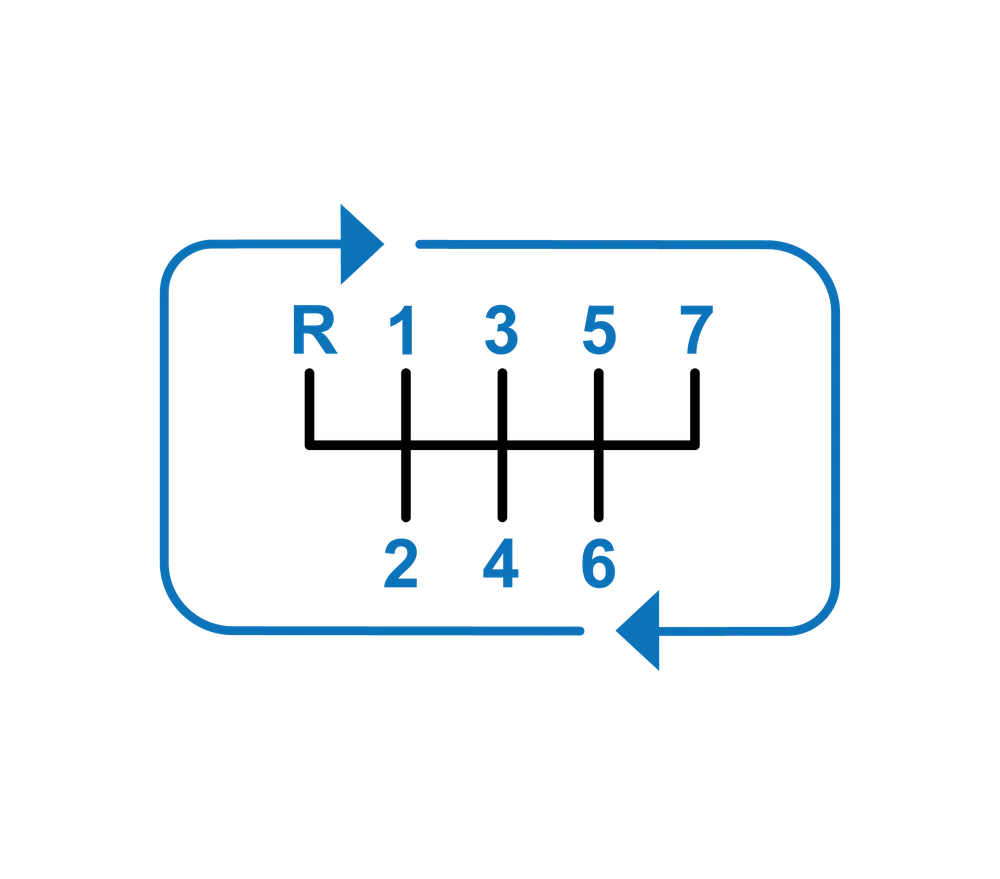
SHIFTER CALIBRATION
STEP 1
Put your Shifter* in H-pattern mode (*shifter sold separately).
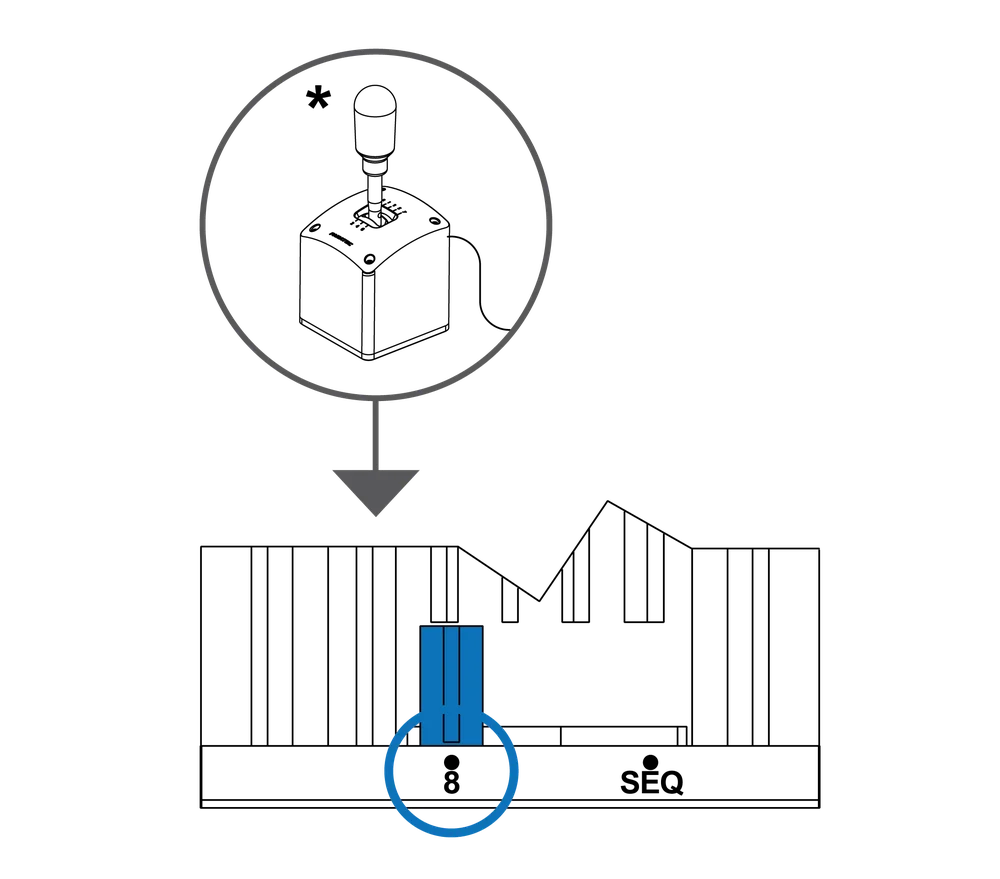
STEP 2
Press the button combination as shown.

STEP 3
Gear to be calibrated will be shown in the Steering Wheel display.

STEP 4
Select the gear.
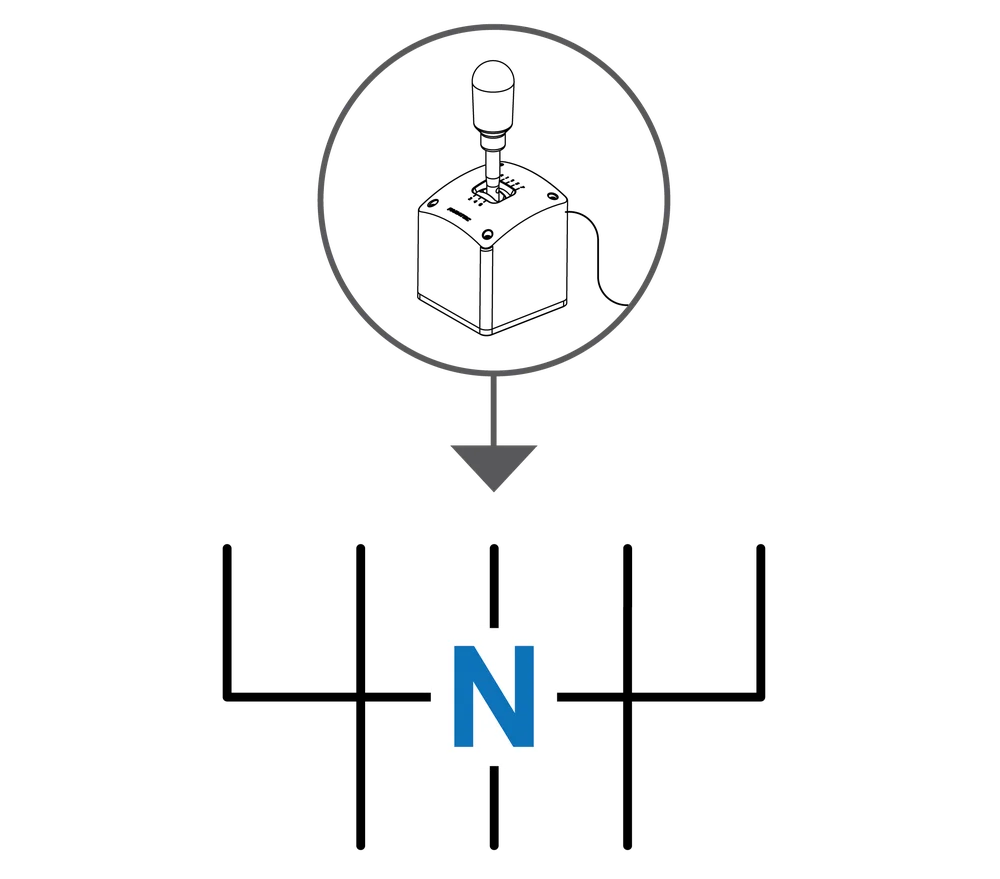
STEP 5
Confirm gear with the button shown.

STEP 6
Repeat for all gears.
BUTTON MAPPING
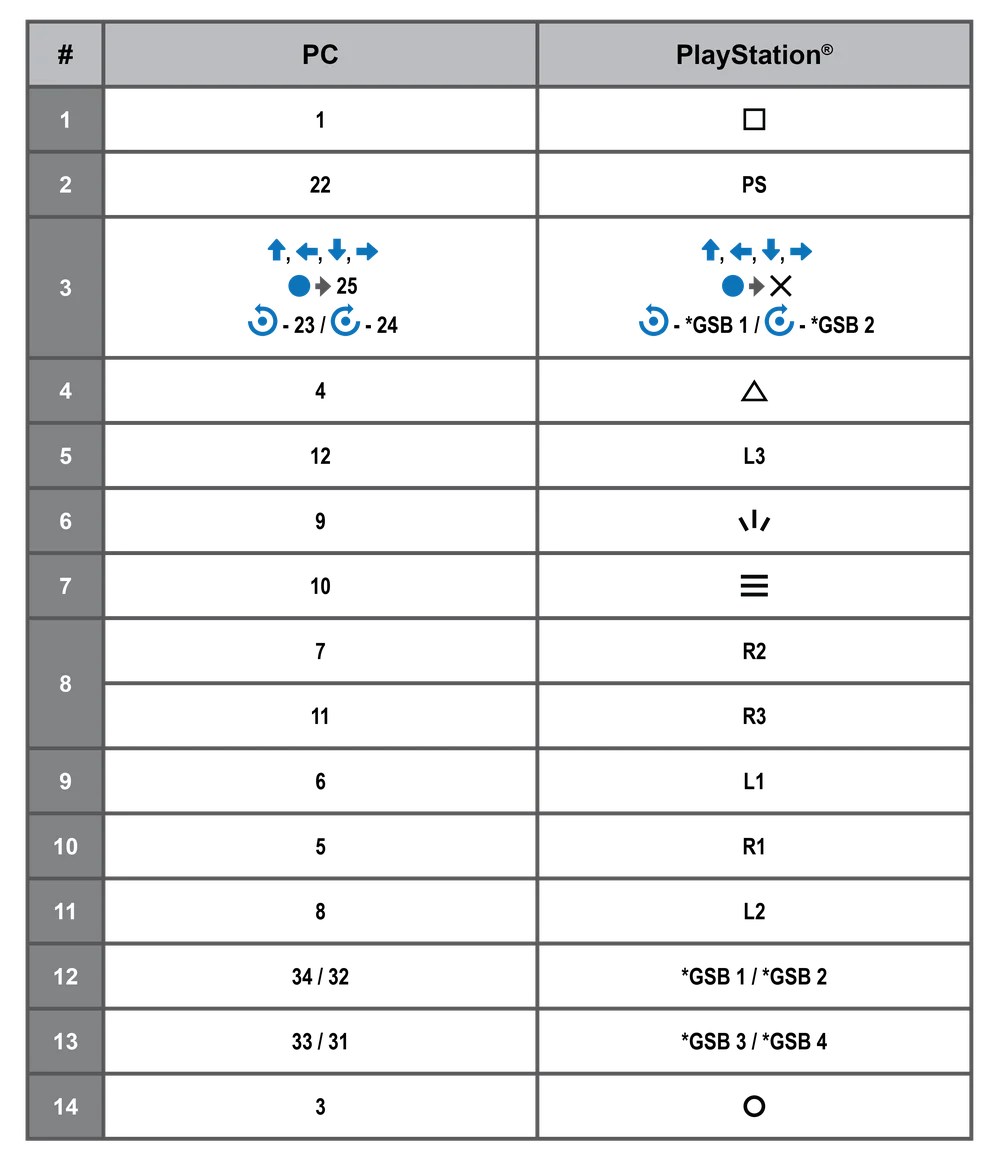
* GSB = Game-Specific Button
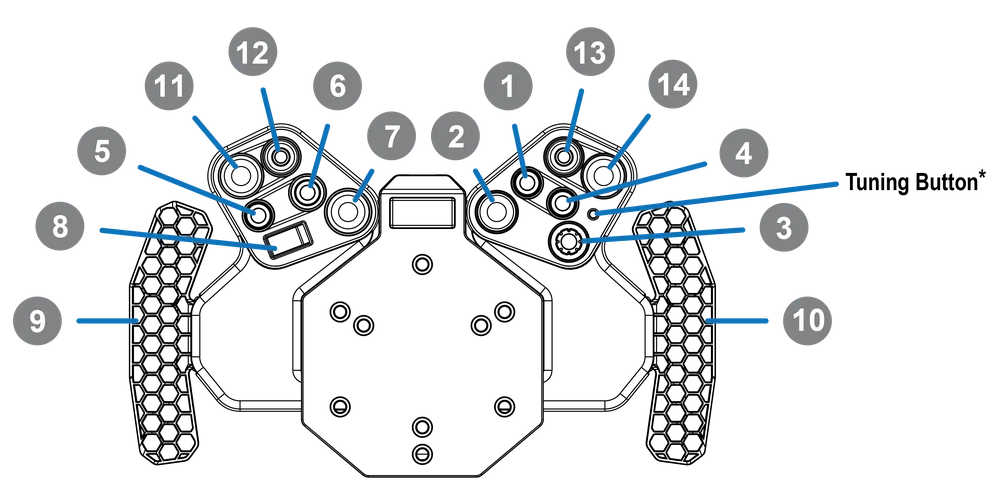
* Tuning Button
The product warranty is provided by CORSAIR MEMORY, Inc. Refer to the terms & conditions of CORSAIR MEMORY, Inc. on fanatec.com