MANUAL | QUICK START GUIDE
GT Cockpit Inverted Pedal Mount
RACING SIMULATOR COCKPIT INVERTED PEDAL MOUNT
BEFORE YOU START
Please take a moment to carefully read this guide prior to assembling.
This product is also part of our comprehensive ClubSport GT Cockpit Quick Start Guide. To learn more, visit: https://www.fanatec.com/p/cockpits/cs_gt_c_blk/clubsport-gt-cockpit-black
|
CAUTION: Your cockpit is engineered from steel for strength and durability.
|
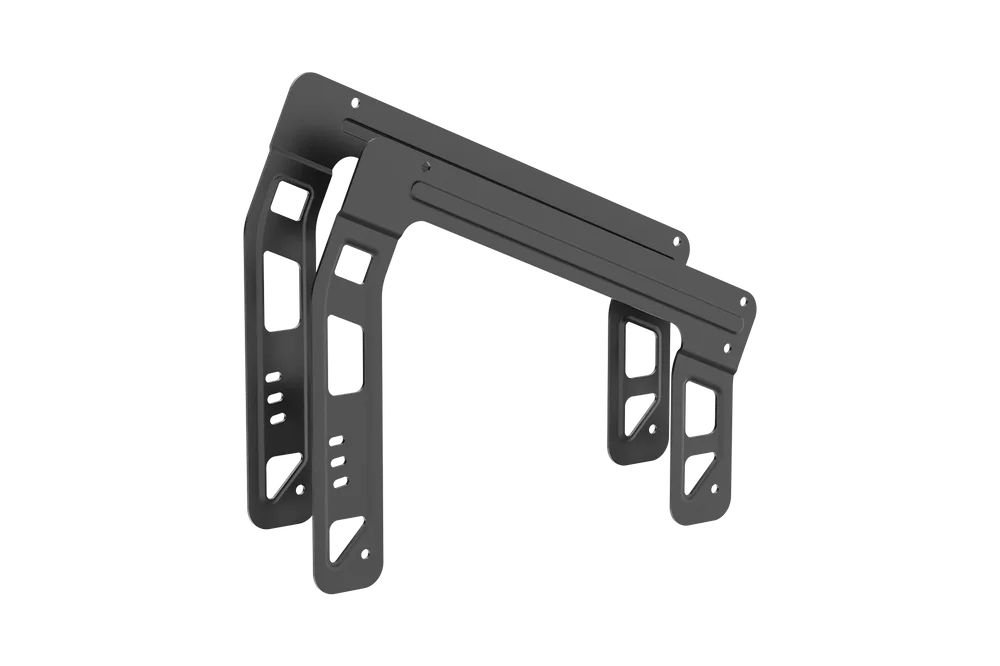
INSTALLING THE INVERTED PEDAL BRACKETS
Open the hardware bag labeled INVERTED PEDAL BRACKETS.
To complete the step, the following hardware and tools will be used:

M8 20mm L-Bolts (4x)
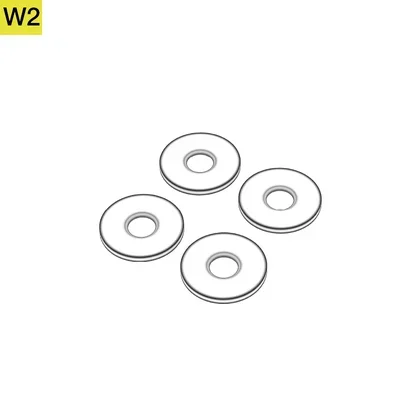
M8 Washers (4x)
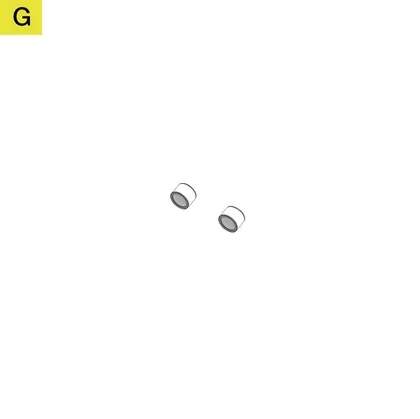
7mm Grommets (2x)
| NOTE: The two 7mm Grommets (G) are used for the formula styled pedal mounting position. The installation process is covered in the SETUP AND ADJUSTMENT SUGGESTIONS section below. |
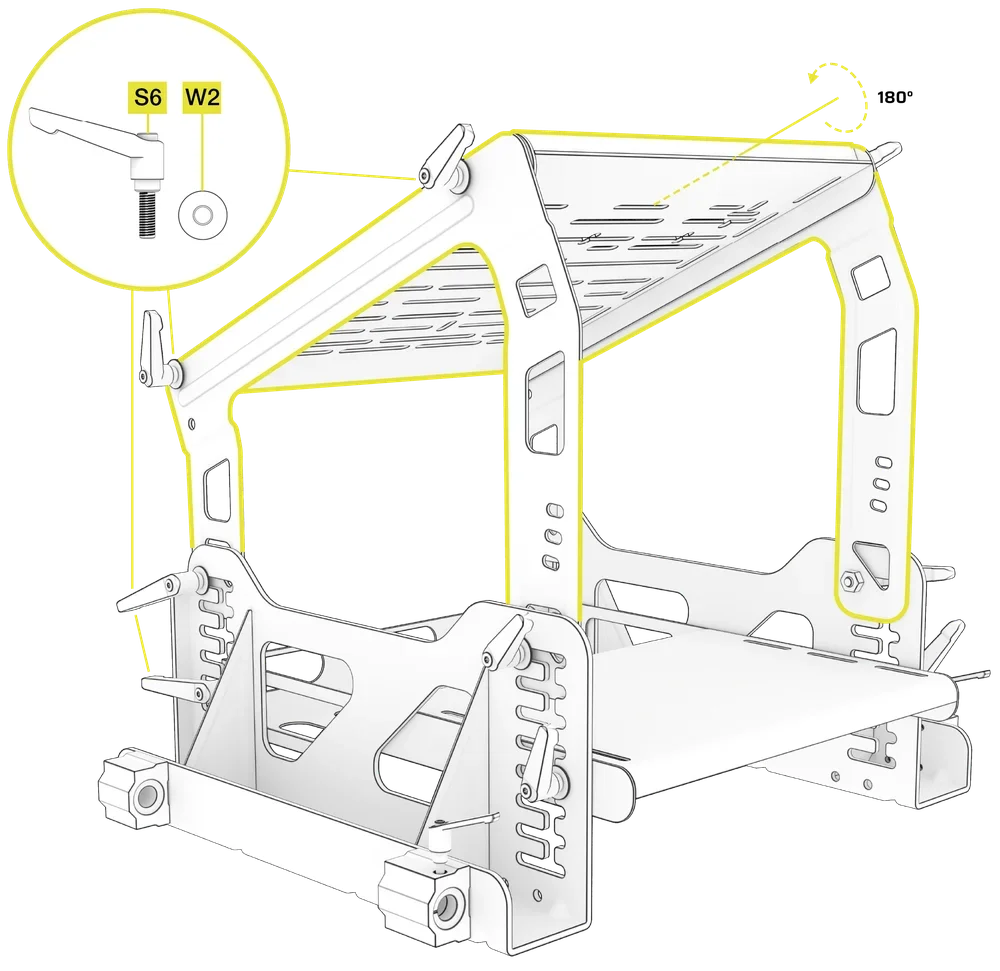
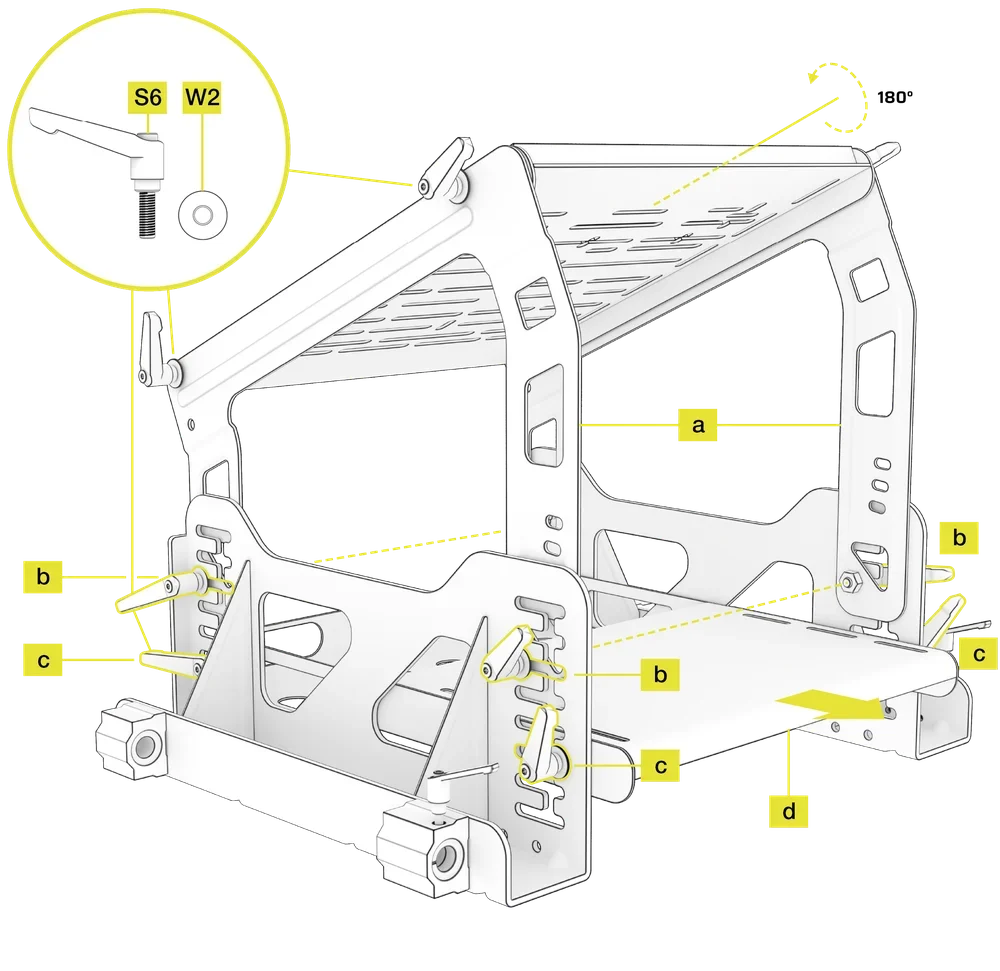
- Remove the upper pedal mounting plate and rotate it 180° on its axis. The upper side of the plate should now be facing down.
- For ease of installation, we suggest attaching the brackets to the now inverted upper pedal plate outside the cockpit.
- Secure the upper pedal mounting plate to the inverted brackets by using the four M8 20mm L-Bolts (S6) and four M8 Washers (W2).
- Place the assembly between the pedal side brackets, determine the required mounting height relative to your pedal set and secure it by using the existing four M8 20mm L-Bolts (S6) and four M8 Washers (W2).
- Adjust the lower heel rest / powerbrick holder to your desired height and secure it by using the existing four M8 20mm L-Bolts (S6) and four M8 Washers (W2).
| TIP: You can use the extra holes in the inverted brackets to create a higher undermounted pedal placement to facilitate an open wheel type seating position. Refer to the SETUP AND ADJUSTMENT SUGGESTIONS section below for optimal configuration of your setup. |
SETUP AND ADJUSTMENT SUGGESTIONS
PEDAL MOUNT ASSEMBLY SUGGESTED ADJUSTMENT
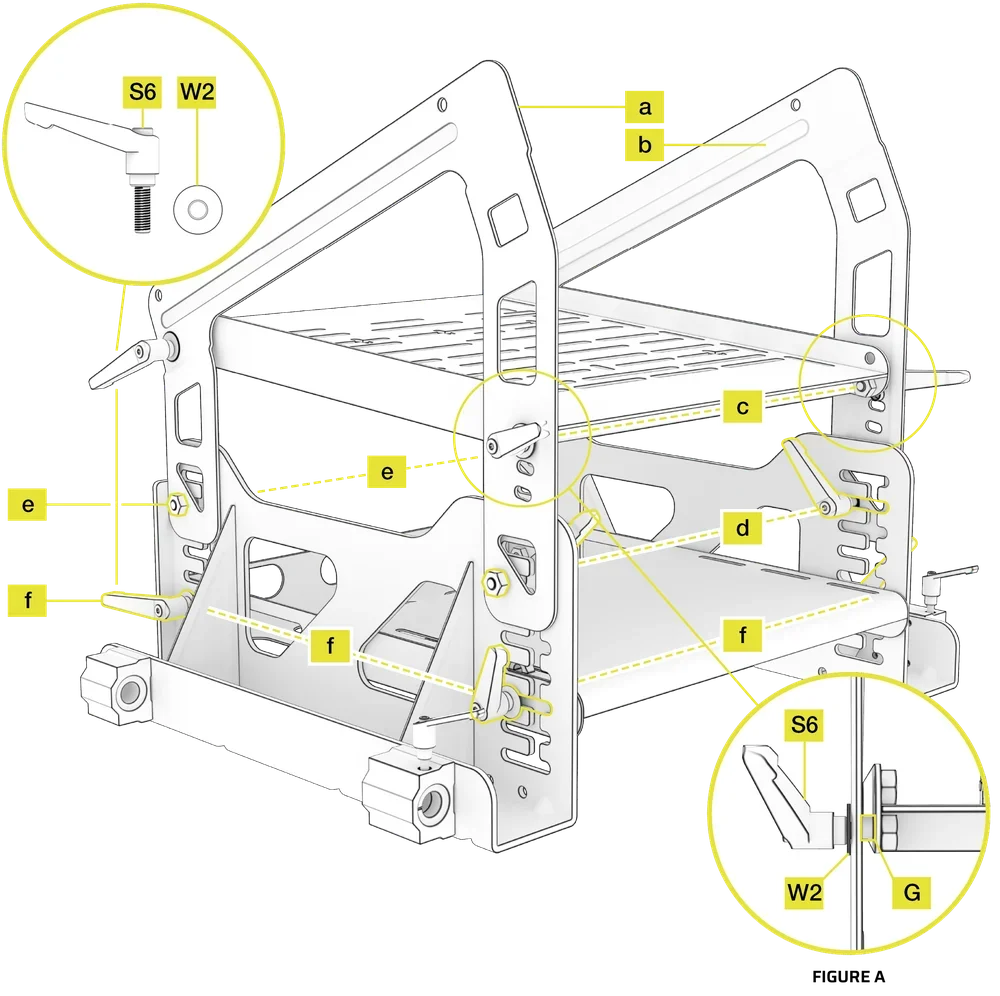
- Place the left and right inverted pedal mounting brackets on the inside of the side pedal brackets (a).
- Mount the pedal mounting brackets to the third slot from the top of the side bracket (b).
- Mount the Heel Plate to the third slot from the bottom of the side bracket (c).
- For extra heel space, slide the Heel Plate all the way towards the driver and secure it with the L-Bolts (d).
FORMULA STYLE PEDAL MOUNT ASSEMBLY SUGGESTED ADJUSTMENT
To complete the step, the following hardware from step OPTIONAL: INSTALLING THE INVERTED PEDAL BRACKETS will be used:
7mm Grommets (2x)

- Place the left side inverted pedal mounting bracket on the outside of the right side pedal bracket (a).
- Place the right side inverted pedal mounting bracket on the outside of the left side pedal bracket (b).
- Place the 7mm Grommets (G) between the inverted brackets and pedal slide plates. Secure the brackets at height shown in the image using four M8 20mm L-Bolts (S6) and four M8 Washers (W2) (c). See FIGURE A.
- Position the front (driver side) of the pedal mounting brackets to the second slot from the top of the side bracket. Secure the brackets using four M8 20mm L-Bolts (S6) and four M8 washers (W2) from the inside (d).
- Position the rear of the pedal mounting brackets to the third slot from the top of the side bracket. Secure the brackets using four M8 20mm L-Bolts (S6) and four M8 washers (W2) from the inside (e).
- Position the Heel Plate to the third slot from the bottom of the side bracket (f).
POSITIONING SEPARATE THIRD-PARTY PEDALS ON THE PEDAL MOUNTING PLATE
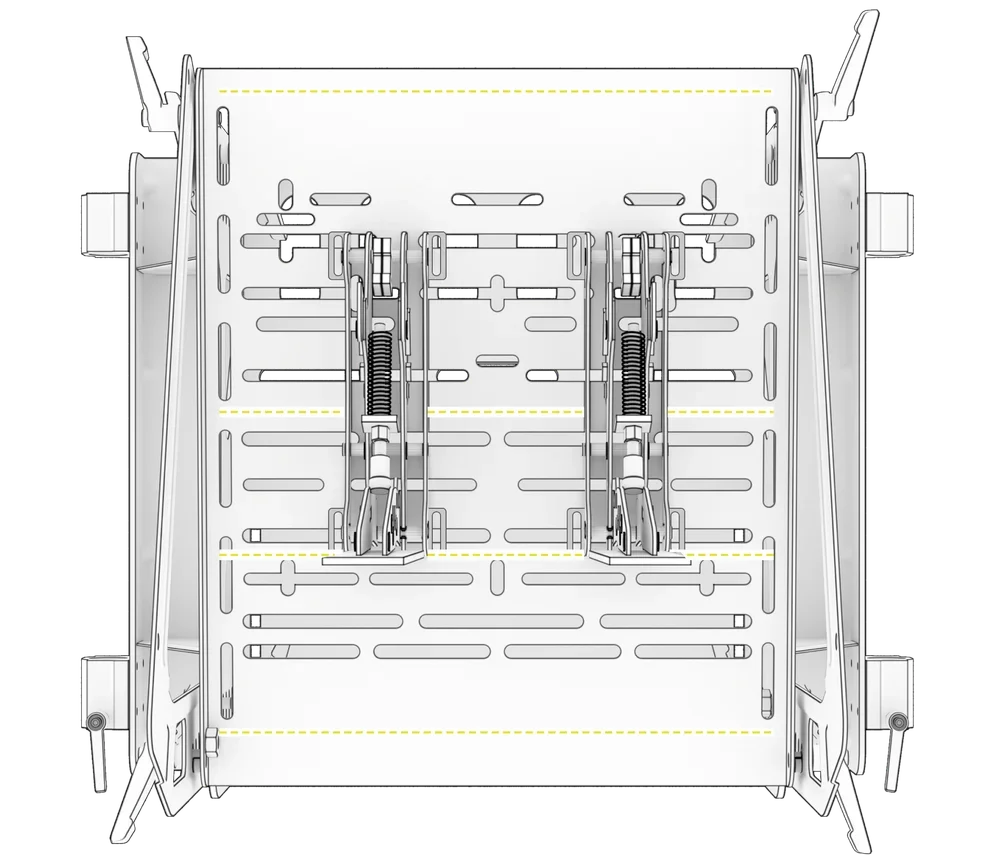
We suggest mounting your OEM separate pedals over the yellow marked strengthening ribs located on the underside of the pedal plate.
SUGGESTED SEAT / PEDAL ADJUSTMENT FOR MULTIPLE DRIVING POSITIONS
RALLY STYLE – FANATEC CSL-DD / CS-DD AND CS V3 PEDALS
For an upright rally style position, we suggest mounting your seat parallel with the horizontal slots in the seat mounting brackets. To increase the seat height, raise the seat, counting an equal number of slots, front and rear. Position the pedal plate as suggested in the image below.
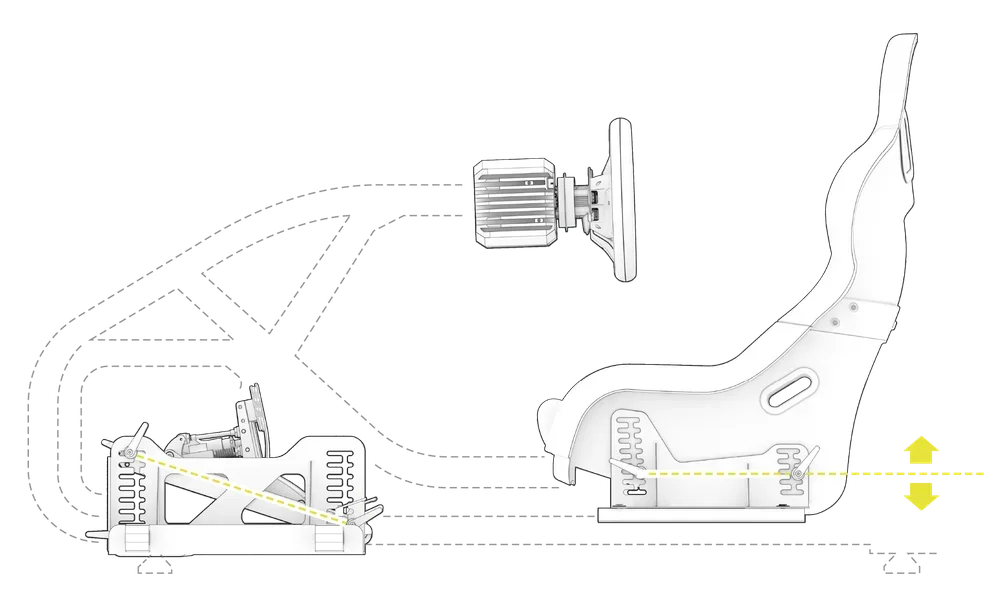
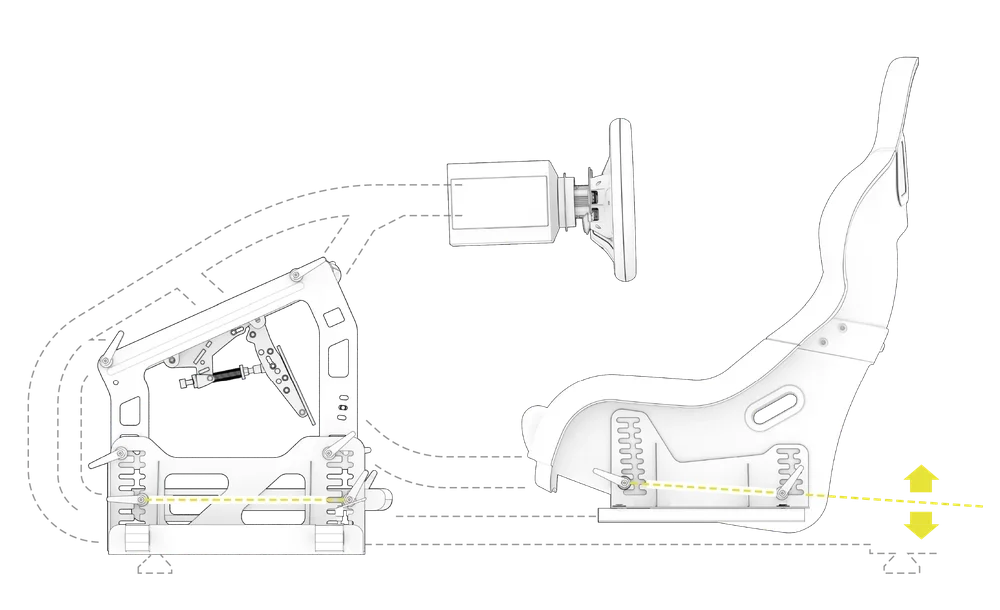
GT STYLE - FANATEC CSL-DD / CS-DD AND CS V3 PEDALS
For a GT style position, we suggest mounting your seat so that the front is 1-2 slots higher than the rear. To increase the seat height, raise the seat, counting an equal number of slots, front and rear. Position the pedal plate as suggested in the image below.
FORMULA STYLE - FANATEC CSL-DD / CS-DD AND CS V3 PEDALS
For a formula style position, we suggest mounting your seat so that the front is 3 slots higher than the rear. To increase the seat height, raise the seat, counting an equal number of slots, front and rear. Position the pedal plate as suggested in the image below.
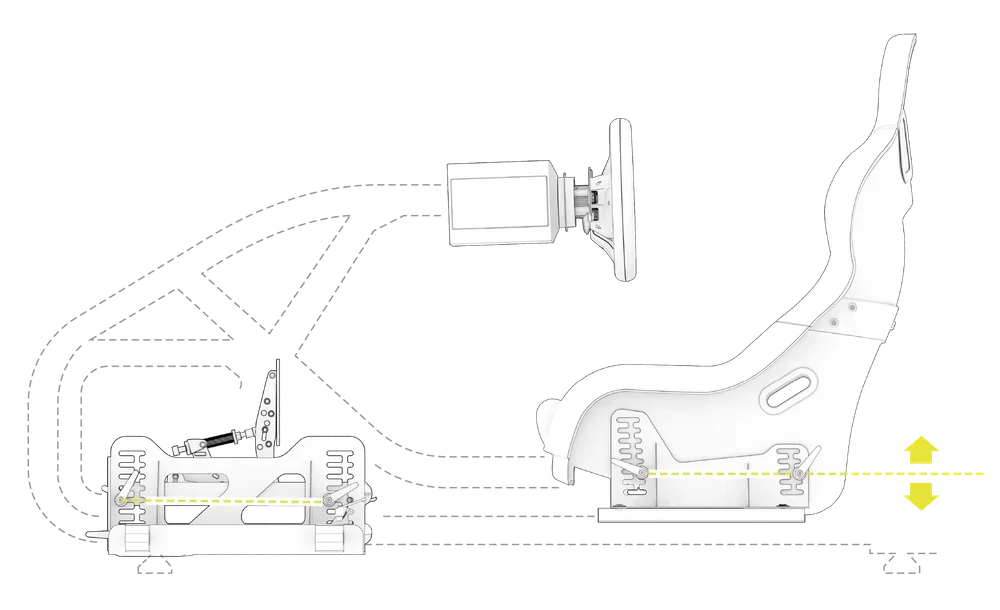
RALLY STYLE – THIRD-PARTY PERIPHERALS
For an upright rally style position, we suggest mounting your seat parallel with the horizontal slots in the seat mounting brackets. To increase the seat height, raise the seat, counting an equal number of slots, front and rear. Position the pedal plate as suggested in the image below.
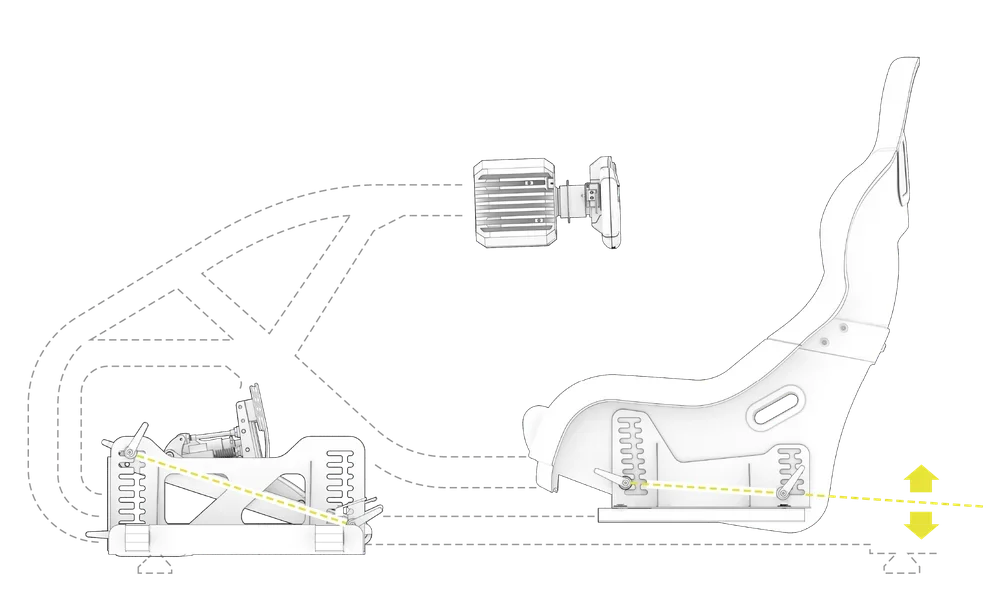
GT STYLE – THIRD-PARTY PERIPHERALS
For a GT style position, we suggest mounting your seat so that the front is 1-2 slots higher than the rear. To increase the seat height, raise the seat, counting an equal number of slots, front and rear. Position the pedal plate as suggested in the image below.
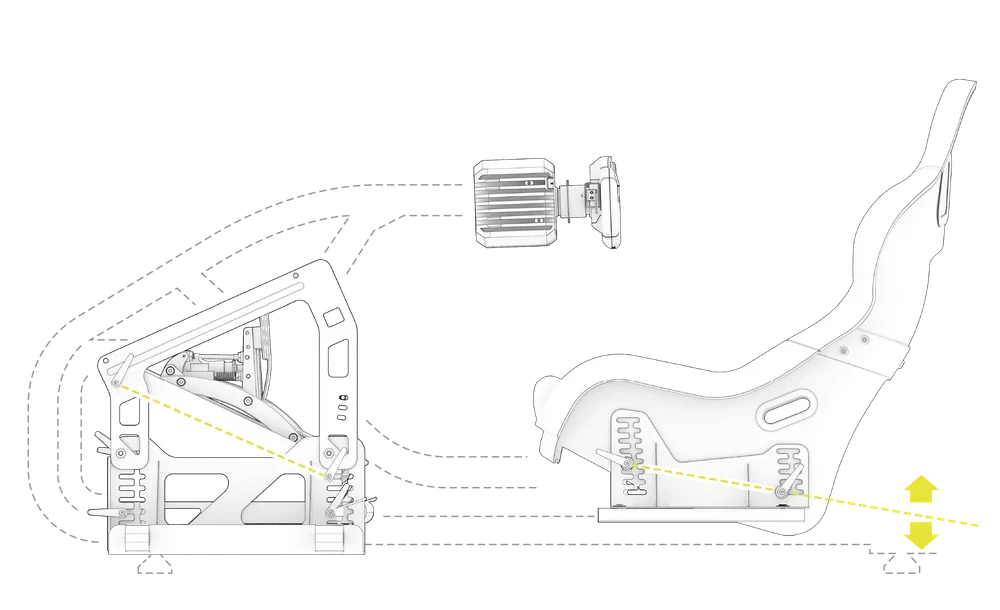
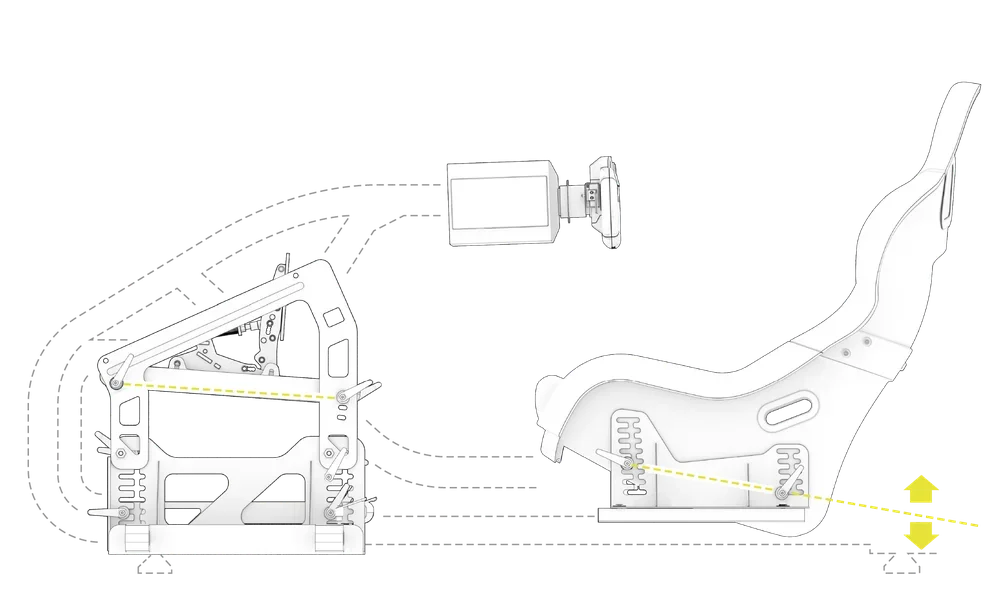
GT STYLE + INVERTED PEDAL MOUNT – THIRD-PARTY PERIPHERALS
For a GT style position, we suggest mounting your seat so that the front is 1-2 slots higher than the rear. To increase the seat height, raise the seat, counting an equal number of slots, front and rear. Position the pedal plate as suggested in the image below.
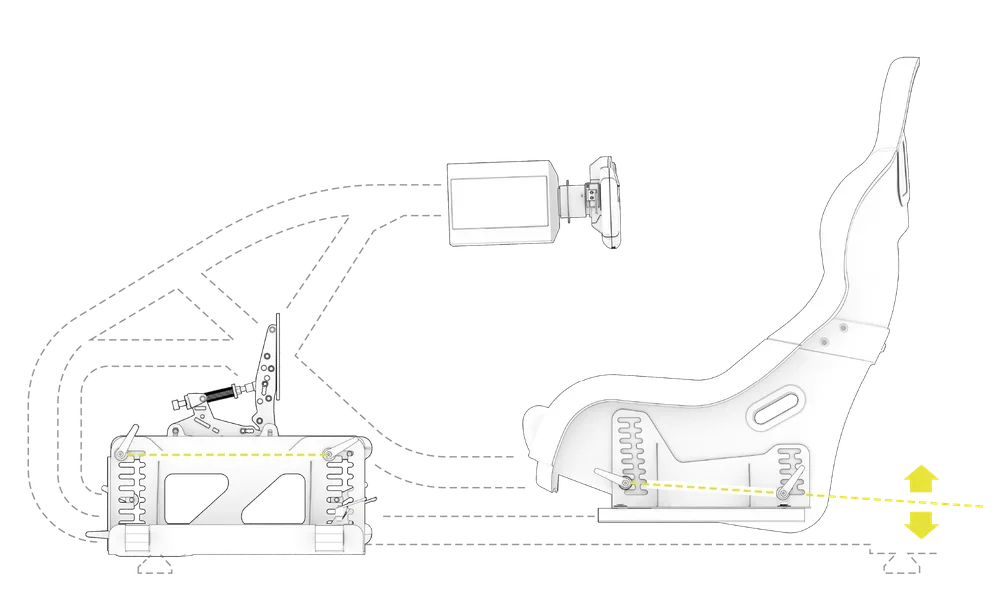
FORMULA STYLE – THIRD-PARTY PERIPHERALS
For a formula style position, we suggest mounting your seat so that the front is 3 slots higher than the rear. To increase the seat height, raise the seat, counting an equal number of slots, front and rear. Position the pedal plate as suggested in the image below.
CARE AND MAINTENANCE
Your Fanatec Clubsport GT cockpit is manufactured to be robust and sturdy during use. However, by following basic care and maintenance steps, you can improve the longevity and performance of your cockpit.
| IMPORTANT: This product is designed for adult use. We recommend adult supervision for any children using this product. |
- Before each use of your cockpit, ensure that all the bolts clamping the pedal assembly in place are secure.
- Routinely (at least once every two weeks) check the bolts securing the seat brackets, wheelbase, and pedals to ensure they are secure.
- To protect the finish of the cockpit, always sufficiently loosen the cam levers and bolts that secure all adjustable parts when using to prevent scraping or cosmetic damage.
- To protect the seat, do not place sharp or heavy items on the upholstered sections.
- To clean your cockpit, use a clean, dry microfiber cloth or a vacuum with a soft bristle attachment.
- Use caution when adjusting seating position to ensure the seat is positioned in the corresponding slots on either side of the seat, and the tracks are free from debris or fingers when sliding the seat.
- To protect your seat, do not place heavy items on the upholstered sections.
- Ensure a clutter-free environment before use and check to ensure cables are secure.
WARRANTY
All Fanatec racing cockpits have a 2-year warranty.
LEGAL
©2025 CORSAIR MEMORY, Inc. Trademarks belong to their respective owners. All rights reserved. Fanatec is a brand of CORSAIR MEMORY Inc.