MANUAL | QUICK START GUIDE
Xeneon Edge Mounting Bracket Set
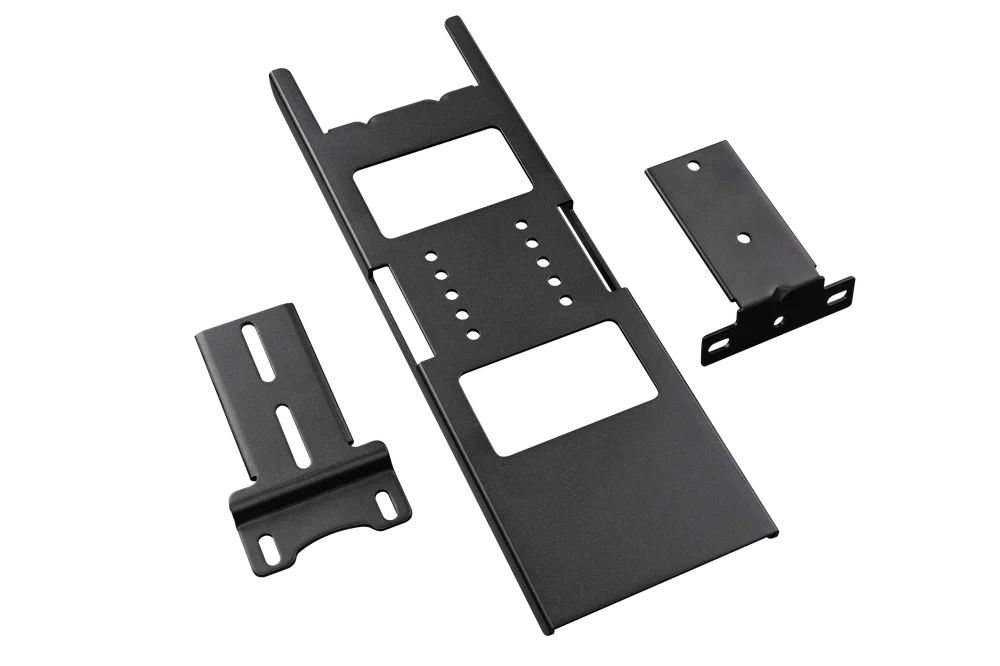
A - PACKAGE CONTENT
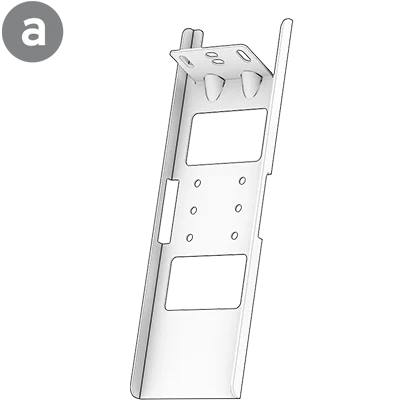
1x Portrait / Landscape Main Bracket
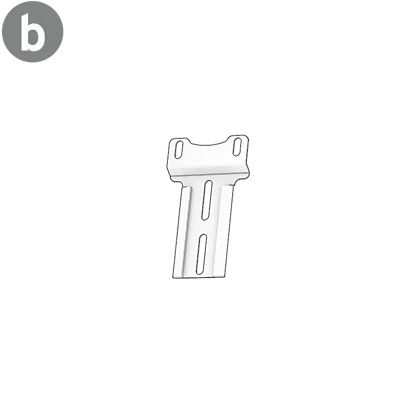
1x Dash Mounting Bracket (Fanatec Bases)
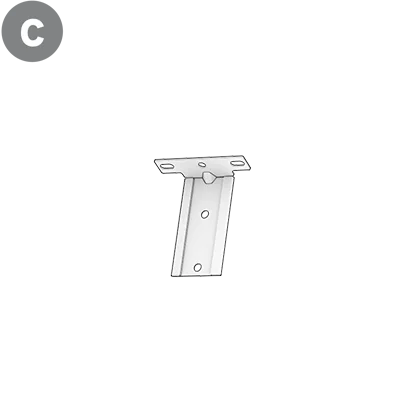
1x Landscape Mounting Bracket

4x M6 Washers
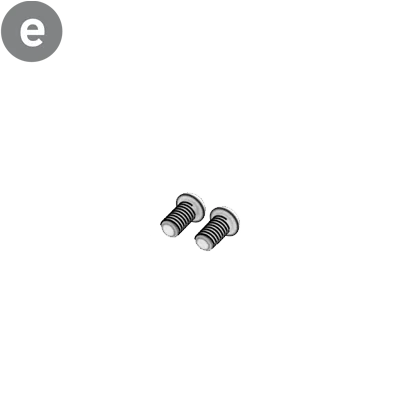
2x M6 x 12 mm Bolts
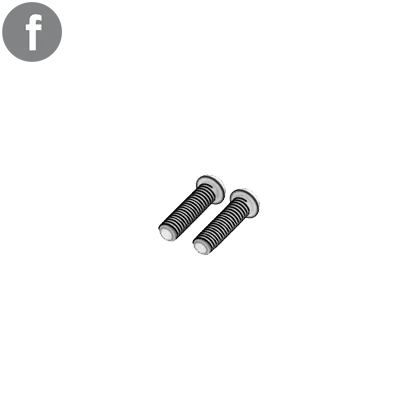
2x M6 x 20 mm Bolts
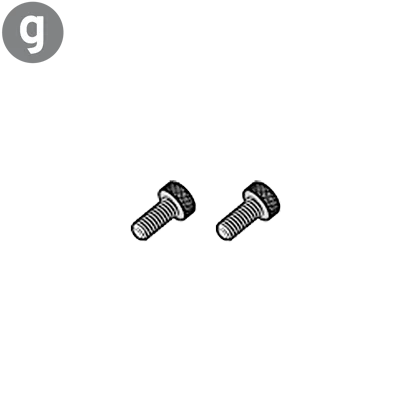
2x ¼-Inch Thumb Screws
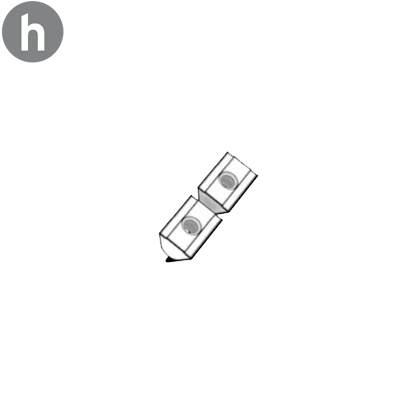
2x M6 T-Nuts
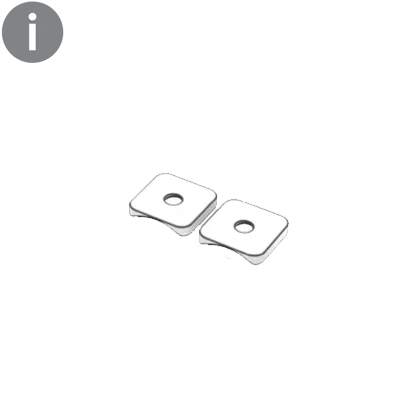
2x Mounting Plate


1x 4 mm Allen Key

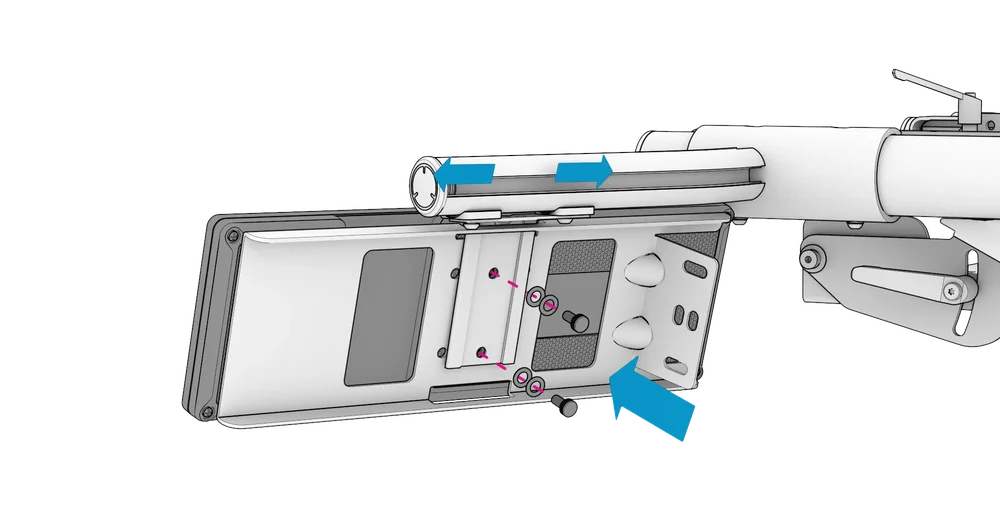
B - DASHBOARD MOUNTING
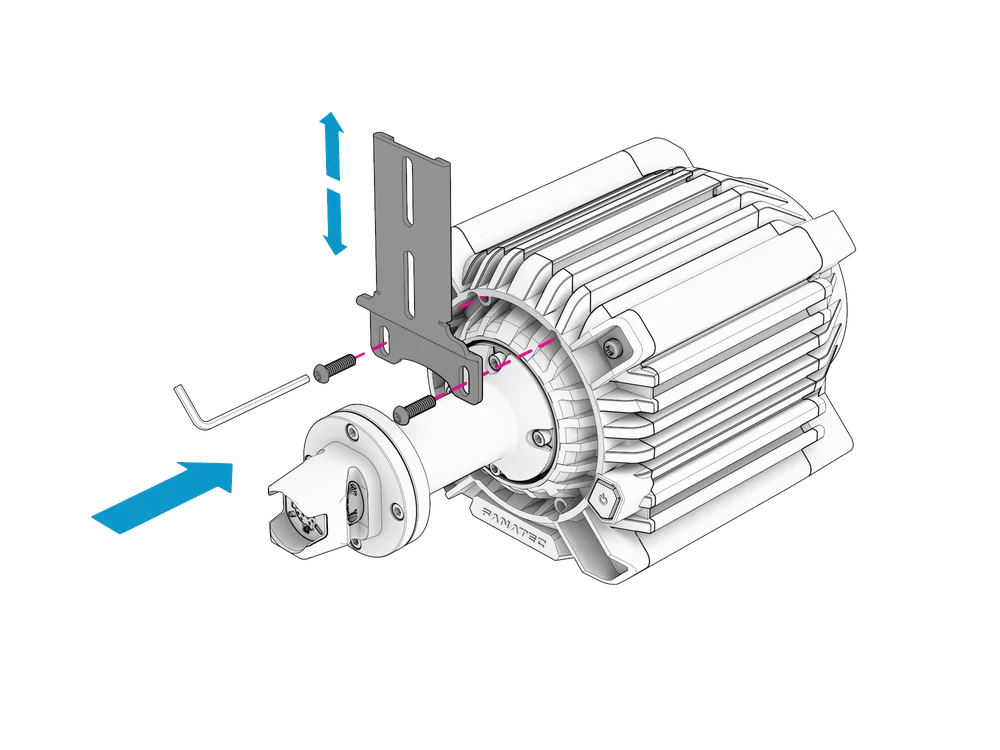
STEP 1
Attach the Dash Mounting Bracket (b) to the front mounting holes of your Fanatec Base using two M6 x 12 mm bolts (e) and tighten with the included Allen key (j).
| NOTE: The new Podium DD requires the two included M6 x 20 mm bolts (f) to attach the Dash Mounting Bracket. |
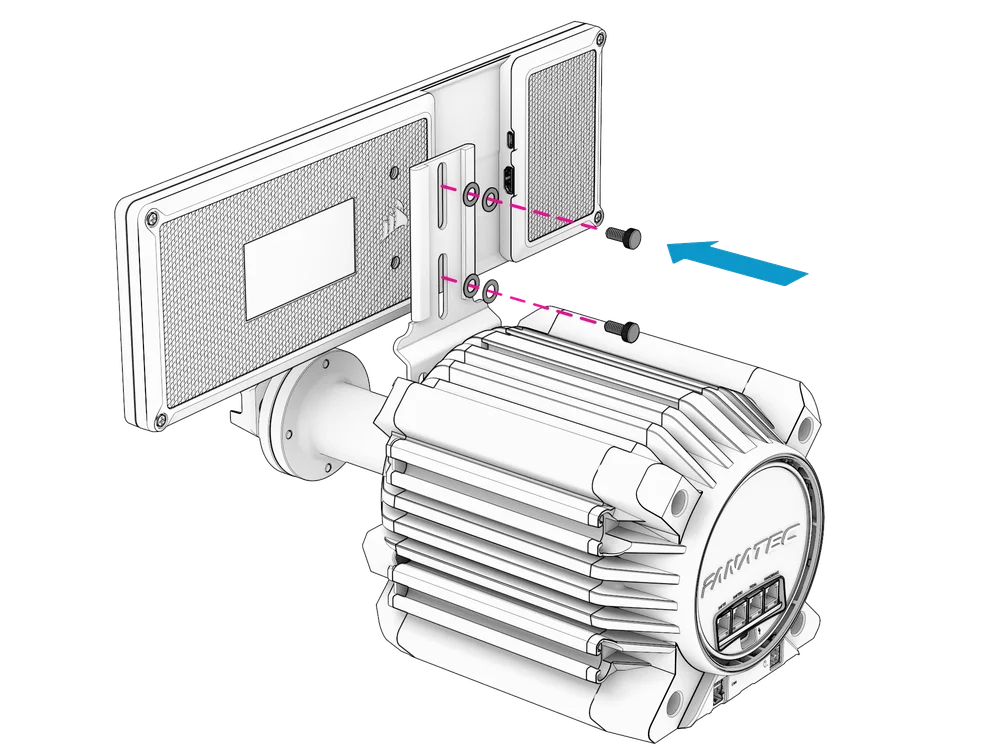
STEP 2
Attach the Xeneon Edge Display to the Dash Mounting Bracket using the two included ¼-Inch thumb screws (g) and four M6 washers (d; two stacked per screw).
| NOTE: Do not overtighten the screws. Once mounted, the Xeneon Edge can be vertically adjusted. |
C - PORTRAIT MOUNTING
| NOTE: The following steps are shown with the GT Cockpit Accessory Mount (required for mounting the Xeneon Edge in portrait orientation). The same steps apply for aluminum profile rigs (excluding mounting plates (i) which are only required for Fanatec ClubSport GT Cockpit accessories). |
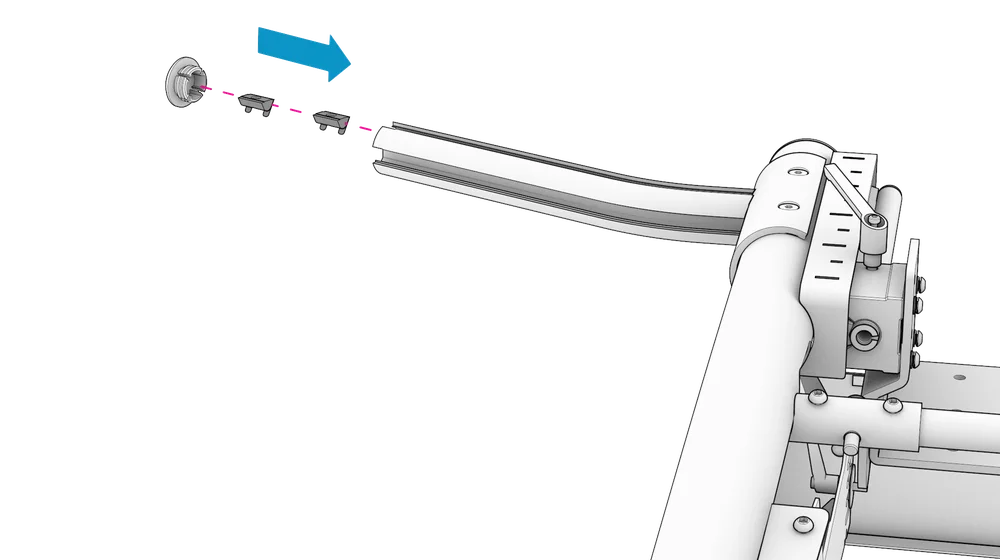
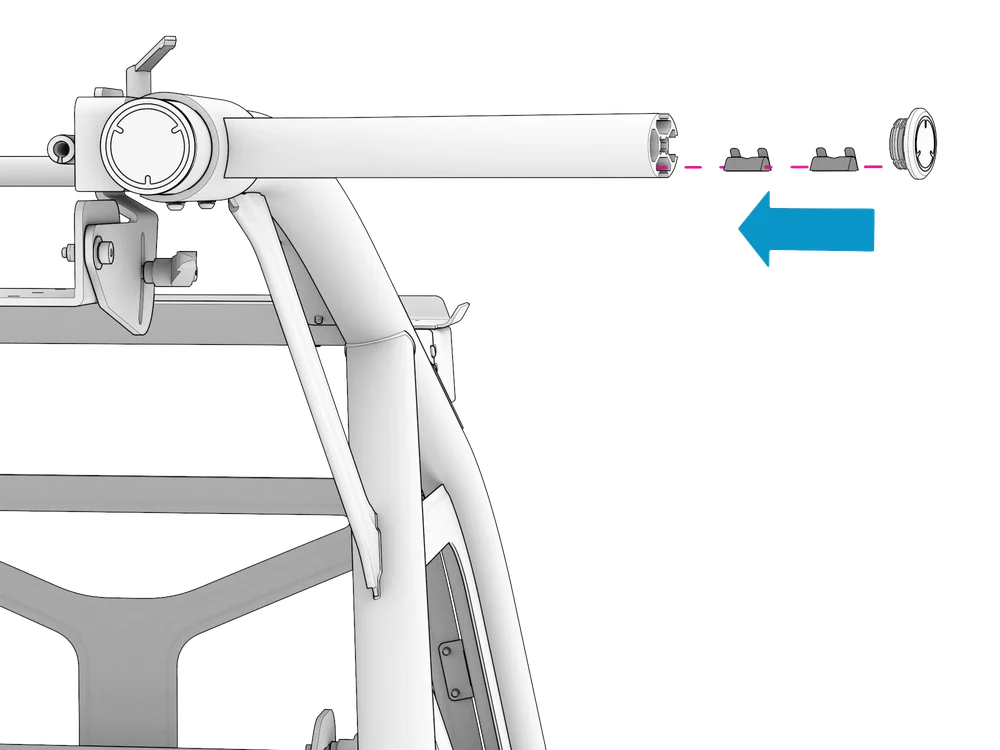
STEP 1
Remove the end cap from the Accessory Mount.
Slide the included M6 T-nuts (h) into the T-slot and re-insert the end cap.
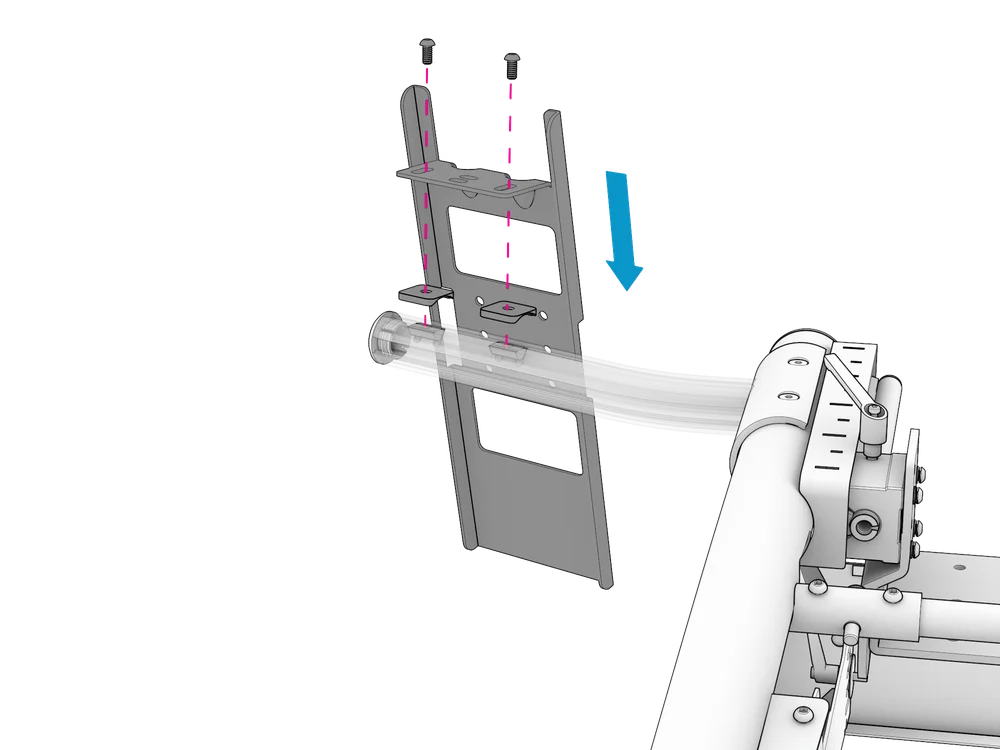
STEP 2
Align the Mounting Plates (i) with the T-nuts.
Align the Main Bracket's (a) bolt holes with the T-nuts and Mounting Plates. Attach the bracket using two M6 x 12 mm bolts (e) and tighten using the included 4 mm Allen key (j). The bracket can be laterally adjusted before tightening the bolts.
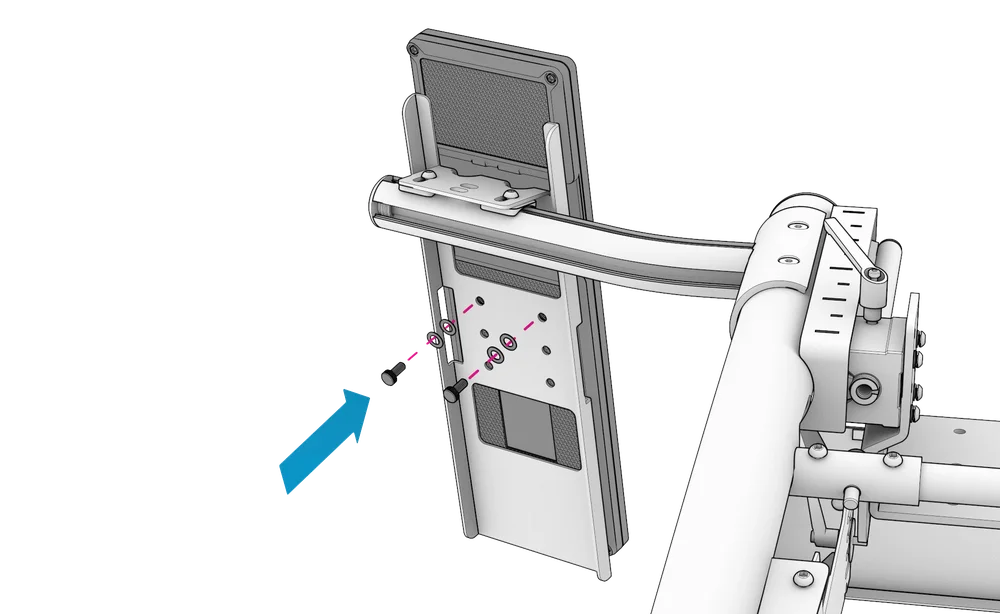
STEP 3
Attach the Xeneon Edge Display to the Main Bracket using the two included ¼-Inch thumb screws (g) and four M6 washers (d; two stacked per screw).
| CAUTION: Do not overtighten the thumb screws. |
D - LANDSCAPE MOUNTING
| NOTE: The following steps are shown with the GT Cockpit Accessory Mount (required for mounting the Xeneon Edge in landscape orientation). The same steps apply for aluminum profile rigs (excluding mounting plates (i) which are only required for Fanatec ClubSport GT Cockpit accessories). |
STEP 1
Remove the end cap from the Accessory Mount.
Slide the included M6 T-nuts (h) into the T-slot on the Accessory Mount's underside and re-insert the end cap.
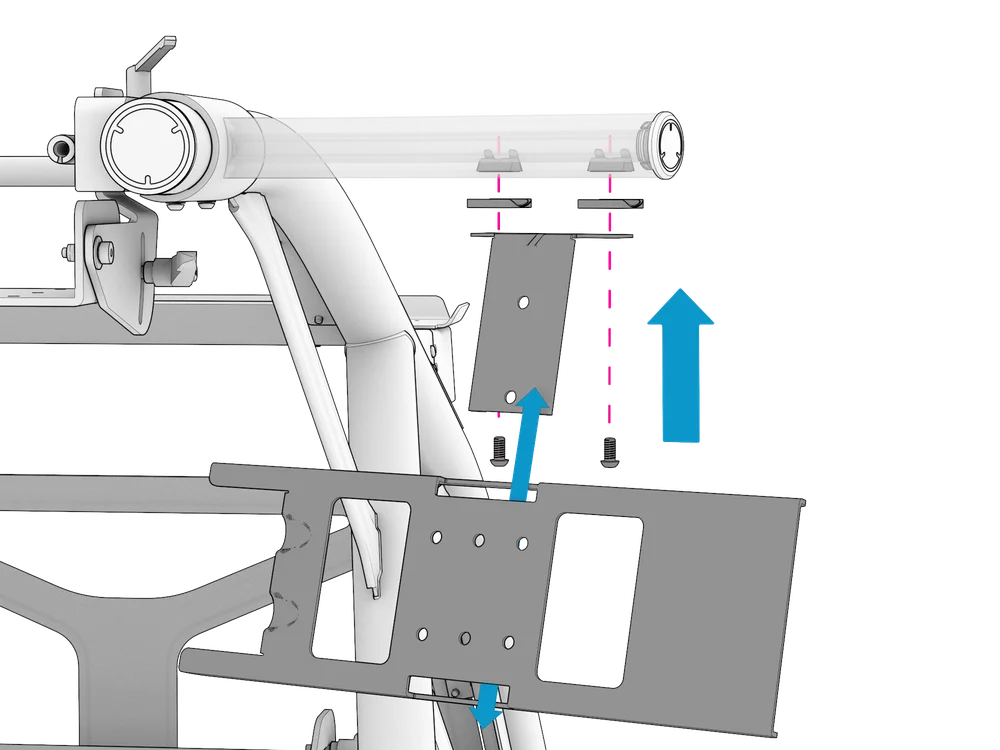
STEP 2
Align the Mounting Plates (i) with the T-nuts.
Align the Landscape Mounting Bracket's (c) bolt holes with the T-nuts and Mounting Plates. Attach the bracket using two M6 x 12 mm bolts (e) and tighten using the included 4 mm Allen key (j). The bracket can be laterally adjusted before tightening the bolts.
Slide the Main Bracket (a) onto the Landscape Mounting Bracket.
STEP 3
Attach the Xeneon Edge Display using the two included ¼-Inch thumb screws (g) and four M6 washers (d; two stacked per screw).
| CAUTION: Do not overtighten the thumb screws. |
E - WARRANTY
The product warranty is provided by CORSAIR MEMORY, Inc. Refer to the terms & conditions of CORSAIR MEMORY, Inc. on Fanatec.com.
F - LEGAL
©2026 CORSAIR MEMORY, Inc. Trademarks belong to their respective owners. All rights reserved. Fanatec is a brand of CORSAIR MEMORY Inc.