


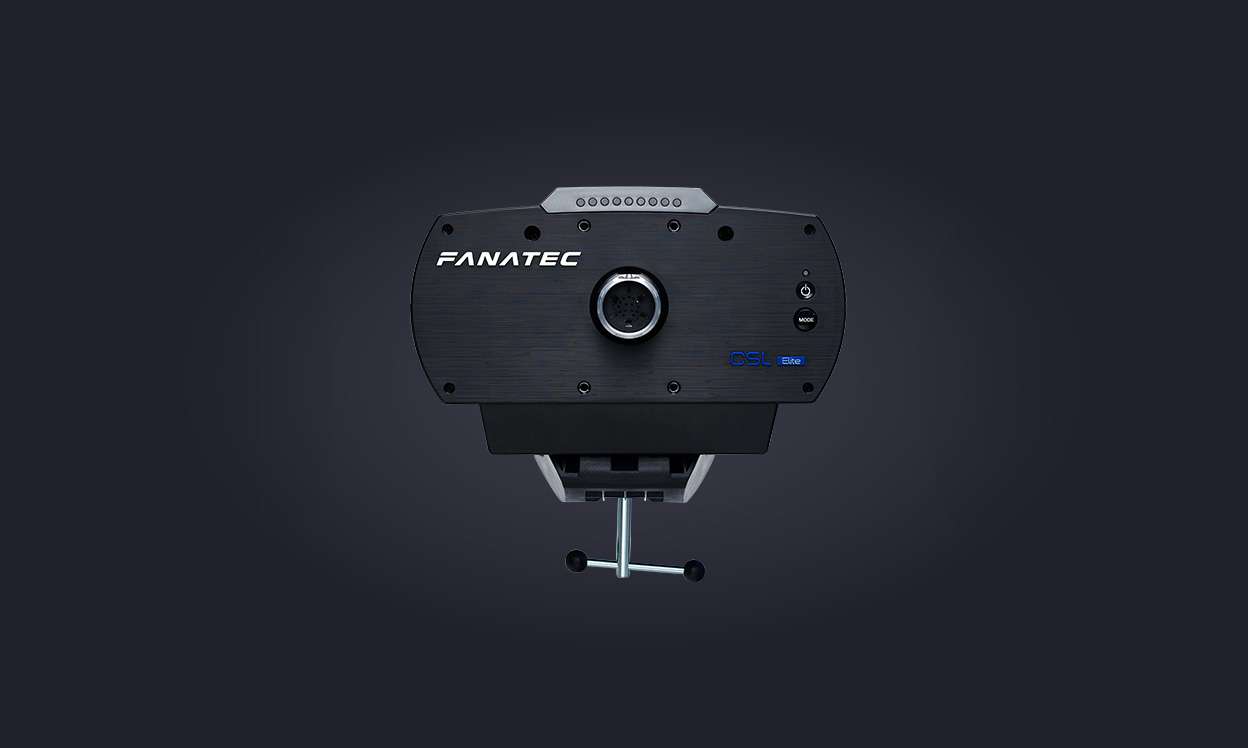
CSL Elite Wheel Base + - offiziell lizensiert für PlayStation™
inkl. MwSt.
zzgl. Versandkosten
Discontinued
This product is discontinued! There are no units left and there will be no pre-order for this product!
Weiterführende Links
Features
- Offiziell PS4™ lizensiert
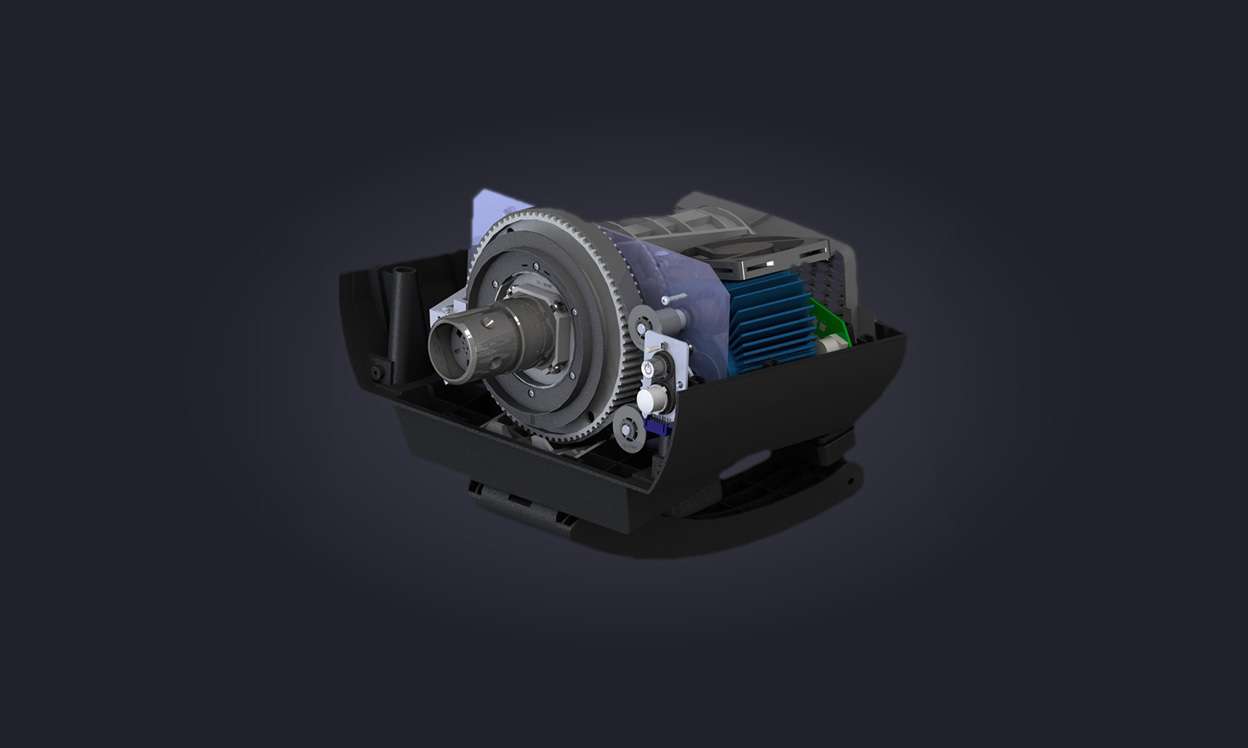
- Ultrastarker Brushless Servo Motor, welcher bis zu 6Nm Drehmoment an der Lenkachse liefert
- Single Belt Drive Antrieb mit extrem niedriger Verzögerung und ohne fühlbare Rasten, große Kugellager für minimalen Widerstand
- DirectSensor™ auf der Lenkachse, um Einflüsse des Riementriebes auf die Messung des Lenkwinkels zu verhindern
- Sehr schnelle Lenkradbeschleunigung - perfekt zum Driften
- 1080° Lenkeinschlag, der mittels des Tuning Menüs am angebrachten Lenkrad sehr schnell auf die verschiedensten Lenkeinschläge aller Autos justiert werden kann
- Integrierte Drehzahlanzeige in der Wheel Base
- Tischklemme inklusive. Die Dicke der (Tisch-)Platte, an der die Tischklemme befestigt werden kann, beträgt zwischen 1,0 und 6,0 cm
- Firmware kann für zusätzliche neue Features ganz einfach aktualisiert werden
- Die Motortreiber-Firmware kann ebenfalls aktualisiert werden
- Sehr schnelle 1000 Hz USB Update Rate
- Sie können gleichzeitig zwei externe Shifter (beispielsweise einen H-Shifter und einen sequenziellen Shifter) verbinden
- Befestigungsmöglichkeit für ClubSport Static Shifter Paddles und anderes optional erhältliches Zubehör
- Anschlüsse für Peripherie-Geräte: USB, Netzteil, Pedale, Shifter 1, Shifter 2, Handbremse
- Wählen Sie aus einer wachsenden Auswahl an realitätsgetreuen Lenkrädern und verschiedenen Styles
- Unser Quick-Release System erlaubt ein sekundenschnelles Wechseln des Lenkrades, sogar während des Spiels
- Unterstützt zusätzliche Vibrationsmotoren im Lenkradkranz (abhängig vom Lenkradmodell)
- Tuning Funktionen* über LED Display im Lenkrad zum Einstellen der Konfiguration unabhängig vom Spiel und während des Spielens
- Speichern von bis zu 5 Lenkradeinstellungen
- Spiel-unabhängige Einstellung der Empfindlichkeit. Der Drehwinkel kann von 90° bis 1080° eingestellt werden
- Einstellen der Force Feedback Stärke während des Spielens
- Einstellbare Vibrationsintensität im Lenkrad (abhängig vom Lenkradmodell). Die Vibrationsmotoren können direkt vom Spiel oder über die ABS Funktion angesteuert werden
- Simulieren von ABS Vibration im Lenkrad (abhängig vom Lenkradmodell) und Pedalen mit Vibratonsfunktion wie den ClubSport Pedalen V3
- Fortschrittlicher Drift Mode, um das Lenkrad mit einer negativen Dämpfung zu beschleunigen oder um mit einem natürlichen Dämpfer das Oszillieren auf der Gerade zu vermeiden
- Passen Sie die Force Feedback Empfindungen durch das Ändern von Spring (Feder), Damper (Dämpfer) und Force (Kraftintensität allgemein) Effekten an
- Stellen Sie die Bremspedalempfindlichkeit (brake force) von Loadcell-Pedalen im Tuning Menü ein, wie z.B. der ClubSport Pedale V3 oder der CSL Elite Pedale LC
- * Änderungen der Tuning-Funktionen vorbehalten
Kompatibilität
Peripherie
- Fanatec ClubSport Handbremse (direkter Anschluss an die Wheel Base)
- Alle Fanatec ClubSport Lenkräder
- Alle Fanatec CSL und CSL Elite Lenkräder
- Alle Fanatec ClubSport, CSR, CSR Elite, CSL und CSL Elite Pedale (Bei Pedalen ohne RJ12 Anschluss könnten Adapterkabel benötigt werden)
- Alle Fanatec CSL und ClubSport Shifters (zwei Shifter parallel)
- Fanatec ClubSport Static Shifter Paddles (stehende Schalthebel)
- Montage auf Cockpits und Wheel Stands: Drei Befestigungslöcher an der Unterseite. Bitte laden Sie die Bohrschablone herunter und überprüfen Sie das Lochmuster. Die Bohrlöcher sind identisch mit dem Lochmuster der ClubSport Wheel Bases ohne Winkeladapter (3 Löcher). Bitte beachten Sie, dass das Lochmuster der CSL Elite Wheel Base (PS4™ Version) NICHT kompatibel zum CSL Sitz (Auslaufprodukt) ist.
- Bitte beachten Sie: Die Kompatibilitäten zu allen Peripheriegeräten wurden von Fanatec getestet, jedoch weder getestet noch bestätigt von Sony Interactive Entertainment Inc.
Plattformen
- PlayStation® Systeme: Alle PlayStation®4 und PlayStation®4 Pro Systeme. Hier können Sie eine vollständige Liste kompatibler Spiele finden. Bitte beachten Sie, dieses Produkt ist derzeit nicht für zukünftige PlayStation® Systeme zertifiziert.
Playstation 5: Weitere Informationen finden Sie auf unserer Plattformkompatibilitätsseite. - PC: Diese Wheel Base ist mit allen wichtigen Rennspielen kompatibel zu PC.
- Andere Plattformen: Die Kompatibilitäten zu anderen Plattformen hängen vom verwendeten Lenkrad ab. Für weitere Informationen lesen Sie bitte die Produktseite des Lenkrades, das Sie benutzen möchten.
- Bitte beachten Sie: Die Kompatibilitäten zu PC und anderen Plattformen wurden von Fanatec getestet, jedoch weder getestet noch unterstützt von Sony Interactive Entertainment Inc.
Hinweise
- WICHTIG: Bitte verbinden Sie das Produkt vor Verwendung mit einem PC, laden Sie den neuesten Treiber herunter und führen Sie ein Firmware-Update durch. Dies stellt die optimale Kompatibilität und Funktion sowie neueste Features sicher.
- Kein Lenkrad und keine Pedale enthalten. Bitte nutzen Sie unseren Produktkonfigurator, um Ihr Wunschpaket zusammenzustellen.
- Tischbefestigung inklusive. Alternativ können Sie das Lenkrad fest mit einem Gaming Cockpit oder Wheel Stand verschrauben (siehe dazu die Bohrschablone im Downloadbereich).
- Keine Schrauben für die Montage z.B. auf einem Cockpit enthalten. Bitte informieren Sie sich im Handbuch über verwendbare Schrauben.
- Um ältere Fanatec Pedale mit PS/2 Anschluss wie z.B. CSP V1/V2 zu verbinden, brauchen Sie das optionale PS/2 auf RJ12 Kabel
Verpackungsinformationen
- Abmessungen (L x W x H) 35cm x 35cm x 28cm
- Gewicht 5.5kg
- Volumengewicht 6.86kg
Inhalt
- CSL Elite Wheel Base + (PS4™ version)
- Tischklemme
- Befestigungsschraube für Tischklemme
- Netzteil (Kabellänge: Netzteil bis Wheel Base 1,5 m/6 ft.)
- Stromkabel (regional) (Kabellänge: Steckdose bis Netzteil 1,5 m/6 ft.)
- O-Ring (Ersatz für Quick Release Schaft)
- USB Kabel (2 m/6 ft.)
- PS4™ Button Caps für (optionale) ClubSport Lenkräder
Technische Spezifikationen
- Plattform PC, PS4, XBox One Ready
- Anschlussports Handbremse, Pedale, Schaltung 1, Schaltung 2
- Tuning Menü über das Lenkrad Ja
- Table Clamp Included
- Rev-LEDs an der Wheel Base Ja
- Quick Release Ja
- Positionssensor Optischer Sensor
- Modustaste Ja
- Permanente Montage 3-hole pattern
- Force Feedback Antriebssystem Einfacher Zahnriemenantrieb
- Force Feedback Antriebsmaterial ABS Rollen mit Kugellager
- Kühlungseinheit Einfacher Lüfter
- Einstellbare Zentrierfeder Ja
- Einstellbare Vibration Ja
- Adjustable sensitivity Ja
- Einstellbare FF Kraft Ja
- Einstellbarer Drift Modus Ja
- Einstellbare Bremskraft Ja
- Einstellbare ABS Vibration Ja
- Maximaler Drehwinkel 90°-1080°
- Drehmoment Bis zu 6Nm
- USB Updaterate 1000Hz
FanaLab Software available here:
https://forum.fanatec.com/categories/fanalab
The latest firmware for this product is included with the most recent drivers and cannot be downloaded separately. Please connect all Fanatec devices to your PC and power them on before you install the new drivers!
Drilling template - additional information:
When printing the Drilling Template at home, please make sure that the print size is 100% (file size = print size).Therefore deactivate "automatic page scaling" in the print dialog box for example.
At the moment, the products we have available in our webshop are only compatible with Windows PC ( WIN 7, 8, 10 and 11), PS4, PS5, Xbox One and Xbox Series X. Mac OS or other systems are currently not supported.
Note: Console compatibility is limited for each product! Please check the compatibility section of the product page for each device for more information.
Derzeit sind alle Produkte, die im Webshop verfügbar sind, nur mit Windows PC (Win 7, 8, 10 und 11), PlayStation 4, 5 und Xbox One, Xbox Series X kompatibel. Andere System werden nicht unterstützt.
Die Funktionen der einzelnen Produkte können auf den Konsolen eingeschränkt sein. Daher empfehlen wir die Produktbeschreibungen der einzelnen Produkte genau zu überprüfen.
MacでFanatecギアを使用できますか?
現時点では、ウェブショップで入手できる製品は、Windows PC、PS4、PS5、Xbox One、Xbox SeriesXとのみ互換性があります。Mac OSは現在対応されていません。
注:コンソールの互換性は、製品ごとに制限されています。詳細については、各デバイスの製品ページの互換性セクションを確認してください。
We are often asked if you can use Thrustmaster or Logitech wheels, pedals, shifters or other accessories in combination with Fanatec hardware. In general the devices of different vendors are not compatible to each other. Therefore, you cannot directly connect products from different companies to each other or at least this is not supported.
In the past there have been adapters which might have worked to make such combinations possible but those solutions have not been reliable due to different techniques used in the hardware and different signal tolerances even if similar specs have been used. Fanatec cannot make any statements about third party adapters or similar solutions. We are putting a lot of effort into the goal of having the highest possible intercompatibility in between all our devices, which is not that easy to achieve. For any questions about compatibility we can only direct you to the information given on our product pages or within our FAQs.
The statement above is valid for every platform (especially on consoles!) EXCEPT PC...since you can connect multiple, individual USB devices there IF the game/simulation supports that.
This gives you multiple options to combine hardware of different vendors the way you want. Most simulation games on Windows PCs will allow you to use combinations like: Logitech wheel, Thrustmaster shifter and Fanatec pedals for example. Since Fanatec provides USB solutions for more or less every kind of hardware (shifter/handbrake by USB adapter, USB pedals, USB wheels, etc.) the possibilities to build your perfect setup are endless.
Even if it is very common, please be so kind to make some research on the web or ask the simulation developer if multiple USB devices are supported.
Wir werden oft gefragt, ob man Thrustmaster- oder Logitech-Racing Wheels, -Pedale, -Schalthebel oder anderes Zubehör in Kombination mit FANATEC-Hardware verwenden kann.
In der Regel sind die Geräte der verschiedenen Hersteller nicht miteinander kompatibel. Daher können Sie Produkte verschiedener Firmen nicht direkt miteinander verbinden oder zumindest wird dies nicht unterstützt.
In der Vergangenheit gab es zwar einen Adapter, der solche Kombinationen ermöglicht hat, aber diese Lösung ist aufgrund unterschiedlicher Techniken in der Hardware und unterschiedlicher Signaltoleranzen nicht mehr möglich, selbst wenn ähnliche Spezifikationen verwendet wurden.
FANATEC kann keine Aussagen oder Empfehlungen zu Adaptern von Drittanbietern oder ähnlichen Lösungen geben. Bei Fragen zur Kompatibilität können wir Sie nur auf die Informationen auf unseren Produktseiten oder in unseren FAQs verweisen.
Die obige Aussage gilt für jede Plattform, (vor allem auf Konsolen!) außer PC, da Sie dort mehrere einzelne USB-Geräte anschließen können, wenn das Spiel bzw. die Simulation dies auch unterstützt. Auch wenn es durchaus üblich ist, recherchieren Sie bitte im Internet oder fragen Sie den Simulationsentwickler, ob mehrere USB-Geräte unterstützt werden.
Dadurch haben Sie mehrere Möglichkeiten, Hardware verschiedener Hersteller so zu kombinieren, wie Sie es wünschen. Bei den meisten Simulationsspielen auf Windows-PCs können Sie Kombinationen verwenden wie:
Zum Beispiel Logitech Lenkrad, Thrustmaster Shifter und FANATEC Pedale. Da FANATEC USB-Lösungen für mehr oder weniger jede Art von Hardware anbietet (Schalthebel/Handbremse per USB-Adapter, USB-Pedale usw.), sind die Möglichkeiten, Ihr perfektes Setup aufzubauen, nahezu endlos.
Activate the Tuning Menu by pressing the Tuning Menu button on your steering wheel. The menu will be shown on the display of your steering wheel or wheel base (Podium DD's). To navigate through the Tuning Menu, use the directional stick (or FunkySwitch™) of the Fanatec® steering wheels.
Inside the Tuning Menu, you can change different values to tune the wheel. The following article will explain which features and values can be set. All wheels are shipped with a default setup which will work very well for most games. All options can be changed depending on the personal taste of the driver.
There are two tuning menus available, the Standard tuning menu (that the wheel base is using by default) and the Advanced tuning menu.
Standard tuning menu – Consisting of 1 Auto (A SET) and 1 Custom (C SET) setups - Allows adjusting the core parameters only in order to provide comfort for beginners and provide optimum force feedback feeling for users who prefer to only plug and play.
Advanced tuning menu – Consisting of 1 Auto and 5 custom setups – Allows adjusting all parameters in order for the user to fine-tune the wheel base to fit the driving style and match the preference in terms of force feedback feeling to the slightest detail.
To switch between the Standard and Advanced tuning menus, press the tuning menu button to open the tuning menu first, then press it again and hold it for 3 seconds.
Auto setup explained:
-
Allows games to control parameter values
-
Select the Auto setup to activate it. It will be displayed as ‘’A SET’’ on the 1’’ OLED display, ‘’A_S’’ on the seven-segment displays and ‘’Auto Setup’’ on the 2,7’’ OLED display
-
The Auto Setup indication will be shown when a game actively uses Auto Setup
-
Select a parameter and use up/down to see the current value
-
If no game uses Auto Setup, factory default values are used
-
Wheel bases supporting Auto setup: CSL DD and GT DD Pro, P DD, CSL E WB+, CS WB V2.5
-
Platforms: PC, PS5 / PS4
Custom setup explained:
-
Allows the users to set the parameter values to their preference
-
Select the Custom setup to activate it. It will be displayed as ‘’C SET’’ on the 1'' OLED displays, ‘’C.SET.’’ on the seven segment displays and ‘’Custom Setup’’ on the 2,7’’ OLED display
-
Select a parameter and press up and down to adjust its value
-
The value is saved and will be used from this moment on
-
Wheel bases: - CSL DD and GT DD Pro, P DD, CSL E WB+, CS WB V2.5
-
Platforms: PC, PS5 / PS4, XBOX
Tuning menu parameters explained:
Setup 1 – S_1 (Setup 1 to 5)
You can select and store up to 5 different setups directly in the Tuning Menu of your wheel base. Each setup contains the following parameters:
Sensitivity – SENSIT - SEN (default = AUTO)
The sensitivity/wheel angle can be changed from 90° up to the maximum allowed by the wheel base. If the sensitivity is set to "AUTO", the PC driver or the console can control the value which is used by some games (e.g. Codemasters F1, Assetto Corsa Competizione, GT Sport, ...)
The sensitivity range per wheel base is as follows:
90° - 900° for the ClubSport Wheel Base (V1, V2 and V2.5)
90° - 1080° - CSL Elite Wheel Base, CSL Elite Wheel Base v1.1 and the CSL Elite Wheel Base+ PS4,
90° - 2520° - Podium Wheel Bases (DD1, DD2 and DD1 PS4)
Force Feedback – F.FEEDB. - FF (default = 100)
Force Feedback simulates the mechanical response you feel when driving an actual car through the help of the motor inside the wheel base.
The maximum strength of the Force Feedback motors can be adjusted from 100% - 0% in increments of 1%.
Brake Level Indicator – BLI (ABS in older drivers) (default = OFF)
This feature can give you direct feedback about your brake inputs. If you set the value to 100, the vibration will start as soon as you give 100% brake input to the game. If you set it to 95%, the vibration will start if you push the brake to 95% or more. The BLI (ABS in older drivers) feature uses the vibration within your wheel rim and the vibration motor in the Fanatec pedal set (ClubSport Pedals V2, ClubSport Pedals V3 and ClubSport Pedals V3i).
Note: In order to control the vibration motors of your pedals, the pedal set must be connected directly to the wheel base and not as a standalone device via USB.
Shock - SHO (default = 100)
This function represents the strength of the shock/vibration motors inside the Fanatec® steering wheel, which can be adjusted from 100% - 0% (OFF) in increments of 10%. These vibration motors can be used by the game directly or by the BLI (ABS in older drivers) function.
Force (FOR), Spring (SPR), Damper (DPR) effects - (default = 100) (range: OFF -> 010 … 120)
These force feedback modifiers give you the ability to change the strength of the force feedback signals a game provides (only applicable if the game uses these effects). 100 means no modification; the lower values will reduce the strength and the higher values will increase the strength. In theory, there are three types of signals which a game can send:
Force (FOR) - pushes the wheel into a specific direction
Spring (SPR) - pulls the wheel towards the centre (steering angle 0)
Damper (DPR) - creates friction (adjusting overall stiffness)
Not every game is supporting all three types of effects. In some games, only one of the three is used to recreate all effects.
Force Effect Intensity (FEI) - (default = 100)
This parameter adjusts the overall intensity of force effects and can make effects smooth or sharp, depending on the user's preference. The setting can be adjusted in increments of 10, ranging from 0 to 100. (with 0 being the smoothest option and 100 being the sharpest and direct). Tuning this parameter can help to refine a harsh or spiky force feedback signal in some games.
Function of the Multi Position Switch (MPS) - 4 modes- (default = AUTO)
The MPS switch provides the user with the option to map a different car setting to each of the available position MPS switches (12 in total). For example, you can set the Traction Control and the ABS of the car, so you can change the values while racing, in order to find the right setting for you or to spare the tires. The switches can work in 4 different modes.
MPS: Auto – The steering wheel decides which mode is appropriate for the game currently being played.
MPS: Encoder – Simulates two buttons, one when you turn the MPS clockwise and one when you turn the MPS counter-clockwise
MPS: Constant – The MPS outputs a constant button signal for each position (1 – 12)
MPS: Pulse – The MPS outputs a specific button signal for each position, which is only sent as a single pulse when you move the switch.
The following steering wheels and accessories have the MPS switches:
ClubSport Formula V2.5/x - https://fanatec.com/eu-en/steering-wheels/clubsport-steering-wheel-formula-v2.5-x
Podium Button Module endurance: https://fanatec.com/eu-en/accessories/steering-wheel-accessories/podium-button-module-endurance
CSL Elite Steering Wheel McLaren GT3 V2 - https://fanatec.com/eu-en/steering-wheels/csl-elite-steering-wheel-mclaren-gt3-v2
Brake Force (BRF) - (default = 50)
This setting will allow you to adjust the sensitivity of your load cell brake pedal. If the BRF is set to 100 or MAX, then it will require the user to press the brake with maximum force in order to achieve 100% of the braking signal. Reducing the BRF to MIN will allow the user to achieve 100% of the braking signal with minimum effort. You can check the brake signal level in the driver (on your PC) or you can see it on the attached steering wheel LEDs (depending on the steering wheel type).
*Settings available on the Direct Drive Wheel bases Only
*Natural Damper (NDP) - (default = 50)
The natural damper will give you an additional damper, which you can adjust from 100 to OFF. At 100, you will have the strongest dampening effect, which reacts to the acceleration and angle of your steering. If you turn it OFF, your steering will have no additional damping, making it easy to turn the wheel. The natural damper is a setting which can also help to reduce unwanted wheel oscillation.
*Natural Friction (NFR) - (default = OFF)
The natural friction setting is used to simulate the mechanical feel of a vehicle’s steering components. The higher the setting, the more resistance you will feel when rotating the wheel. This can enhance the feeling if driving vehicles without power steering, or with very wide tires. This setting can also help to prevent oscillation.
*Natural Inertia (NIN) - (default = OFF)
This setting simulates additional weight on the steering axis. It can be useful when using lighter wheels like the P1 or McLaren GT3. The Natural Inertia can also affect the Natural Friction (NFR) setting from feeling less ‘sticky’ on direction changes.
*Force Feedback Linearity (LIN) - (default = OFF)
The linearity mode can be set to ON and OFF. When enabled, this setting reduces the maximum FFB output by a small amount in order to guarantee consistent output between peaks and holding forces. It also ensures an improved general linearity between game output and wheel base torque output.
*Force Feedback Interpolation (INT) (default = 6)
Force Feedback Interpolation “INT” filters and smoothens the incoming rough game FFB signal and increases the refresh rate. For example, some games use a 60Hz FFB signal, which can feel very rough and noisy, but this can be fixed with the Force Feedback Interpolation. By increasing the value, you reduce the rough feeling and increase the smoothness of the signal. You can set the value to OFF, meaning that you will get unfiltered raw force feedback signal. To enable the interpolation, the value must be set from 1 to 20.
Dans le menu tuning, vous pouvez modifier les différents paramètres du volant. L'article suivant vous explique quelles caractéristiques et quels paramètres peuvent être réglés.
par défaut sur CSW V2.5
disponible depuis la mise à jour 446, incluse avec le pilote v310
par défaut sur CSL Base: 050
disponible pour la base de roue CSL Elite depuis la mise à jour 313 incluse avec le pilote v292
et pour la CSL Elite Racing Wheel pour PS4 depuis la mise à jour 314 incluse avec le pilote v292
Cette option offre la possibilité d'ajuster l'intensité des effets de retour de force et de les arrondir ou de les adoucir: OFF signifie très doucement, ce qui atténue fortement le bruit mécanique de la base de roue. Si vous définissez la valeur à 100, les effets de retour de force sont très durs et directs. Adapter cette valeur individuellement au jeu correspondant peut aider à optimiser l'expérience de conduite.
Öffnen Sie das Tuning Menu indem Sie den Tuning Menu Button an Ihrem Lenkrad drücken. Das Menü wird auf dem Display Ihres Lenkrads oder Ihrer Wheel Base (Podium DDs) angezeigt. Um durch das Menü zu navigieren, nutzen Sie den Richtungsstick (oder FunkySwitch™) des Fanatec® Lenkrads. Einstellungen können ebenfalls in der Fanatec Wheel Property Page (oder Fanatec Control Panel) auf Ihrem PC geändert werden.
https://forum.fanatec.com/categories
Das CSL DD Tuning Menu ist ab Werk auf Standard Mode eingestellt. Wenn der Standard Mode aktiviert ist, sind nicht alle Einstellungen sichtbar und es gibt nur 1 anpassbares Setup Profile.
Um zwischen dem Standard und Advanced Mode zu wechseln, aktivieren Sie das Tuning Menu indem Sie den Tuning Menu Button auf Ihrem Lenkrad drücken und anschließend den Tuning Menu Button erneut drücken und für 3 Sekunden gedrückt halten.
Setup 1 - S_1 (Setup 1-5)
Es können bis zu 5 verschiedene Setups direkt im Tuning Menu Ihrer Wheel Base auswählen. Jedes Setup enthält die folgenden Parameter:
Sensitivity - SENSIT - SEN (standard = 900)
Die Sensitivity bzw. der Lenkwinkel kann von 900° (CSL E WB: 1080°) bis 90° ihren Vorlieben entsprechend verändert werden. Wenn die SEN Funktion auf "OFF/Aut" gesetzt wird kann der Wert durch den PC Treiber oder bestimmte Spiele (Codemasters F1, GT5, ...) selbstständig verändert werden. Fest eingestellte Werte bleiben unangetastet.
Ab Version 094 der CSW Firmware wird der Wert OFF mit "Aut" benannt. Dies bedeutet, dass diese Einstellung vom Treiber und von Spielen automatisch eingestellt werden kann.
Der Lenkwinkelbereich, aufgelistet nach Wheel Base:
90° - 900° für die ClubSport Wheel Base (V1, V2 und V2.5)
90° - 1080° - CSL Elite Wheel Base, CSL Elite Wheel Base v1.1 und die CSL Elite Wheel Base+ PS4,
90° - 2520° - Podium Wheel Bases (DD1, DD2 and DD1 PS4), CSL DD, GT DD
Force Feedback – F.FEEDB. - FF (Standard = 100)
Force Feedback definiert die maximale Stärke des Motors, wenn Force-Feedback-Effekte von Software / Spielen an die Wheel Base gesendet werden. Wenn FF auf OFF gesetzt ist, wird kein Force-Feedback-Effekt vom Wheel Base Motor ausgeführt. Wenn FF auf 001 eingestellt ist, führt der Motor nur 1 % der maximalen Motorleistung aus. Wenn FF auf 100 eingestellt ist, führt der Motor 100 % der maximalen Motorleistung aus.
Brake Level Indicator – BLI (ABS in älteren Treibern) (Standard = OFF)
Diese Funktion kann Ihnen direktes Feedback zu Ihren Brems Inputs geben. Wenn Sie den Wert auf 100 setzen, beginnt die Vibration, sobald Sie dem Spiel 100 % Bremseingabe geben. Wenn Sie ihn auf 95 % einstellen, beginnt die Vibration, wenn Sie die Bremse auf 95 % oder mehr drücken. Die BLI-Funktion (ABS in älteren Treibern) nutzt die Vibrationsmotoren in Ihrem Lenkrad und den Vibrationsmotor am Fanatec-Pedalset (ClubSport Pedals V2, ClubSport Pedals V3 und ClubSport Pedals V3i).
Beachten Sie: Um die Vibrationsmotoren Ihrer Pedale steuern zu können, müssen diese direkt mit Ihrer Wheel Base verbunden sein, und nicht separat via USB-Kabel zum PC.
Shock - SHO (standard = 100)
Diese Funktion stellt die Stärke der Stoß-/Vibrationsmotoren im Fanatec®-Lenkrad dar, die von 100 % - 0 % (OFF) in Schritten von 10 % eingestellt werden kann. Diese Vibrationsmotoren können direkt vom Spiel oder von der BLI-Funktion (ABS in älteren Treibern) verwendet werden.
Force (FOR), Spring (SPR), Damper (DPR) effects - (standard = 100) (Skala: OFF -> 010 … 120)
Diese Force-Feedback-Modifikatoren geben Ihnen die Möglichkeit, die Stärke der Force-Feedback-Signale eines Spiels zu ändern (gilt nur, wenn das Spiel diese Effekte verwendet). 100 bedeutet keine Änderung; die niedrigeren Werte verringern die Stärke und die höheren Werte erhöhen die Stärke. Theoretisch gibt es drei Arten von Signalen, die ein Spiel senden kann:
Force (FOR) - bewegt das Lenkrad in eine bestimmte Richtung
Spring (SPR) - zieht das Lenkrad in die Mittelstellung (Lenkwinkel = 0°)
Damper (DPR) - erzeugt Widerstand/Reibung (stellt die grundlegende Steifigkeit ein)
Nicht jedes Spiel unterstützt alle drei Arten von Effekten. In manchen Spielen wird nur einer dieser drei Werte genutzt, um alle Effekte zu erzeugen.
Force Effect Intensity (FEI) - (Standard = 100)
Dieser Parameter passt die Gesamtintensität von Krafteffekten an und kann die Effekte je nach Vorliebe des Benutzers weich oder hart stellen. Die Einstellung kann in 10er-Schritten von 0 bis 100 angepasst werden (wobei 0 die sanfteste Option und 100 die härteste und direkteste Option ist). Die Abstimmung dieses Parameters kann in einigen Spielen helfen, ein hartes oder spitzes Force-Feedback-Signal zu verfeinern.
Function of the Multi Position Switch (MPS) - 4 Modi – (Standard = AUTO)
Der MPS-Schalter bietet dem Benutzer die Möglichkeit, jeder Position der verfügbaren MPS-Schalter (insgesamt 12 Positionen) eine andere Fahrzeugeinstellung zuzuordnen. Sie können beispielsweise die Traktionskontrolle und das ABS des Autos einstellen, sodass Sie die Werte während des Rennens ändern können, um die für Sie richtige Einstellung zu finden oder die Reifen zu schonen. Die Schalter können in 4 verschiedenen Modi arbeiten.
MPS: Auto – Das Lenkrad entscheidet, welcher Modus für das aktuelle Spiel geeignet ist
MPS: Encoder – Simuliert zwei Buttons, einen, wenn der MPS im Uhrzeigersinn gedreht wird, und einen wenn der MPS gegen den Uhrzeigersinn gedreht wird.
MPS: Constant – Der MPS sendet ein konstantes Button-Signal für jede Position (1 – 12)
MPS: Pulse – Der MPS sendet ein spezifisches Button-Signal für jede einzelne Position, welches als einzelner Puls gesendet wird, wenn Sie den Switch bewegen.
Nur wenn Sie ein Fanatec® Lenkrad mit Multi-Position-Switches nutzen (wie z.B. das ClubSport Lenkrad Formula V2.5) ist dies verfügbar.
Brake Force (BRF) - (Standard = 50)
Mit dieser Einstellung können Sie die Empfindlichkeit Ihres Loadcell-Bremspedals einstellen. Wenn BRF auf 100 oder MAX eingestellt ist, muss der Benutzer die Bremse mit maximaler Kraft betätigen, um 100 % des Bremssignals zu erreichen. Durch die Reduzierung der BRF auf MIN kann der Benutzer mit minimalem Aufwand 100 % des Bremssignals erreichen. Den Bremssignalpegel können Sie im Treiber (an Ihrem PC) oder an den angebrachten Lenkrad-LEDs (je nach Lenkradtyp) ablesen.
Analogue Paddles (AP) - (Standard = CbP)
CbP (Clutch Bite Point): Beide, das linke und rechte analoge Paddle arbeiten parallel als Kupplung (Clutch), das stärker gedrückte Paddle zählt.
CH (Clutch / Handbrake): Linkes Paddle: Kupplung (Clutch) / Rechtes Paddle: Handbremse (Handbrake)
Bt (Brake / Throttle): Linkes Paddle: Bremse (Brake) / Rechtes Paddle: Gas (Throttle)
AnA (Mappable Axes): Die Paddles können als zwei zusätzliche Achsen belegt werden. Diese Funktion kann bei manchen Lenkrädern mit dem Joystick geteilt werden.
Nur verfügbar, wenn ein Lenkrad mit analogen Paddles (z.B. mit Podium Advanced Paddle Module) genutzt wird, aber kein bestimmter Knopf für den Wechsel zwischen diesen Modi vorhanden ist (z.B. Podium Hub und Podium Button Module Endurance)
*Einstellungen nur bei Direct Drive Wheel Bases verfügbar
*Natural Damper (NDP) - (Standard = 50)
Natural Damper bietet einen zusätzlichen Dämpfer, der von OFF bis 100 eingestellt werden kann. 100 hat die stärkste Dämpfungswirkung, die auf die Beschleunigung und den Winkel Ihrer Lenkung reagiert. Im ausgeschalteten Zustand hat Ihre Lenkung keine zusätzliche Dämpfung, was das Drehen des Lenkrads erleichtert.
Natural Damper ist nützlich, um unerwünschte Lenkradschwingungen zu reduzieren. Oszillation wird typischerweise durch Latenz in der Rückkopplungsschleife verursacht und tritt in Rennspielen häufiger auf, die nicht für drehmomentstarke Motoren optimiert sind. Der Standardwert von 50 ist ein gutes Gleichgewicht zwischen Lenkansprechverhalten und Schwingungsdämpfung.
*Natural Friction (NFR) - (Standard = OFF)
Natural Friction wird verwendet, um das mechanische Gefühl von Lenkungskomponenten zu simulieren. Eine höhere Einstellung bewirkt mehr Widerstand beim Drehen des Lenkrads. Dies kann das Fahrgefühl von Fahrzeugen ohne Servolenkung oder mit sehr breiten Reifen verbessern. Diese Einstellung kann auch dazu beitragen, Schwingungen (Oszillation) zu vermeiden. Natural Friction ist unabhängig vom Spiel-FFB und immer aktiv, auch wenn kein Spiel läuft.
*Natural Inertia (NIN) - (Standard = OFF)
Diese Einstellung simuliert zusätzliches Gewicht auf der Lenkachse. Es kann nützlich sein, wenn leichtere Lenkräder wie das P1 oder McLaren GT3 verwendet werden. Die natürliche Trägheit kann sich auch auf die Einstellung der natürlichen Reibung (NFR) auswirken, da sie sich bei Richtungsänderungen weniger „stockend“ anfühlt.
*Force Feedback Scaling (FFS) - (Standard = LIN)
Die FF-Skalierung reduziert die maximale FFB-Leistung um einen kleinen Wert, um eine konstante Leistung zwischen Spitzen und Haltekräften (Peak und Holding Torque) sowie eine verbesserte allgemeine Linearität zwischen Spielleistung und Drehmomentleistung zu gewährleisten. LIN (Linear) aktiviert diese Einstellung und PEA (Peak) deaktiviert diese Einstellung.
*Force Feedback Interpolation (INT) - (Standard = 6)
Force Feedback Interpolation „INT“ filtert und glättet das eingehende, rohe FFB-Signal des Spiels und erhöht die Bildwiederholfrequenz. Einige Spiele verwenden beispielsweise ein 60-Hz-FFB-Signal, das sich sehr rau und verrauscht anfühlen kann, aber dies kann mit der Force Feedback Interpolation behoben werden. Indem Sie den Wert erhöhen, reduzieren Sie das raue Gefühl und erhöhen die Glätte des Signals. Sie können den Wert auf OFF setzen, was bedeutet, dass Sie ein ungefiltertes Force-Feedback-Rohsignal erhalten. Um die Interpolation zu aktivieren, muss der Wert von 1 bis 20 eingestellt werden.
Any RJ12-RJ12 (6p6c straight) and USB (type A -- type B; USB 1/2.0; USB Type C) cable which has the right connectors on both ends can be used. If you use high quality cables of similar length to the originals, there should be no issues. Please keep in mind that FANATEC cannot guarantee perfect functionality of our products if third-party products are used, even if the combination should work!
Important notes regarding (replacement) cables:
- Cables which are significantly longer than the original cables can cause connection issues
- Extension cables are often the source of connection issues. Longer high-quality cables are the better option
- If your product came with a high-quality ferrite core cable, a replacement cable should be of similar quality
- For USB Type C cables, please make sure that you are using USB Type C Data and not a Charging cable
Q: Can I purchase replacement "RJ12--RJ12" / "USB A -- USB B / USB Type C (for the CSL DD)" cables from FANATEC?
A: We should be able to offer replacement cables for all recent products. If they are not offered in the webshop, please ask our support team. Alternatively, it is also possible to use similar standard USB/RJ12 high quality cables, which are inexpensive and can be found at most electrical retailers.
Grundsätzlich sollten alle standard RJ12--RJ12 (6p6c - straight) und USB (Type A auf Type B; USB 1/2.0) Kabel passen und einwandfrei funktionieren, welche die richtigen Stecker bieten. Sofern hochqualitative Kabel mit ähnlicher Länge verwendet werden, sollte dies kein Problem darstellen. Bitte beachten Sie, dass Fanatec keine uneingeschränkte Garantie auf Funktionalität geben kann, sofern Teile/Produkte von Drittherstellern verwendet werden bzw. involviert sind.
Wichtige Anmerkungen zu Ersatzkabeln:
- Kabel welche (deutlich) länger als die Originalkabel sind, können zu Verbindungsproblemen führen
- Verlängerungskabel (und Adapterstecker) sind oft die Ursache von mangelhafter Übertragungsqualität der Signale. Längere Kabel wären hier die bessere Option.
- Wenn ihr Produkt mit einem hochwertigen Kabel inkl. Ferrit-Kern geliefert wurde, sollten sie als Ersatz ein ähnlich hochwertiges Kabel verwenden.
Frage: Kann ich ein (RJ12--RJ12 oder USB A -- USB B) Ersatzkabel von Fanatec kaufen?
Antwort: Wir sollten in der Lage sein für aktuelle Produkte Ersatzkabel zu Verfügung zu stellen. Falls diese im Webshop nicht gelistet sind, fragen sie bitte unser Supportteam danach. Es ist allerdings auch möglich ähnliche Standardkabel in hoher Qualität von anderen Händlern zu erschwinglichen Preisen zu kaufen und zu verwenden.
When using the CSL Elite Wheel base, it is possible that the motor generates audible force feedback noises, and sometimes violent force feedback effects when you are going off track, or driving over kerbs. The CSL E WB has an exceptionally strong force feedback motor which generates torques up to 6Nm, and is ~40% stronger than average force feedback wheels made from synthetic material. Additionally, the "single drive" system has been designed to directly deliver all forces straight to the steering wheel and to your hands which will lead to a higher sound level due to the plastic construction of the housing.
Lors de l'utilisation de la base de volant CSL Elite, il est possible que le puissant moteur génère des sons de retour de force clairement audibles, en particulier lorsque le jeu envoie des effets de retour de force puissants et parfois violents lorsque vous franchissez des bordures ou hors de la piste. Le CSL E WB est doté d'un moteur à retour de force exceptionnellement puissant qui génère des couples jusqu'à 6 Nm, ce qui est ~ 40% plus fort que la moyenne de retour de force des bases en matériau synthétique. De plus, le système « single drive » a été conçu pour fournir toutes les forces directement au volant et à vos mains, ce qui conduira à un niveau sonore plus élevé. Une unité en métal lourd comme le CSW V2 peut absorber ces forces violentes plus facilement, mais sans surprise, cela a un coût plus élevé.
Al usar la base CSL Elite Wheel base, es posible que el fuerte motor genere sonidos por el Force Feedback, especialmente cuando el juego envía efectos de FFB violentos o fuertes cuando se sale de la pista o al recorrer curvas.
La base CSL Elite Wheel Base tiene un motor de FFB excepcionalmente fuerte, que genera una torsión de hasta 6 Newtonmeters que es aproximadamente 40% más fuerte que el promedio de las bases con Force feedback hechas de materiales sintéticos.
Adicionalmente cada sistema “single drive” ha sido diseñado para que pueda emitir toda la fuerza directamente al volante y a sus manos, lo cual puede generar mayor nivel de sonido. Una unidad de metal sólido como la CSW v2 puede absorber tales fuerzas violentas con mayor facilidad, pero no debe de sorprenderse de que esto conlleve un mayor costo.
Quando si utilizza la base del CSL Elite è possibile che la potenza del motore generi suoni di forza di riscontro chiaramente udibili. Specialmente quando il gioco invia effetti di riscontro di forza robusti e talvolta violenti quando si superano i cordoli o si esce fuori pista. Il CSL E WB ha un motore eccezionalmente potente che genera coppie fino a 6 Nm, che è ~ 40% più forte delle altre basi realizzate in materiale sintetico. Inoltre, il sistema "single drive" è stato progettato per fornire direttamente tutta la forza direttamente al volante e alle mani, il che porta a un livello sonoro più elevato. Un'unità fatta di metalli robusti come il CSW V2 può assorbire queste violenti forze, per questo non bisogna essere sorpresi che l’unita ha un costo maggiore della media.
Die CSL Elite Wheel Bases erzeugen deutlich hörbare Geräusche, sobald eingehende Force Feedback Signale umgesetzt werden. Solche Geräusche können wahrgenommen werden beim Überfahren von Kurbs, wenn das Auto von der Strecke abkommt oder zum Beispiel bei Fahrten über unbefestigte Untergründe, wie es in Rallye Spiele üblich ist.
Der verbaute Brushless Motor leistet bis zu 6 Nm (Newtonmeter) und das entspricht ca. 40 % mehr Kraft als bei vergleichbaren Modellen in diesem Preissegment.
Das Riemensystem wurde so gestaltet, dass alle erzeugbaren Force Feedback Signale mit so wenig Schwund wie nur möglich ans Lenkrad weitergeben werden. Durch dieses spezielle System wird dem Anwender ermöglicht, selbst die feinsten Force Feedback Signalen spüren zu können.
Das Gehäuse der CSL Elite Wheel Bases ist aus Kunststoff gefertigt und anders als bei schwereren Geräten mit einem Metallgehäuse wie zum Beispiel bei der ClubSport Wheel Base V2.5 ist somit eine Dämpfung aller mechanischen erzeugten Geräusche über das Gehäuse bzw. über das höhere Eigengewicht von der Wheel Base selber nicht möglich. Es ist aber auch zu erwähnen, dass dies sich im Preis widerspiegelt.
With the new firmware manager, the ‘’Update’’ button will remain grey and not available in case you are having the latest firmware installed on your devices. This of course doesn’t mean that you are still not able to reflash/reinstall the firmware again. To make the option become available again, press the Manual Firmware Update button in the top right corner of the Firmware Manager window:

This will unlock the firmware update option for each device. You can then proceed and perform the firmware update/reflash on the device you wish:

Remarque : suivez les instructions ci-dessous uniquement lorsque vous êtes sûr à 100 % que la version du pilote PC est compatible avec vos produits Fanatec connectés. La dernière version du pilote PC est toujours disponible sur https://fanatec.com/driver .
Avec le nouveau gestionnaire de firmware, le bouton « Update » restera gris et non disponible au cas où vous auriez le dernier firmware installé sur vos appareils. Cela ne signifie bien sûr pas que vous ne pouvez toujours pas reflasher/réinstaller le firmware à nouveau. Pour que l'option redevienne disponible, appuyez sur le bouton Manual Firmware Update dans le coin supérieur droit de la fenêtre Firmware Manager :
Cela débloquera l'option de mise à jour du Firmware pour chaque appareil. Vous pouvez ensuite procéder et effectuer la mise à jour/reflashage du firmware sur l'appareil de votre choix :
Con el nuevo administrador de firmware (firmware updater), el botón de actualización (“Update”) permanecerá en gris y no estará disponible en caso de que tenga el firmware más reciente instalado en sus dispositivos. Esto por supuesto no significa que no pueda reflashear o reinstalar el firmware de nuevo. Para activar la opción una vez más, seleccione la opción de actualización manual del firmware (Manual Firmware Update) ubicada en la esquina superior derecha en la ventana del administrador de firmware.
Esto permitirá la opción de actualización de firmware para cada dispositivo. Entonces puede continuar y realizar la actualización de firmware o bien “reflashear” el dispositivo que desee.
Con il nuovo gestore del firmware, il pulsante "Aggiorna" rimarrà grigio e non disponibile nel caso in cui sui dispositivi sia installato il firmware più recente. Questo, ovviamente, non significa che non sei ancora in grado di eseguire nuovamente il reflash/reinstallare il firmware. Per rendere nuovamente disponibile l'opzione, premere il pulsante Aggiornamento manuale firmware nell'angolo in alto a destra della finestra Firmware Manager:
Questo sbloccherà l'opzione di aggiornamento del firmware per ogni dispositivo. Puoi quindi procedere ed eseguire l'aggiornamento/reflash del firmware sul dispositivo che desideri:
Mit dem neuen Firmware Manager wird der „Update“-Button ausgegraut und nicht verfügbar erscheinen, sofern die neueste Firmware bereits auf Ihren Geräten installiert ist. Dies bedeutet aber selbstverständlich nicht, dass Sie die Firmware nicht erneut installieren/flashen können. Um diese Funktion wieder verfügbar zu machen, setzen Sie ein Häkchen bei ‚Manual Firmware Update‘ in der oberen, rechten Ecke des Firmware Manager Fensters:
Dies ermöglicht die Option eines Firmware Updates für jedes Gerät. Sie können anschließend fortfahren und das Firmware Update für das gewünschte Produkt durchführen bzw. erneut flashen:
Every car in every game can have a different steering angle. In order to match your steering angle with the one of the car, you will need to have the ‘Sensitivity’ setting (in the tuning menu) set to ‘Auto’. Once this is done, you will have to re-calibrate the controller in the game.
As every game is different, some will require you to set the steering angle in the options menu. For example, in Assetto Corsa or Assetto Corsa Competizione, you will need to set the degrees in game and then apply the same setting in the tuning menu.
For Dirt Rally and Dirt Rally 2.0 for example, you will need to perform the calibration in game, then set the saturation to 63 and set the sensitivity in the tuning menu to 900 degrees in order to get the exact steering lock of the car in-game.
In case the steering angles are still not matching, please try check the following:
- Turn your steering wheel at 90 degrees.
- Open the tuning menu and go to the ‘Sensitivity’ setting
- Start reducing the sensitivity setting until the in-game steering wheel starts to match that of your steering wheel. Turn the wheel left and right, and check that it is now matching with the in-game steering wheel.
Some games may not have a realistic steering wheel animation, and will therefore be impossible to match with your steering wheel.
Chaque voiture dans chaque jeu peut avoir un angle de braquage différent. Afin de faire correspondre votre angle de braquage avec celui de la voiture, vous devrez régler le paramètre Sensibilité (dans le menu de réglage) sur Auto. Ensuite, vous devrez terminer le calibrage du contrôleur dans le jeu.
Si vous obtenez toujours un angle de braquage différent sur votre volant et dans la voiture dans le jeu, vous devrez alors vérifier les points suivants :
Comme chaque jeu est différent, certains jeux nécessitent de régler l'angle de braquage dans les paramètres. Par exemple, dans Assetto Corsa et Assetto Corsa Competizione, vous devrez définir les degrés en jeu, puis appliquer le même paramètre dans le menu de réglage. Ensuite, toutes les voitures seront assorties.
Pour Dirt Rally et Dirt Rally 2.0 par exemple, vous devrez effectuer le calibrage dans le jeu, puis régler la saturation sur 63 et régler la sensibilité dans le menu de réglage sur 900 degrés afin d'obtenir le verrouillage de direction exact de la voiture en Jeu.
Si le volant ne correspond toujours pas, procédez comme suit :
- Tournez votre volant à 90 degrés.
- Ouvrez le menu de réglage et allez dans le réglage ''Sensibilité''
- Commencez à réduire la sensibilité jusqu'à un point où vous voyez le volant sur l'écran correspondant à la position de votre propre volant. Tournez à gauche et à droite jusqu'au bout, jusqu'à ce que vous sentiez le soft lock (limite de rotation du volant) et vérifiez si la position du volant sur l'écran correspond à la vôtre.
Sachez que certains jeux n'ont pas d'animation réaliste de rotation du volant, il ne sera donc pas possible de faire correspondre le volant à l'écran avec le vôtre.
Cada coche en cada juego puede tener un ángulo de dirección diferente. Con el fin de hacer coincidir su ángulo de dirección con el del coche, usted tendrá que tener el ajuste de sensibilidad (en el menú de ajuste) establecido en automático. A continuación, tendrá que completar la calibración del controlador en el juego.
En caso de que usted todavía está recibiendo un ángulo de dirección diferente en el volante y en el coche en el juego, entonces usted tendrá que comprobar lo siguiente:
Como cada juego es diferente, algunos juegos requieren para establecer el ángulo de dirección en los ajustes. Por ejemplo, en Assetto Corsa y Assetto Corsa Competizione, deberá establecer los grados en el juego y luego aplicar la misma configuración en el menú de ajuste. Entonces todos los coches estarán a la par.
Para Dirt Rally y Dirt Rally 2.0, por ejemplo, deberá realizar la calibración en el juego, luego establecer la saturación en 63 y establecer la sensibilidad en el menú de ajuste a 900 grados para obtener el bloqueo de dirección exacto del automóvil en el juego.
En caso de que el volante no coincida todavía, realice lo siguiente:
- Gire el volante a 90 grados.
- Abra el menú de ajuste y vaya a la configuración de ''Sensibilidad'' (Sensitivity).
- Comience a reducir la sensibilidad a un punto, donde se ve el volante en la pantalla que coincide con la posición de su propio volante. Gire a la izquierda y a la derecha y todo el camino hasta que sienta el bloqueo suave y compruebe si la posición del volante en la pantalla coincide con la suya.
Por favor, sepa, que algunos juegos no tienen una animación de giro del volante realista, por lo tanto, no será posible hacer coincidir el volante en la pantalla con el suyo.
Ogni auto in ogni gioco può avere un angolo di sterzata diverso. Per far corrispondere il tuo angolo di sterzata a quello dell'auto, dovrai impostare la sensibilità (nel menu di messa a punto) su Auto. Quindi dovrai completare la calibrazione del controller nel gioco.
Nel caso in cui ottieni ancora un angolo di sterzata diverso sul volante e nell'auto nel gioco, dovrai controllare quanto segue:
Poiché ogni gioco è diverso, alcuni giochi richiedono di impostare l'angolo di sterzata nelle impostazioni. Ad esempio, in Assetto Corsa e Assetto Corsa Competizione, dovrai impostare i gradi nel gioco e quindi applicare la stessa impostazione nel menu di ottimizzazione. Quindi tutte le auto saranno corrispondenti.
Per Dirt Rally e Dirt Rally 2.0, ad esempio, sarà necessario eseguire la calibrazione nel gioco, quindi impostare la saturazione su 63 e impostare la sensibilità nel menu di regolazione su 900 gradi per ottenere l'esatto bloccasterzo dell'auto in gioco.
Nel caso in cui il volante non corrisponda ancora, eseguire le seguenti operazioni:
- Ruota il volante di 90 gradi.
- Apri il menu di sintonizzazione e vai all'impostazione "Sensibilità"
- Inizia a ridurre la sensibilità fino a un punto in cui vedi il volante sullo schermo che corrisponde alla posizione del tuo volante. Gira a sinistra e a destra e fino in fondo finché non senti il blocco morbido e controlla se la posizione del volante sullo schermo corrisponde alla tua.
Tieni presente che alcuni giochi non hanno un'animazione realistica del volante, quindi non sarà possibile abbinare il volante sullo schermo con il tuo.
Jedes Fahrzeug in jedem Spiel/Simulation kann einen unterschiedlichen Lenkwinkel haben. Um den Lenkwinkel Ihrer Hardware mit dem des Fahrzeugs in der Simulation anzupassen, müssen Sie das Sensitivity Setting (Im Tuning Menü) auf ‚Auto‘ stellen. Anschließend müssen Sie die Controller Kalibrierung im Spiel abschließen.
Falls Sie dennoch einen anderen Lenkwinkel als im Spiel haben, beachten Sie bitte folgendes:
Da jedes Spiel anders ist, müssen Sie bei einigen Spielen den Lenkwinkel in den Einstellungen einstellen. In Assetto Corsa und Assetto Corza Competizione müssen Sie beispielsweise die Gradzahl im Spiel einstellen und dann die gleiche Einstellung im Tuning-Menü anwenden. Dann passen alle Lenkwinkel der Fahrzeuge.
Für Dirt Rally 1 und 2 zum Beispiel, muss die Kalibrierung im Spiel vorgenommen werden, dann die Sättigung (Saturation) auf 63 gestellt werden und das Lenkrad auf 900° gestellt werden um den exakt gleichen Lenkwinkel wie beim Fahrzeug im Spiel einzustellen.
Sollte das Lenkrad immer noch nicht mit dem im Spiel übereinstimmen, führen Sie die folgenden Schritte durch:
- Drehen Sie Ihr Lenkrad auf 90°
- Öffnen Sie das Tuning Menu und die „Sensitivity“ Einstellung
- Beginnen Sie die Sensitivität zu senken, bis zu einem Punkt, an dem das Lenkrad auf dem Bildschirm im Spiel mit dem Lenkrad an Ihrer Wheel Base übereinstimmt. Drehen Sie das Lenkrad dann anschließend bis zum Anschlag links und rechts und überprüfen Sie, ob das Lenkrad, mit dem im Spiel übereinstimmt.
Bitte bedenken Sie, dass nicht jedes Spiel eine realistische Anzeige des Lenkrads im Fahrzeug anzeigt, bei diesen Spielen ist es leider nicht möglich, das Lenkrad mit dem im Spiel über den Bildschirm zu synchronisieren.
Functionality on Xbox consoles is limited by the Xbox OS. Our Xbox-licensed Steering Wheels have almost the same number of usable inputs as the standard Xbox controller (gamepad). Only the 'LS' and 'RS' (clickable sticks on the Xbox gamepad) are not accessible. When you connect an Xbox wheel to a compatible Fanatec Wheel Base, all connected Fanatec hardware becomes detectable by the Xbox, i.e. the wheel base itself, the pedals, the shifter, and the handbrake. Some of our wheels have many additional buttons and switches that you don't find on a gamepad; these inputs are either mapped as duplicates of normal gamepad buttons or have no function on Xbox. Steering wheel displays and LEDs are also not currently supported by the Xbox OS (the display is still accessible to adjust Tuning Menu settings). Microsoft is in the process of opening up the Xbox OS to support more features of third-party input devices in the near future.
Manche Funktionen auf Xbox-Konsolen werden durch das Xbox-Betriebssystem eingeschränkt. Unsere Xbox-lizenzierten Lenkräder haben fast die gleiche Anzahl an nutzbaren Eingängen wie der Standard-Xbox-Controller (Gamepad). Nur die 'LS' und 'RS' (klickbare Sticks auf dem Xbox-Gamepad) sind nicht zugänglich. Wenn Sie ein Xbox-Lenkrad an einer kompatiblen Fanatec-Wheelbase anschließen, wird die gesamte angeschlossene Fanatec-Hardware von der Xbox erkannt, d.h. die Wheelbase selbst, die Pedale, der Shifter und die Handbremse. Einige unserer Lenkräder haben viele zusätzliche Tasten und Schalter, die Sie auf einem Gamepad nicht finden; diese Eingänge sind entweder als Duplikate normaler Gamepad-Tasten abgebildet oder haben auf der Xbox keine Funktion. Lenkradanzeigen und -LEDs werden derzeit ebenfalls nicht vom Xbox-Betriebssystem unterstützt (das Display ist jedoch weiterhin zugänglich, um Einstellungen im Tuning-Menü vorzunehmen). Microsoft arbeitet daran, das Xbox-Betriebssystem anzupassen, um in Zukunft mehr Funktionen von Eingabegeräten anderer Hersteller zu unterstützen.
If the wheel base is unable to power up, please check the following:
- Is the power button clicking properly?
- Can you rule out visible damage on the power port on the wheel base?
If you answered yes to both of these questions, please follow the Troubleshooting Instructions below.
If you answered no to either of these questions, please open a support ticket via the affected product in your Fanatec account.
Troubleshooting Instructions:
Scenario 1
- Remove the steering wheel from your wheel base.
- If there are no hardware issues visible, press and hold the power button for 10 seconds while the wheel base is connected to a Windows PC (bootloader mode) with the latest Fanatec driver installed. This will prompt a pop up for a firmware update. Proceed with the update and power the base off and on again.
Scenario 2
- If you are using a Podium DD wheel base with a Kill Switch installed, please check if the Kill Switch button is unlocked. When powering the wheel base off by using the Kill Switch, the button itself stays pressed until it is manually unlocked. This can be done by turning the button clockwise, as shown by the arrows on it. Leaving it locked can result in problems with turning on your wheel base.
Scenario 3
If the PSU LED is off while the power supply is connected, please check the following:
- Inspect the power supply and cables for any damage (make sure the PSU is NOT plugged in/connected to a power socket)
- If there is no visible damage, please try connecting the PSU to a different wall socket (please avoid extension cords or power strips).
If none of these troubleshooting instructions resolved your issue, please reach out to our technical support for further assistance.
Si la roue ne peut pas s'allumer alors que le bloc d'alimentation ne présente aucun problème et que le voyant est allumé, veuillez vérifier les points suivants :
1. 1) Le bouton d'alimentation clique-t-il correctement ?
2. 2) Repérez-vous des dommages visibles sur le port d'alimentation de la roue ?
3. 3) Si aucun problème matériel n'est visible, essayez de démarrer la base en mode bootloader. Appuyez sur le bouton d'alimentation et maintenez-le enfoncé pendant 10 secondes pendant que la base est connectée à un PC Windows avec notre pilote installé. La mise à jour du micrologiciel s'affichera à l'écran. Procédez à la mise à jour et essayez de rallumer la base.
Si le voyant PSU est éteint alors que l'alimentation est connectée, veuillez vérifier les points suivants :
1. 1) Inspectez l'alimentation et les câbles pour tout dommage. (Assurez-vous que le bloc d'alimentation n'est PAS connecté au réseau électrique « multiprise » !)
2. 2) S'il n'y a aucun dommage visible, veuillez essayer de connecter le bloc d'alimentation à une autre prise murale.
Si le voyant d'alimentation ne s'allume pas ou si le dépannage ci-dessus ne vous aide pas, veuillez contacter notre support technique pour obtenir de l'aide.
En caso de que la base del volante no pueda encenderse aun cuando el suministro eléctrico no muestra problemas y el LED está encendido, compruebe lo siguiente:
1) ¿El botón de encendido está haciendo clic correctamente?
2) ¿Detecta algún daño visible en el puerto de alimentación de la base?
En caso de que el LED de la unidad de fuente de poder (PSU) esté apagada mientras está conectada, compruebe lo siguiente:
1) Inspeccione la fuente de poder y los cables en busca de cualquier daño. (¡Asegúrese desconectarla de la red eléctrica primero!)
2) Si no hay ningún daño visible, por favor intente conectar la PSU a un enchufe de pared diferente.
Si el LED de la fuente de poder no se enciende o la solución de problemas anterior no ayuda, comuníquese con nuestro soporte técnico para obtener más ayuda.
Nel caso in cui la base del volante non sia in grado di accendersi mentre l'alimentatore non mostra problemi e il LED su di esso è acceso, controllare quanto segue:
1. 1) Il pulsante di accensione fa clic correttamente?
2. 2) Rilevi danni visibili sulla presa di alimentazione nella base del volante?
3. 3) Nel caso in cui non siano visibili problemi hardware, provare ad avviare la base in modalità bootloader. Tieni premuto il pulsante di accensione per 10 secondi mentre la base è collegata a un PC Windows con il nostro driver installato. L'aggiornamento del firmware verrà visualizzato sullo schermo. Procedi con l'aggiornamento e prova a riaccendere la base.
Nel caso in cui il LED dell'alimentatore sia spento mentre l'alimentatore è collegato, verificare quanto segue:
1. 1) Ispezionare l'alimentatore ei cavi per eventuali danni. (Assicurarsi che l'alimentatore NON sia collegato alla rete elettrica!)
2. 2) Se non ci sono danni visibili, provare a collegare l'alimentatore a un'altra presa a muro.
Se il LED dell'alimentatore non si accende o la risoluzione dei problemi di cui sopra non aiuta, contattare il nostro supporto tecnico per ulteriore assistenza.
Wenn sich die Wheel Base nicht einschalten lässt, überprüfen Sie bitte Folgendes:
- Klickt der Einschaltknopf richtig?
- Können Sie eine sichtbare Beschädigung des Stromanschlusses an der Wheel Base ausschließen?
Wenn Sie beide Fragen mit Ja beantwortet haben, folgen Sie bitte den nachstehenden Anweisungen zur Fehlerbehebung.
Wenn Sie eine dieser Fragen mit Nein beantwortet haben, eröffnen Sie bitte ein Support-Ticket über das betroffene Produkt in Ihrem Fanatec-Konto.
Anweisungen zur Fehlerbehebung:
Szenario 1
- Entfernen Sie das Lenkrad von Ihrer Wheel Base.
- Wenn keine Hardware-Probleme sichtbar sind, halten Sie die Einschalttaste 10 Sekunden lang gedrückt, während die Wheel Base mit einem Windows-PC (Bootloader-Modus) verbunden ist, auf dem der neueste Fanatec-Treiber installiert ist.
- Daraufhin erscheint ein Pop-up-Fenster mit der Aufforderung, ein Firmware-Update durchzuführen. Fahren Sie mit dem Update fort und schalten Sie die Wheel Base aus und wieder ein.
Szenario 2
- Wenn Sie eine Podium DD Wheel Base mit installiertem Kill Switch verwenden, überprüfen Sie bitte, ob der Kill Switch-Knopf entriegelt ist.
- Wenn Sie die Wheel Base mit dem Kill Switch ausschalten, bleibt die Taste gedrückt, bis sie manuell entriegelt wird. Dies kann durch Drehen des Schalters im Uhrzeigersinn geschehen, wie durch die Pfeile auf dem Schalter angezeigt. Wenn Sie ihn nicht entriegeln, kann es zu Problemen beim Einschalten Ihrer Wheel Base kommen.
Szenario 3
Wenn die PSU-LED nicht leuchtet, während das Netzteil angeschlossen ist, überprüfen Sie bitte die folgenden Punkte:
- Überprüfen Sie das Netzteil und die Kabel auf Beschädigungen (stellen Sie sicher, dass das Netzteil NICHT in eine Steckdose eingesteckt/angeschlossen ist).
- Wenn keine sichtbaren Schäden vorhanden sind, versuchen Sie bitte, das Netzteil an eine andere Steckdose anzuschließen (vermeiden Sie bitte Verlängerungskabel oder Steckdosenleisten).
Wenn keine dieser Anweisungen zur Fehlerbehebung Ihr Problem gelöst hat, wenden Sie sich bitte an unseren technischen Support, um weitere Unterstützung zu erhalten.
")