MANUALES | GUÍA DE INICIO RÁPIDO
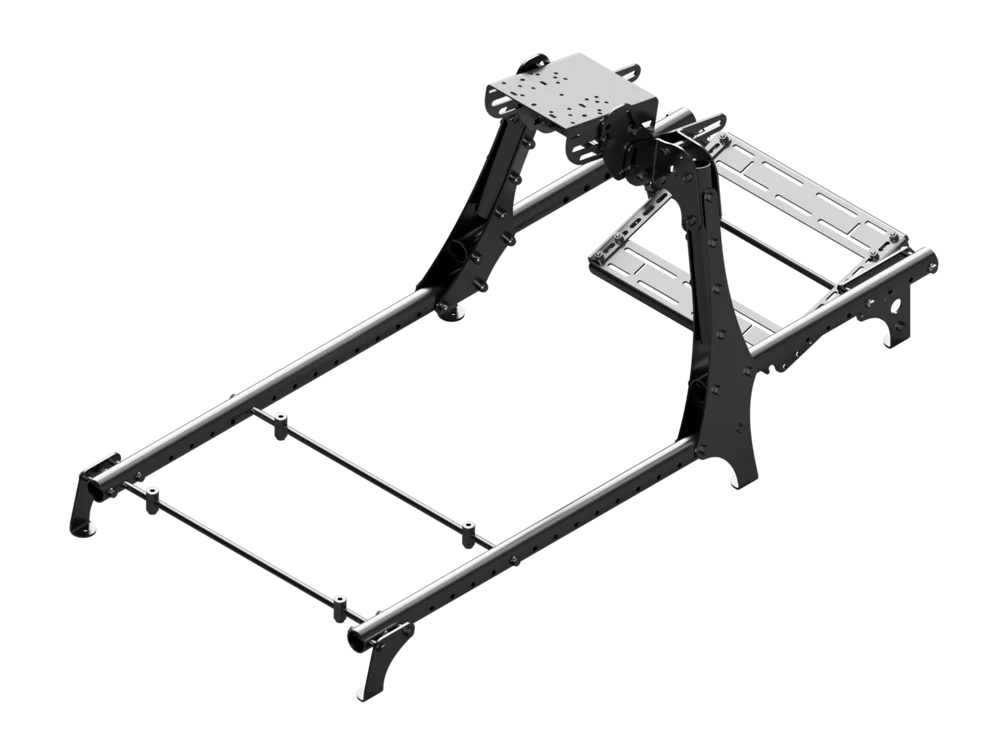
Cabina CSL
La versión en inglés está disponible aquí. - English
Si tienes algún otro problema por favor contacta atención al cliente
CONTENIDO DEL PAQUETE
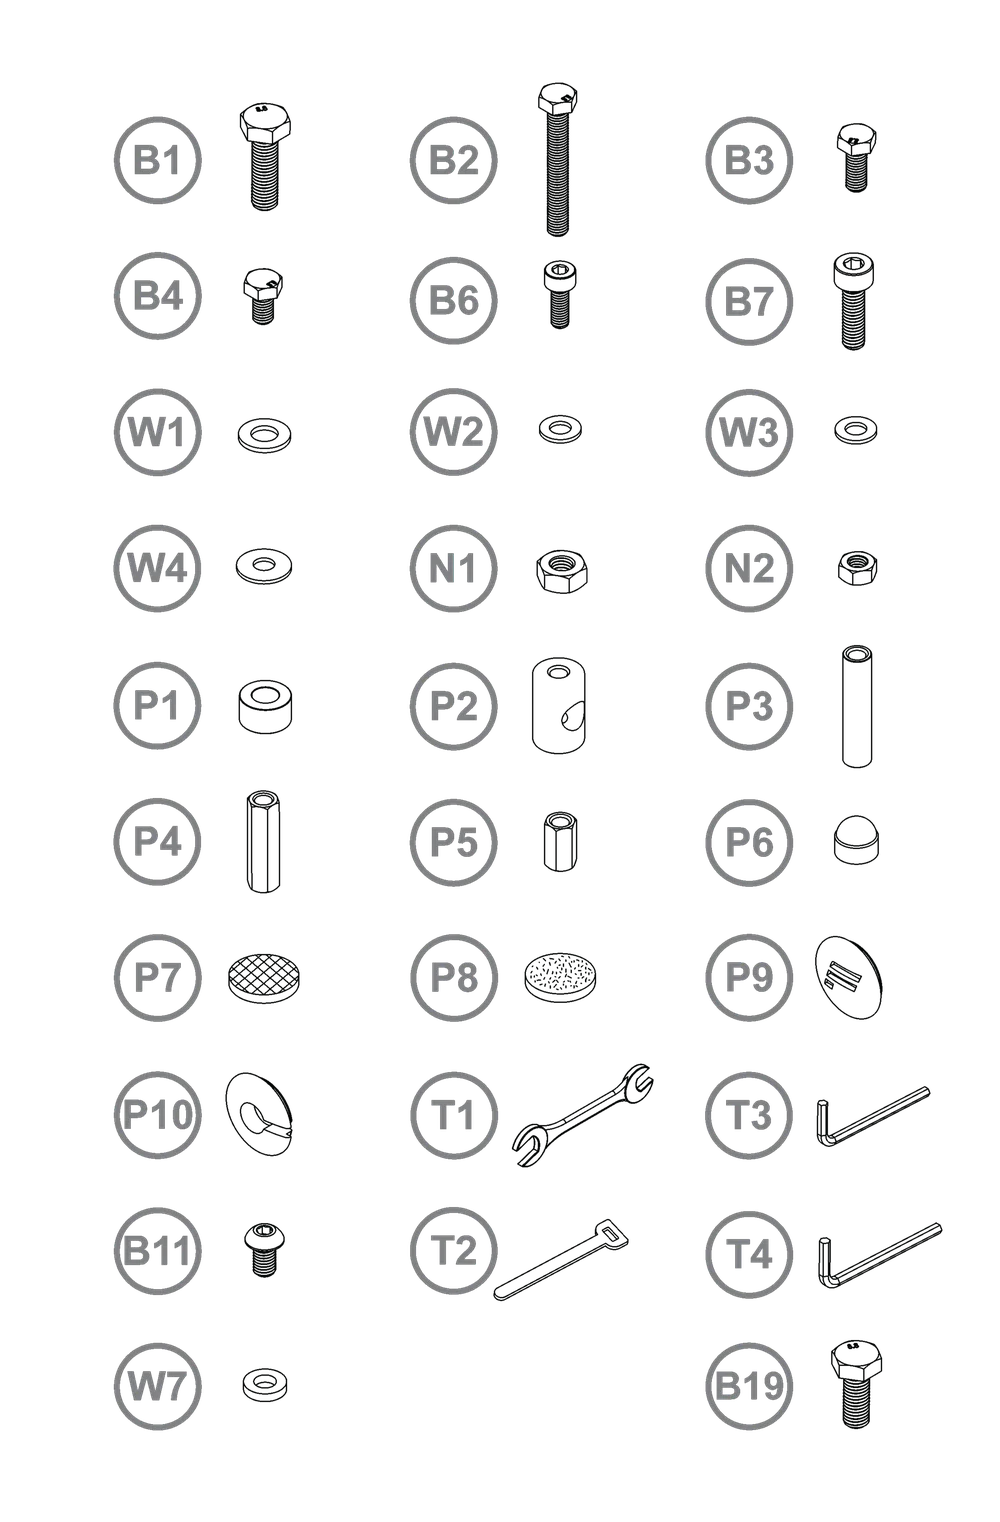
B1 - 4x - M10 x 35 mm
B2 - 20x - M8 x 60 mm
B3 - 8x - M8 x 20 mm
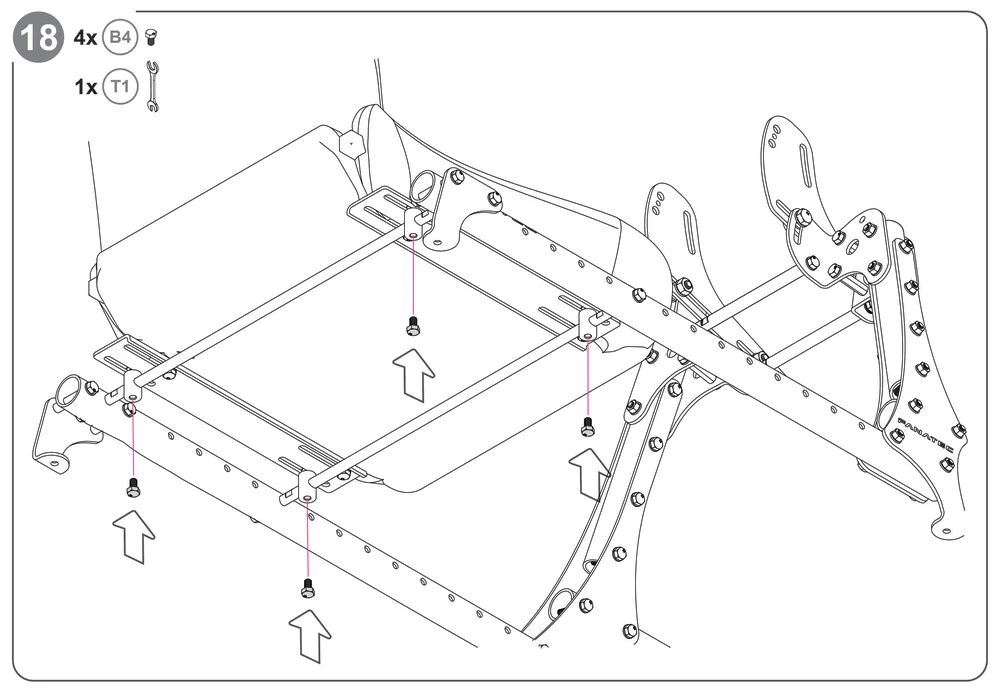
B4 - 46x - M8 x 14 mm
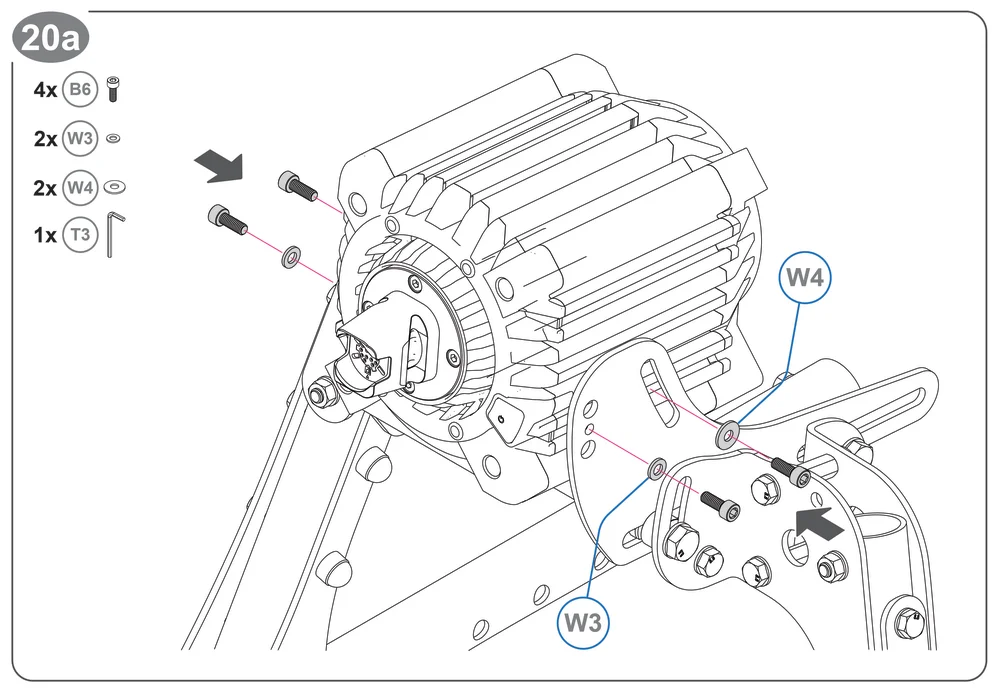
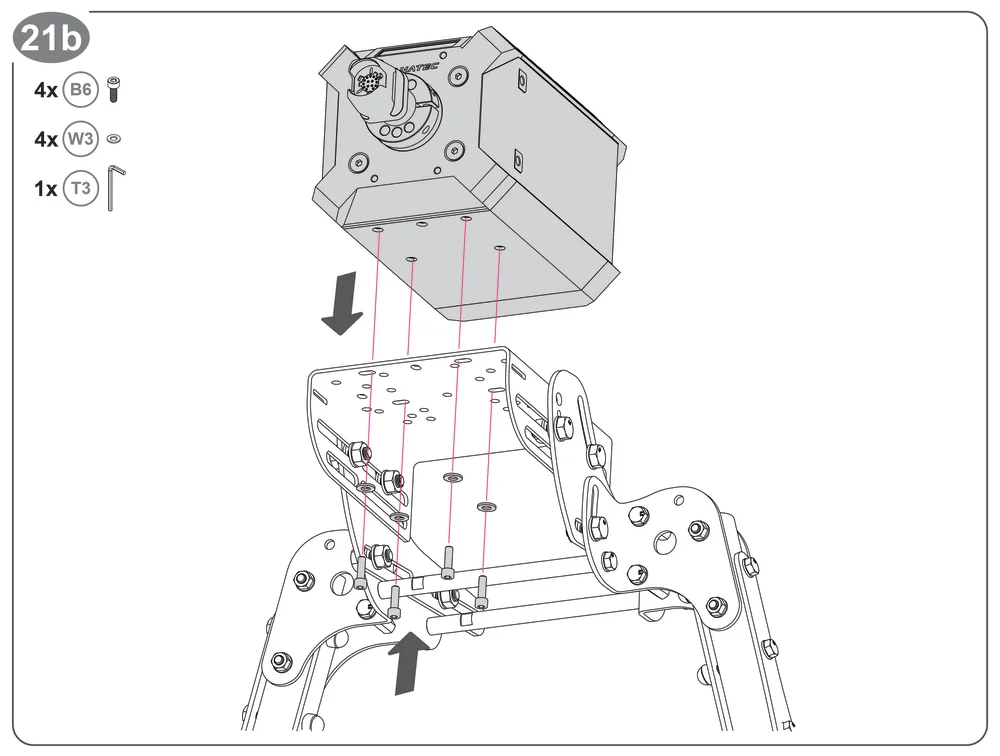
B6 - 4x - M6 x 16 mm
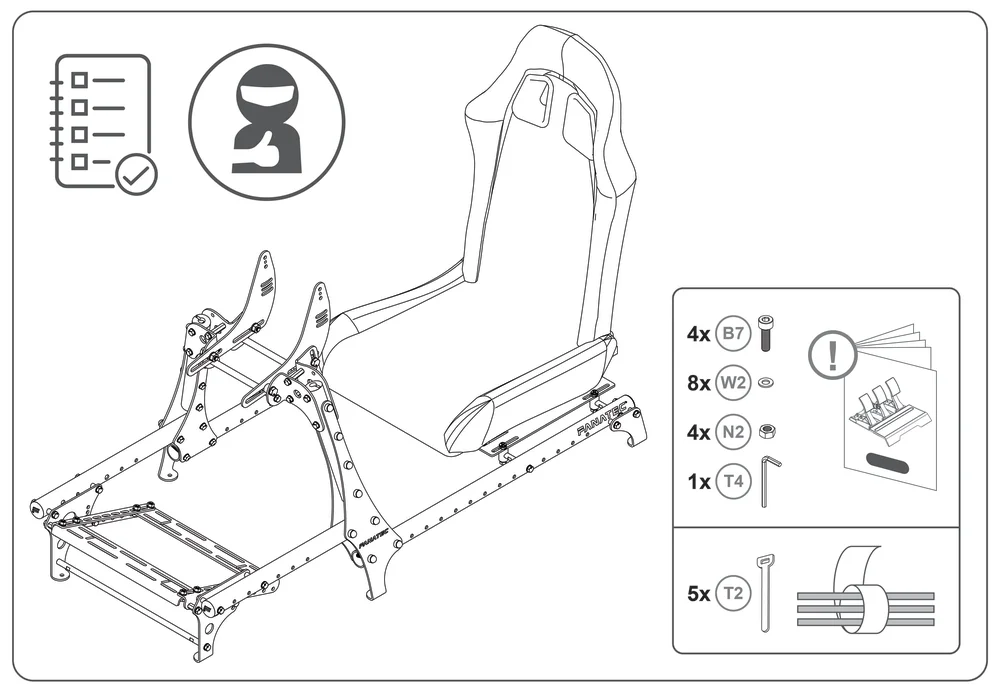
B7 - 4x - M8 x 25 mm
W1 - 24x - Arandela M10
W2 - 110x - Arandela M8
W3 - 4x - Arandela M6
W4 - 4x - Arandela M8
N1 - 4x - Tuerca M10
N2 - 32x - Tuerca M8
P1 - 4x - Espaciador M10
P2 - Tuerca cilíndrica M8
P3 - Varilla M8
P4 - 4x - Tuerca hexagonal M8 (larga)
P5 - 4x - Tuerca hexagonal M8 (corta)
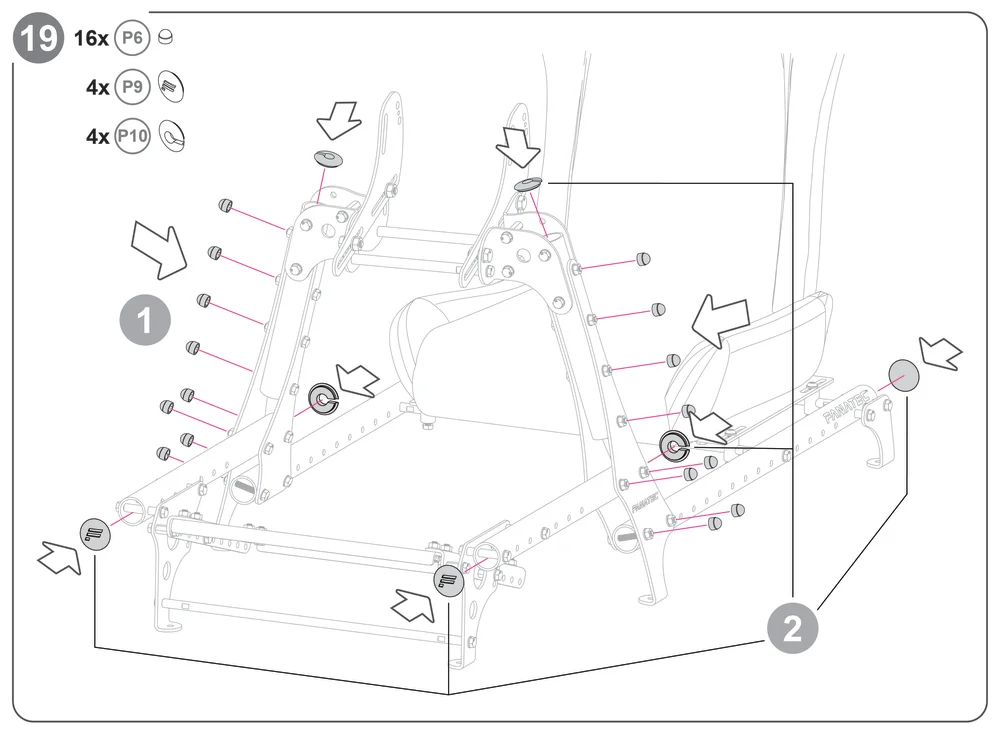
P6 - 16x - Tapas de 13 mm
P7 - 6x - Almohadillas de goma
P8 - 6x - Almohadillas de fieltro
P9 - 4x - Tapas para tubos
P10 - 4x - Tapas para cables
T1 - 2x - 13 mm / 16 mm
T3 - 1x - 5 mm
B11 - 4x - M8 x 14 mm
T2 - 5x - Tira de velcro
T4 - 1x - 6 mm
W7 - 4x - Arandela M8 de 3 mm
B19 - 8x - M10 x 25 mm
NOTA: ¡El asiento se vende por separado!

B12 - 4x - M8 x 20 mm
COMENZAR


Opcional
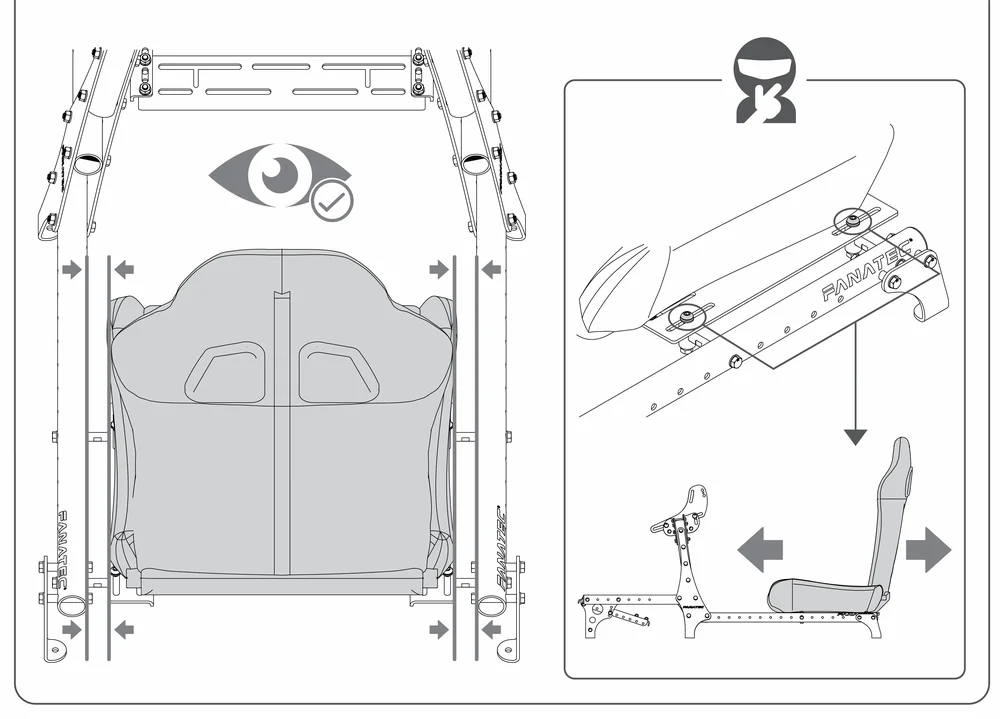
CONJUNTO DE LA CABINA DE PILOTO


NOTA: Antes de continuar, consulte el manual del soporte para monitor CSL Cockpit si va a montar la cabina con el soporte para monitor.


Continúe con los pasos 20a, 20b o 20c, dependiendo de la distancia entre ejes.
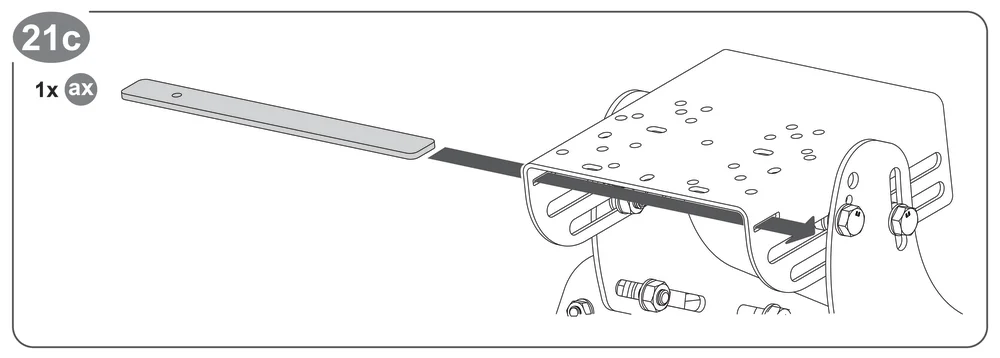
NOTA: Los pasos 20c a 23c son específicos para los propietarios de G29 / 920 / 923.
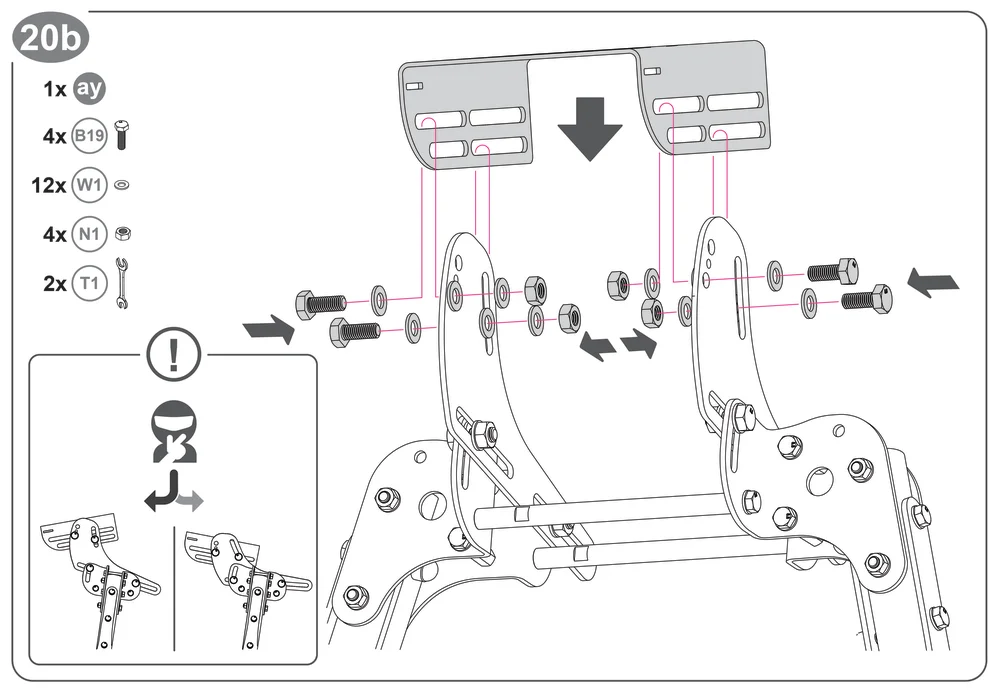
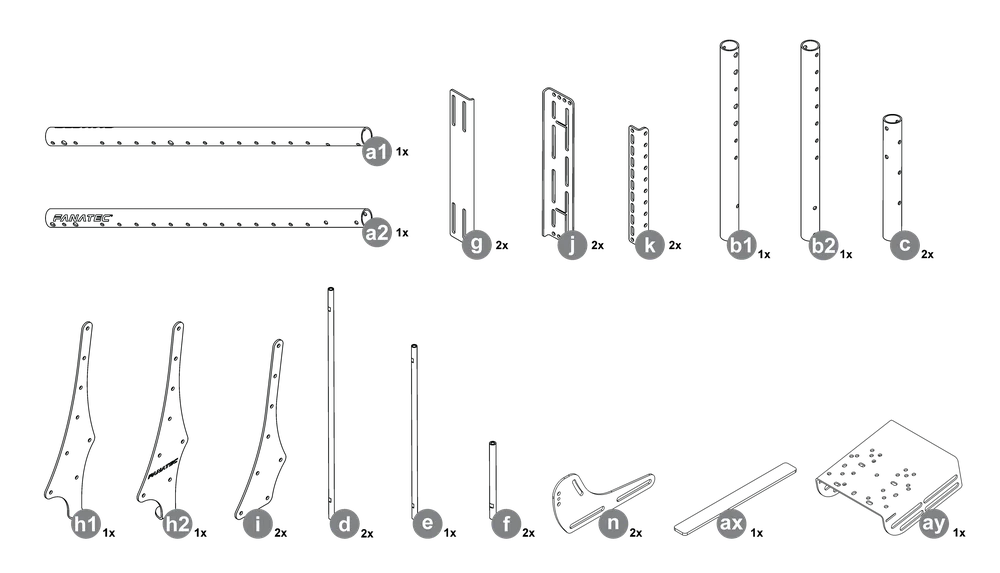
NOTA: Coloque la pieza «ay» en el ángulo deseado.
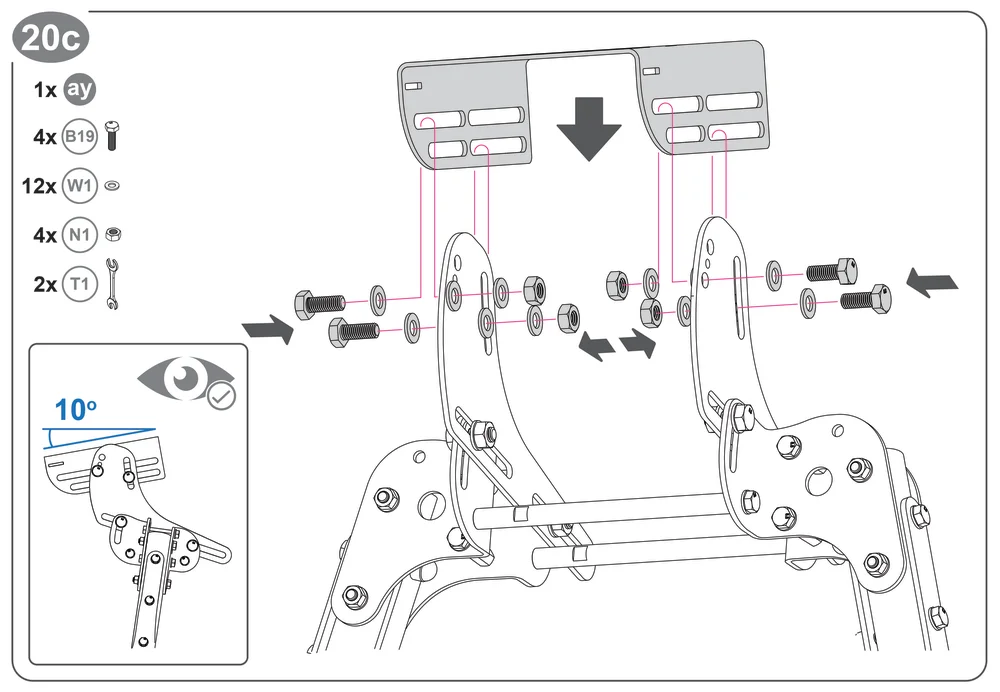
NOTA: La posición óptima de la pieza«ay» es con un ángulo de 10 grados hacia abajo para los modelos G29 / 920 / 923.
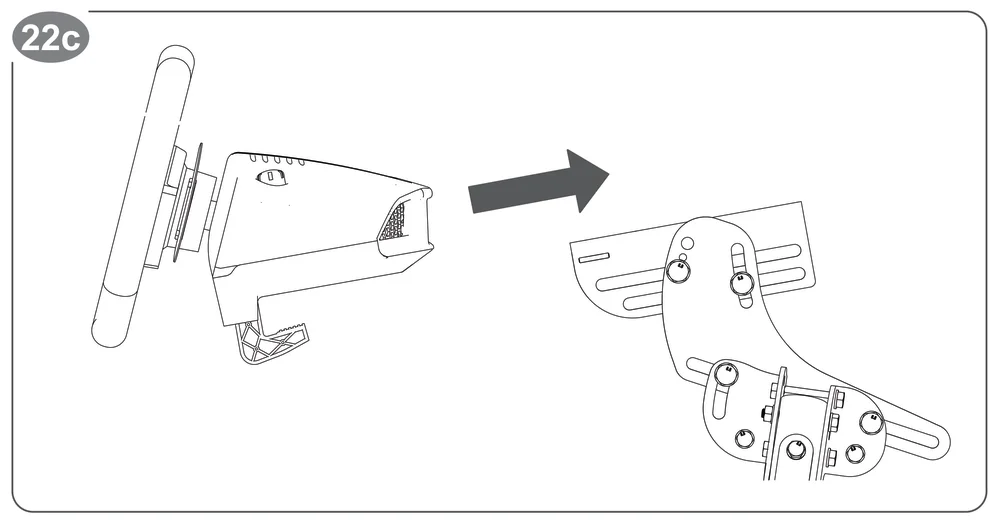
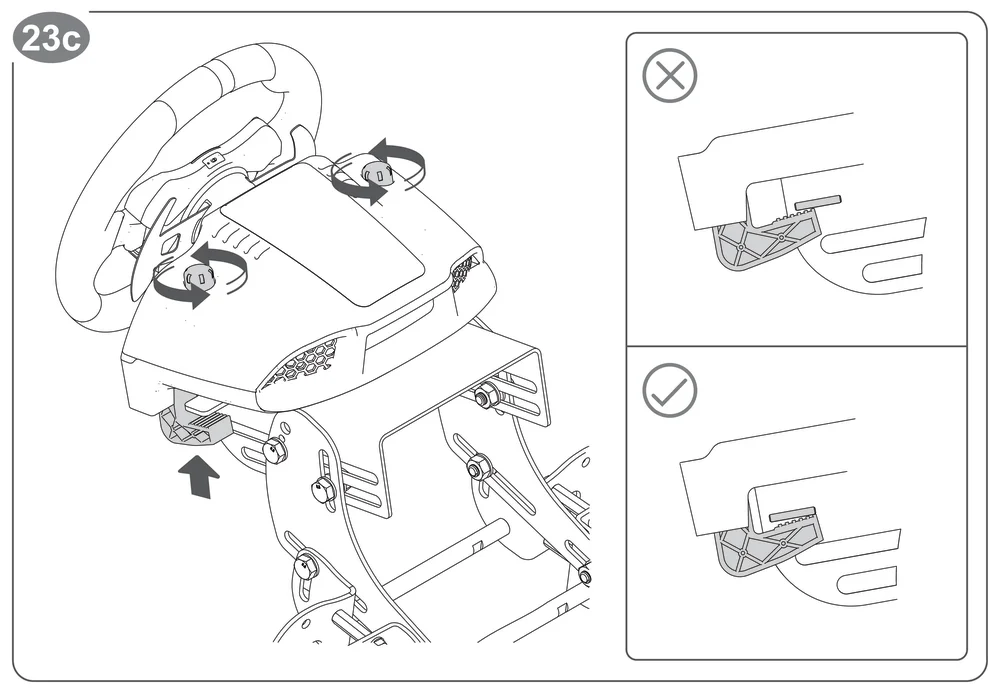
No se necesitan tornillos adicionales para fijar aún más los modelos G29 / 920 / 923.
Fanatec.com/manuales
SOPORTE
APP: https://www.fanatec.com/eu/en/s/download-apps-driver
Preguntas frecuentes: https://help.fanatec.com/hc/
La garantía del producto es proporcionada por Corsair Memory, Inc. Consulte la hoja de garantía incluida, así como los Términos y condiciones de Corsair Memory, Inc. en www.fanatec.com.