КРАТКОЕ РУКОВОДСТВО ПОЛЬЗОВАТЕЛЯ
Fanatec Wheel Hub
A - PACKAGE CONTENT
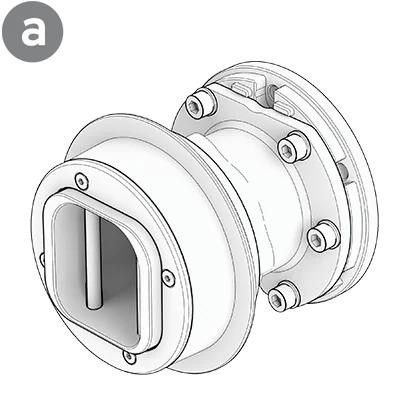
1x Fanatec Wheel Hub
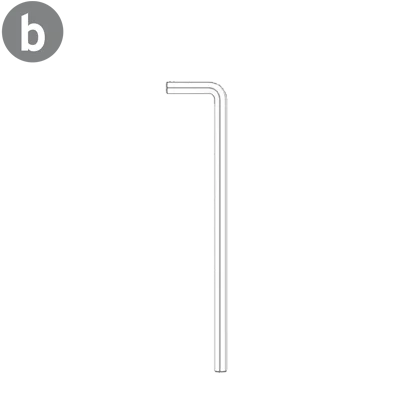
1x 4 mm Allen key

1x 3 mm Allen key

2x M5 strain reliever clip (for data cables)
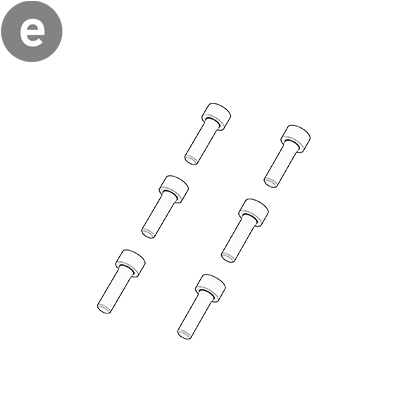
6x M5 x 14 mm bolt
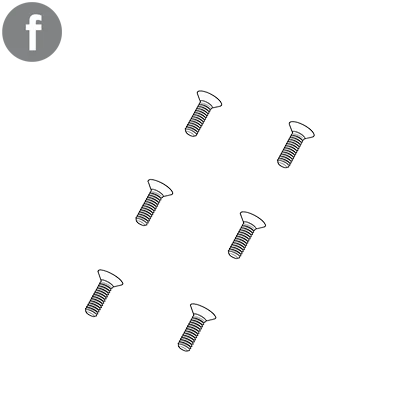
6x M5 x 14 mm countersunk bolt
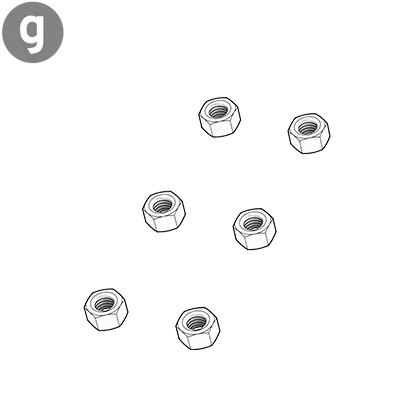
6x M5 nut
1x Safety & Compliance leaflet

B - MOUNTING OPTIONS
The Fanatec Wheel Hub allows for different mounting configurations:
Mounting from the rear
Mounting from the front
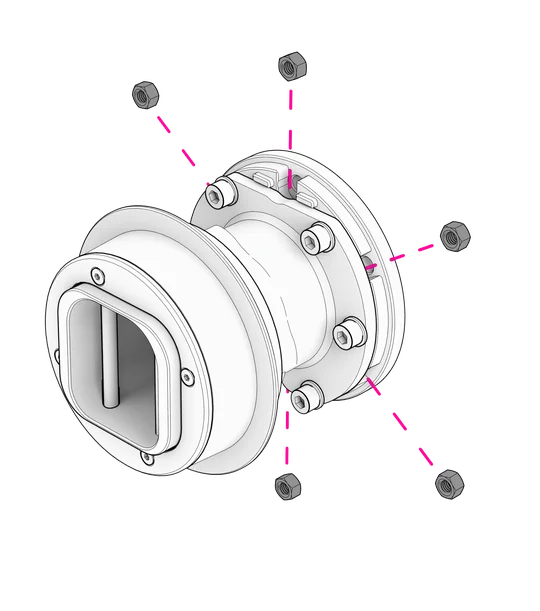
MOUNTING FROM THE REAR
The Fanatec Wheel Hub features two hole patterns:
- 6 x 70 mm M5 (not threaded)
- 6 x 50.8 mm M5 (threaded)
| NOTE: Check your wheel manufacturer's documentation for detailed information about mounting hole spacing and threads. |
STEP 1
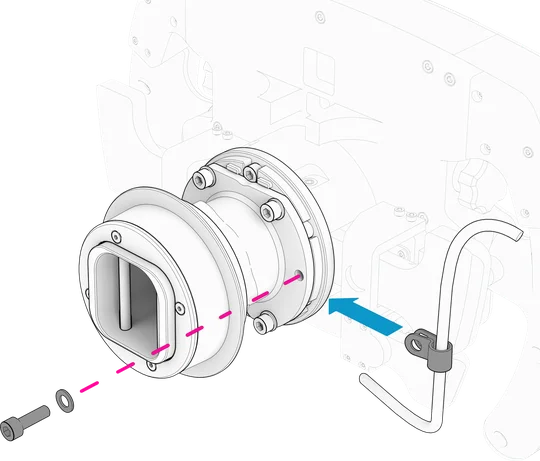
Loosen and remove the bolts and washers attaching the pre-installed QR2 Wheel-Side using the included 4 mm Allen key (b). Keep the bolts and washers for reattaching the QR2 Wheel-Side in a later step.
STEP 2
Carefully slide the QR2 off the Wheel Hub.
STEP 3
Align the Wheel Hub with the mounting holes of your wheel. Insert the included M5 x 14 mm bolts (e) and tighten them using the 4 mm Allen key (b).
| NOTE: Depending on your wheel, it may be necessary to partly disassemble it and mount the bolts from the inside. The number of bolts needed may also differ. Check your wheel manufacturer's documentation for detailed information. |
STEP 4
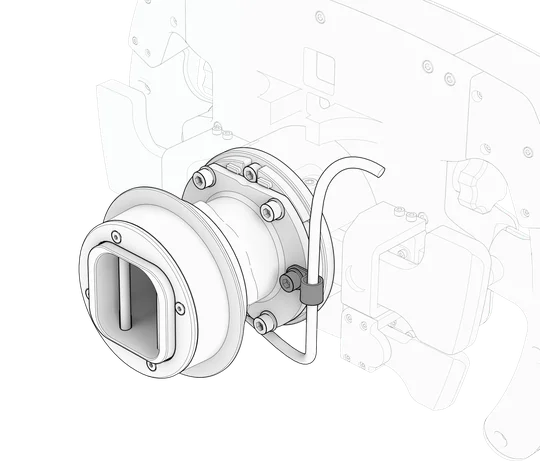
Reattach the QR2 Wheel-Side using the bolts and washers removed in Step 1.
| CAUTION: Be careful not to damage the Wheel Hub's connection pins while attaching. The QR2 Wheel-Side only has one correct orientation. |
STEP 5 (OPTIONAL)
If your wheel has a wired USB connection, insert the cable into the included strain reliever clip (d) and attach it as illustrated.
MOUNTING FROM THE FRONT
The Fanatec Wheel Hub features two hole patterns:
- 6 x 70 mm M5 (not threaded)
- 6 x 50.8 mm M5 (threaded)
| NOTE: Check your wheel manufacturer's documentation for detailed information about mounting hole spacing and threads. |
STEP 1
Insert the included M5 nuts (h) into the notches between the QR2 Wheel-Side and Wheel Hub. The nuts will provide the threads necessary to attach the wheel.
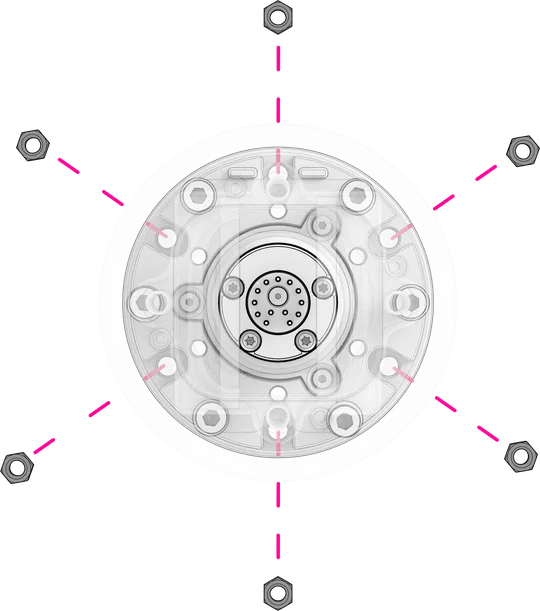
STEP 2
Align your wheel with the mounting holes of the Wheel Hub. Insert the included M5 x 14 mm countersunk bolts (g) and tighten using the included 3 mm Allen key (d).
C - STEERING WHEEL ATTACHMENT
ATTACHING THE WHEEL
Before attaching your wheel, make sure your base-side quick release is upright.
When oriented correctly, no pinhole should be positioned at the bottom of the connector.
The top of the base-side QR is more rounded than the underside. It is not possible to connect the wheel incorrectly.
To attach your wheel, slide it directly onto the Base. Do not force the connection. If it does not attach easily, check that the base-side QR is correctly aligned.
DETACHING THE WHEEL
To detach the wheel, squeeze the sleeve mechanism while carefully pulling the wheel towards you.
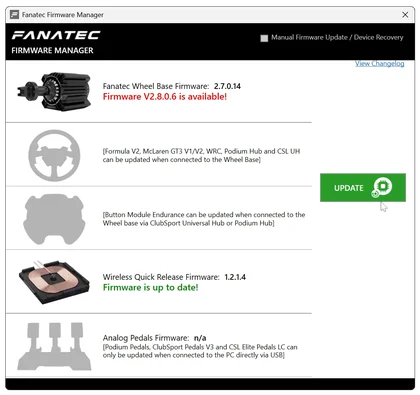
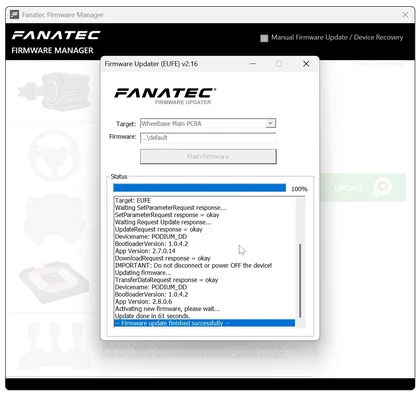
D - FIRMWARE UPDATE
|
NOTE: A Base firmware update may be needed for your Fanatec Wheel Hub to be detected properly. We recommend checking regularly for new updates. Firmware updates can only be performed with the Fanatec App (PC only). |
STEP 1
Download and install the latest version of the Fanatec App.
STEP 2
To update your hardware, make sure it is connected to PC via USB and is in PC mode (red). Use the included USB cable with your Fanatec Base.
STEP 3
Connect the Fanatec Wheel Hub to your Base (see chapter C - STEERING WHEEL ATTACHMENT).
STEP 4
Open the Fanatec App. If new firmware is available, a red dot will be displayed next to the firmware icon. Click on the icon to open the Firmware Manager.
STEP 5
Click on the "UPDATE" button in the Firmware Manager. Follow the instructions on screen and update your hardware components. Close the Firmware Manager when all updates are completed.

E - CENTER CALIBRATION
STEP 1
In the Fanatec App, select your Base in the left column.
STEP 2
Turn your wheel to the center position.
STEP 3
Click on "WHEEL CENTER CALIBRATION" in the Fanatec App window.
F - WARRANTY
The product warranty is provided by CORSAIR MEMORY, Inc. Refer to the terms & conditions of CORSAIR MEMORY, Inc. on Fanatec.com.
G - LEGAL
©2026 CORSAIR MEMORY, Inc. Trademarks belong to their respective owners. All rights reserved. Fanatec is a brand of CORSAIR MEMORY Inc.