MANUAL | QUICK START GUIDE
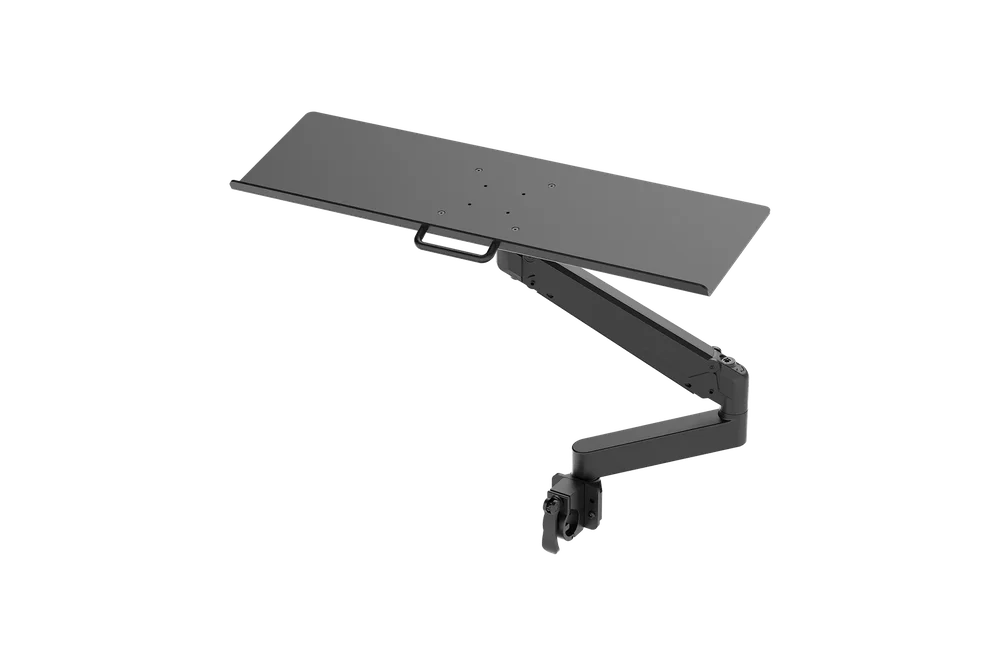
GT Cockpit Keyboard Tray
RACING SIMULATOR COCKPIT KEYBOARD TRAY
BEFORE YOU START
Please take a moment to carefully read this guide prior to assembling.
This product is also part of our comprehensive ClubSport GT Cockpit Quick Start Guide. To learn more, visit: https://www.fanatec.com/p/cockpits/cs_gt_c_blk/clubsport-gt-cockpit-black
|
CAUTION: Your cockpit is engineered from steel for strength and durability.
|
INSTALLING THE KEYBOARD TRAY ASSEMBLY
| NOTE: The Keyboard Tray requires at least one Shifter Mounting Kit in order to fit it to your cockpit. |
The keyboard tray requires some assembly prior to installing it to your cockpit.
The included hardware bags labeled KEYBOARD TRAY SPARE PARTS and KEYBOARD TRAY contain a set of allen keys and spare bolts for reconfiguring your keyboard tray accessory to attach other products to the VESA Mount.
To complete the step, the following tools will be used:

M4 Allen Key

M8 Allen Key
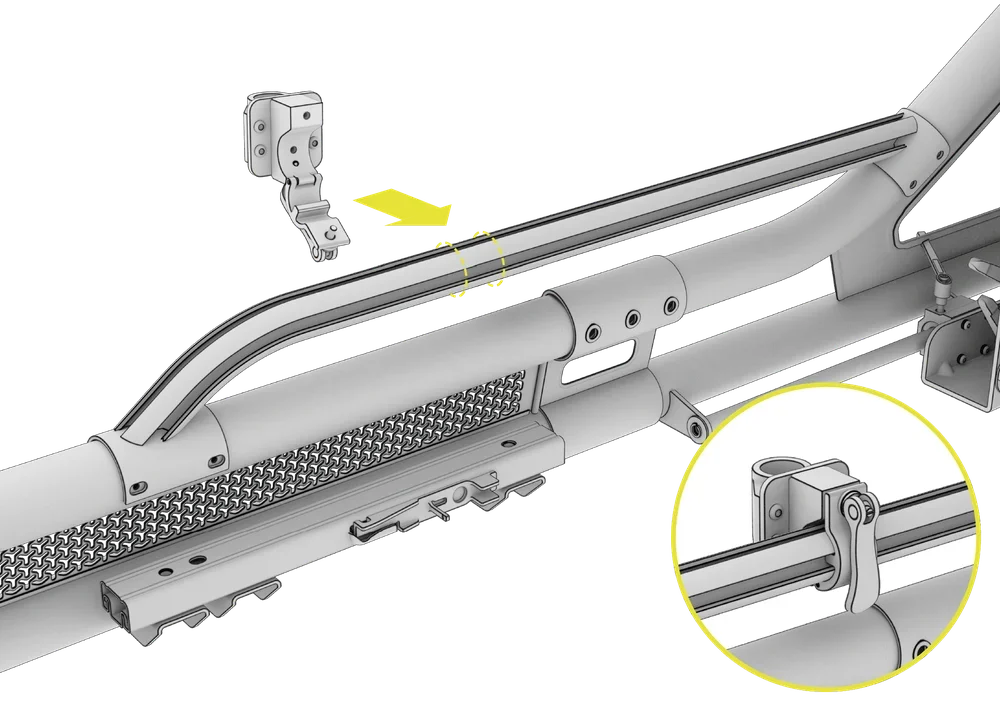
1: ATTACHING THE CLAMPING BLOCKS
- Determine where on the Shifter Mounting Tube you would like to install your optional Keyboard Tray.
- Lift the cam lever of the Clamping Block and unscrew it. Open the clamp and place it over the Shifter Mounting Tube so that the locating pin of the clamp catches the inner groove of the tube.
- Ensure the hinge section of the Clamping Block is on the underside of the Shifter Mounting Tube.
- Close the clamp by inserting it through the smaller hinged section of the Clamping Block.
- Re-screw the cam-lever until it is sufficiently tightened to lock the cam-lever in place when in its closed position. Do not overtighten cam levers of the clamps.
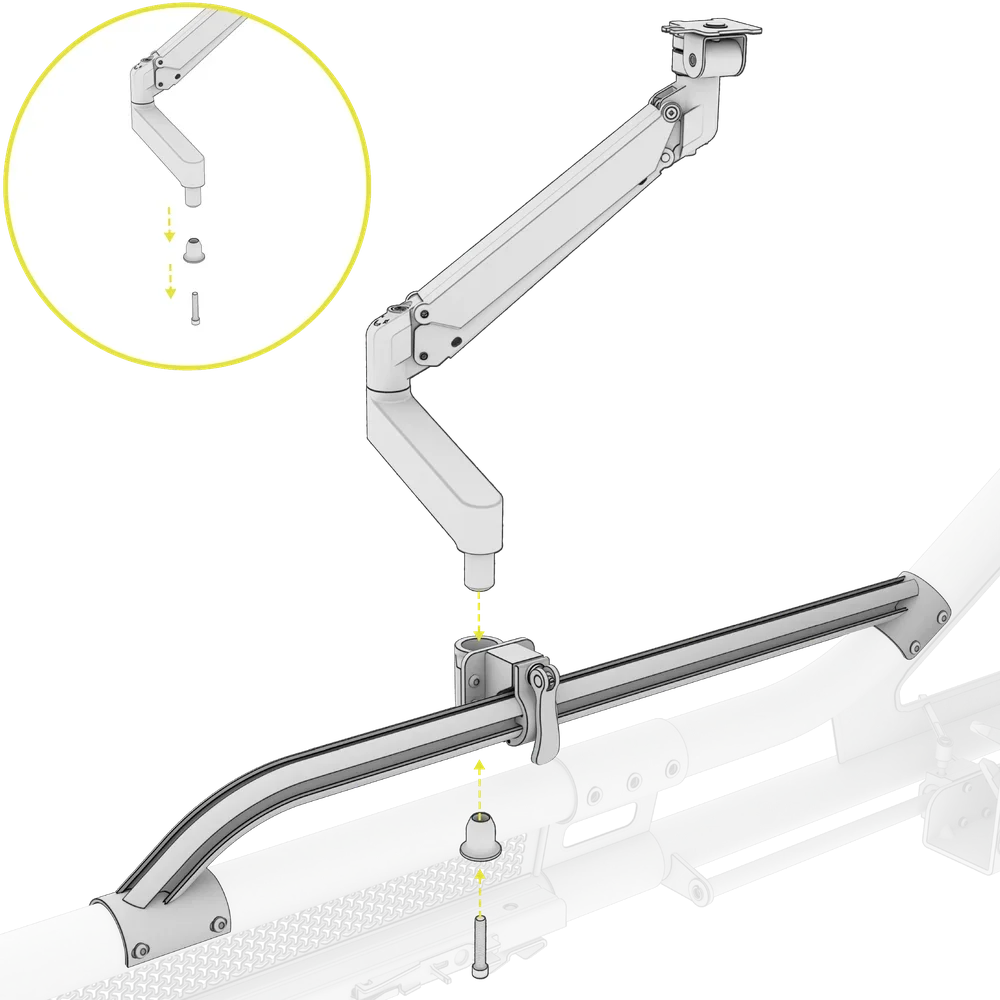
2: ATTACHING THE ARTICULATING ARM
- Using the M8 Allen Key, remove the locking bolt and holder from the underside of the Articulating Arm.
- Insert the end of the Articulating Arm into the already positioned Clamping Block.
- Reinsert the holder and the locking bolt and secure tightly.
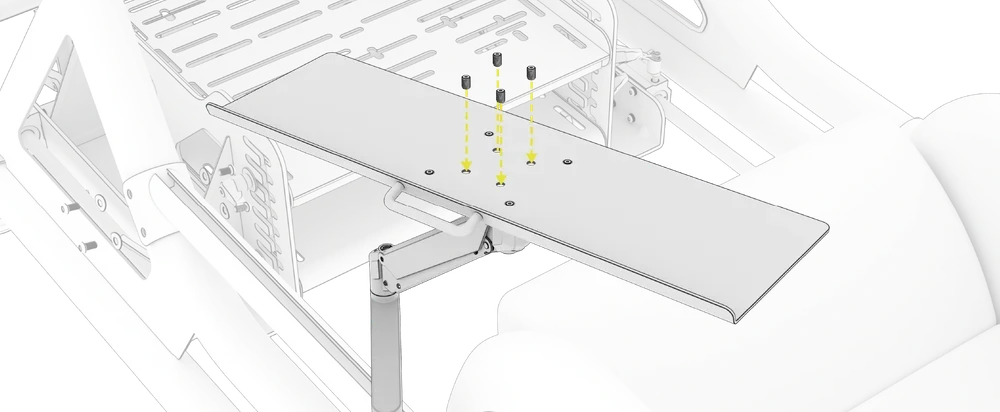
3: ATTACHING THE KEYBOARD TRAY
1. Using the M4 Allen Key, loosen the four set screws in the center of the Keyboard Tray.
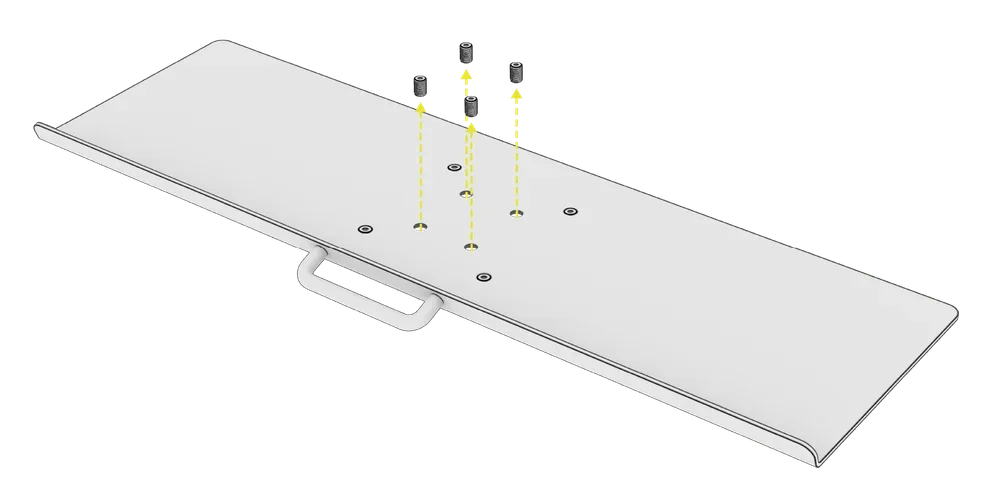
2. Position the tray over the Mounting Plate of the upper section of the Articulating Arm.
3. Slide the Keyboard Tray over the Mounting Plate, ensuring the orientation of the tray matches the image below.

4. Rotate the locking pin that secures the tray on the mount and tighten the four set screws to secure the tray.
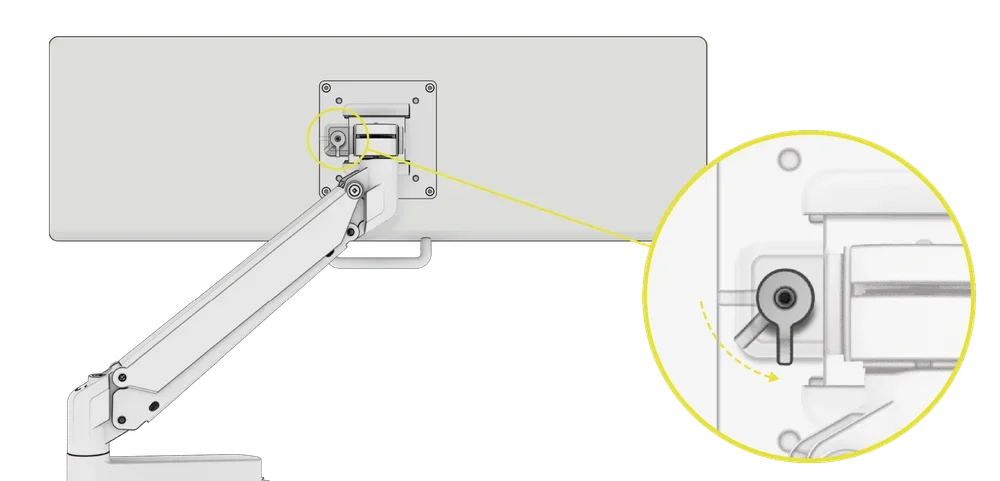
| IMPORTANT: To avoid damage to your keyboard or mouse ensure the set screws are flush with the upper surface of the Keyboard Tray. |
|
NOTE:
|
CARE AND MAINTENANCE
Your Fanatec Clubsport GT cockpit is manufactured to be robust and sturdy during use. However, by following basic care and maintenance steps, you can improve the longevity and performance of your cockpit.
| IMPORTANT: This product is designed for adult use. We recommend adult supervision for any children using this product. |
- Before each use of your cockpit, ensure that all the bolts clamping the pedal assembly in place are secure.
- Routinely (at least once every two weeks) check the bolts securing the seat brackets, wheelbase, and pedals to ensure they are secure.
- To protect the finish of the cockpit, always sufficiently loosen the cam levers and bolts that secure all adjustable parts when using to prevent scraping or cosmetic damage.
- To protect the seat, do not place sharp or heavy items on the upholstered sections.
- To clean your cockpit, use a clean, dry microfiber cloth or a vacuum with a soft bristle attachment.
- Use caution when adjusting seating position to ensure the seat is positioned in the corresponding slots on either side of the seat, and the tracks are free from debris or fingers when sliding the seat.
- To protect your seat, do not place heavy items on the upholstered sections.
- Ensure a clutter-free environment before use and check to ensure cables are secure.
WARRANTY
All Fanatec racing cockpits have a 2-year warranty.
LEGAL
©2025 CORSAIR MEMORY, Inc. Trademarks belong to their respective owners. All rights reserved. Fanatec is a brand of CORSAIR MEMORY Inc.